DISCLAIMER: The modifications described in the following text are for educational purposes only. In no way do I recommend that you apply these modifications to your own motorcycle. If you do choose to go ahead and modify your motorcycle based on the information in this document you will accept all responsibility for your own actions. The author(s) of this document, and host(s) providing it for you, accept no responsibility whatsoever. If you are unqualified to make any of the changes described herein but are bent on doing the modification, seek out a knowledgeable friend or professional mechanic for assistance.
TTR250 Bash Plate fitting guide
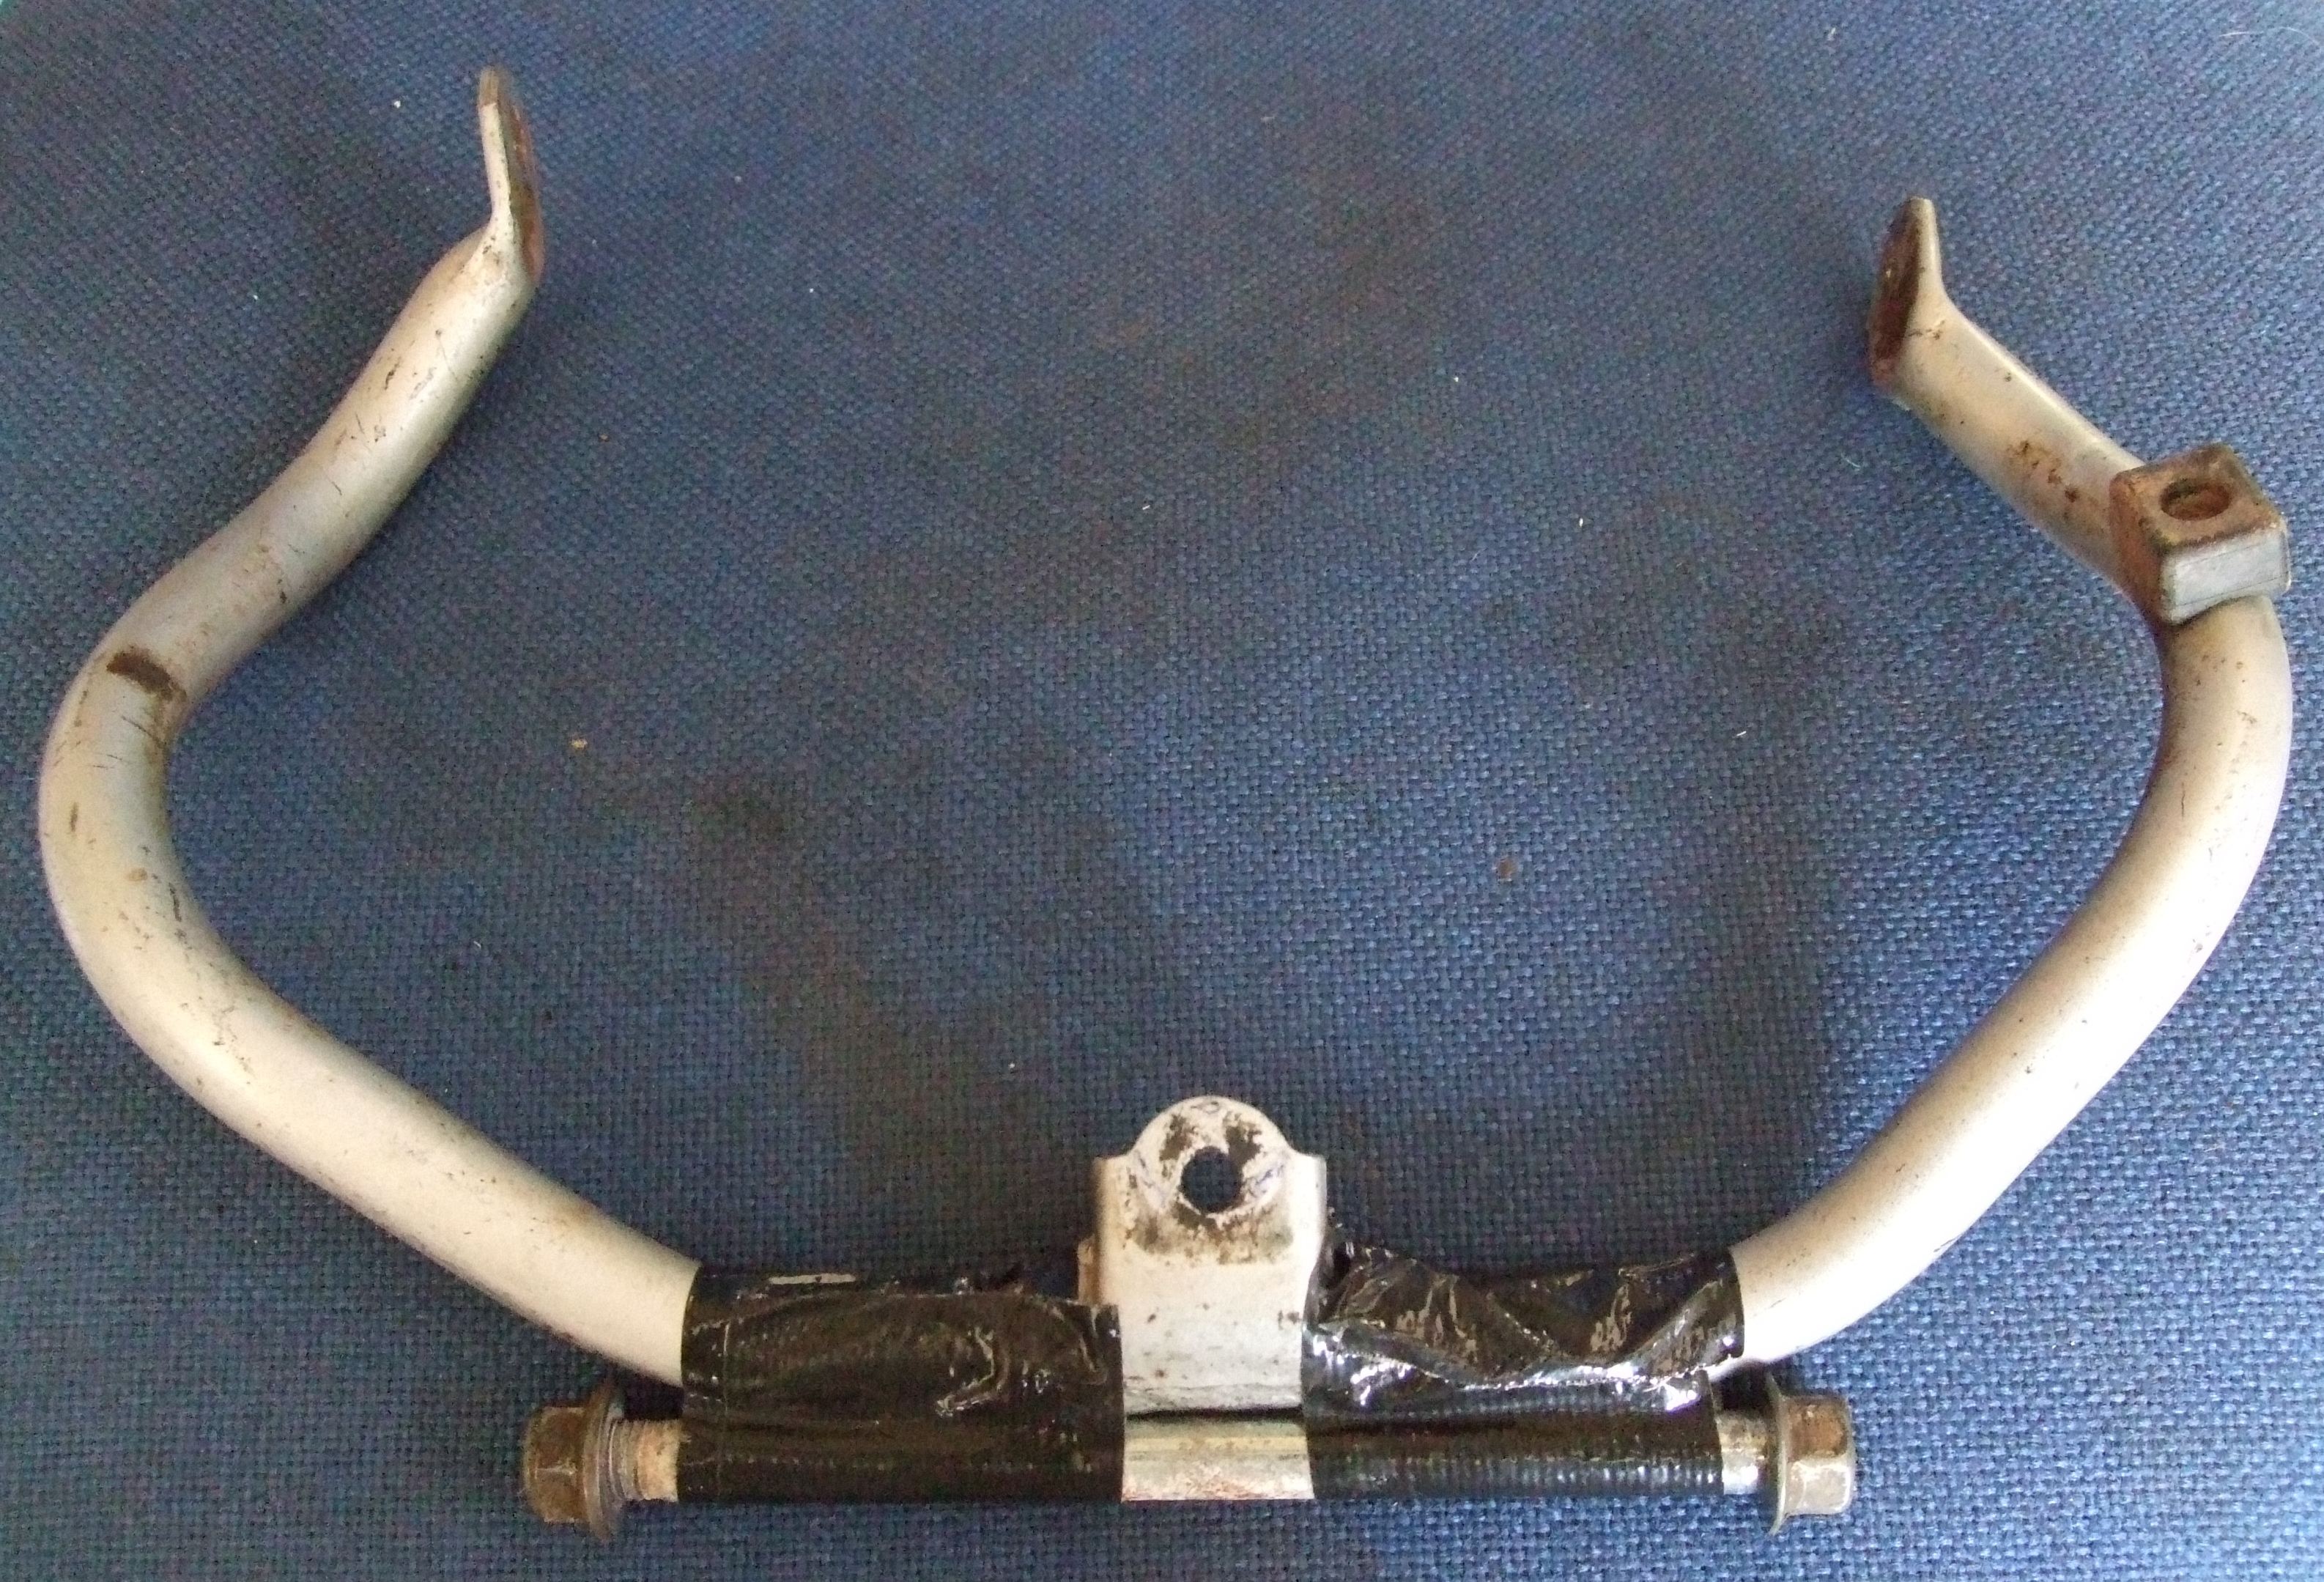
1.Remove the original engine protection bar (if still fitted) – 10mm bolts. To keep the threaded holes on the engine frame clean of mud and muck, you can re-fit the side bolts to the frame. Use 3 plain washers for each bolt to act as packing so that the bolts can be tightened without the thread end of the bolt touching the frame.
2.Remove the rear engine long mounting bolt – 14mm bolt and nut. The bolt head has an integral washer which can be too big for straight removal of the bolt. On some bikes it will be necessary to either (a) remove the rear brake lever or (b) move the brake lever 'up' to clear the bolt by removing the cotter pin at the rod end of the brake master cylinder (where it connects to the brake lever) and pull out the pin to disconnect. The bolt should now come out.
3.Tape up the bar and bolt and put them somewhere safe!
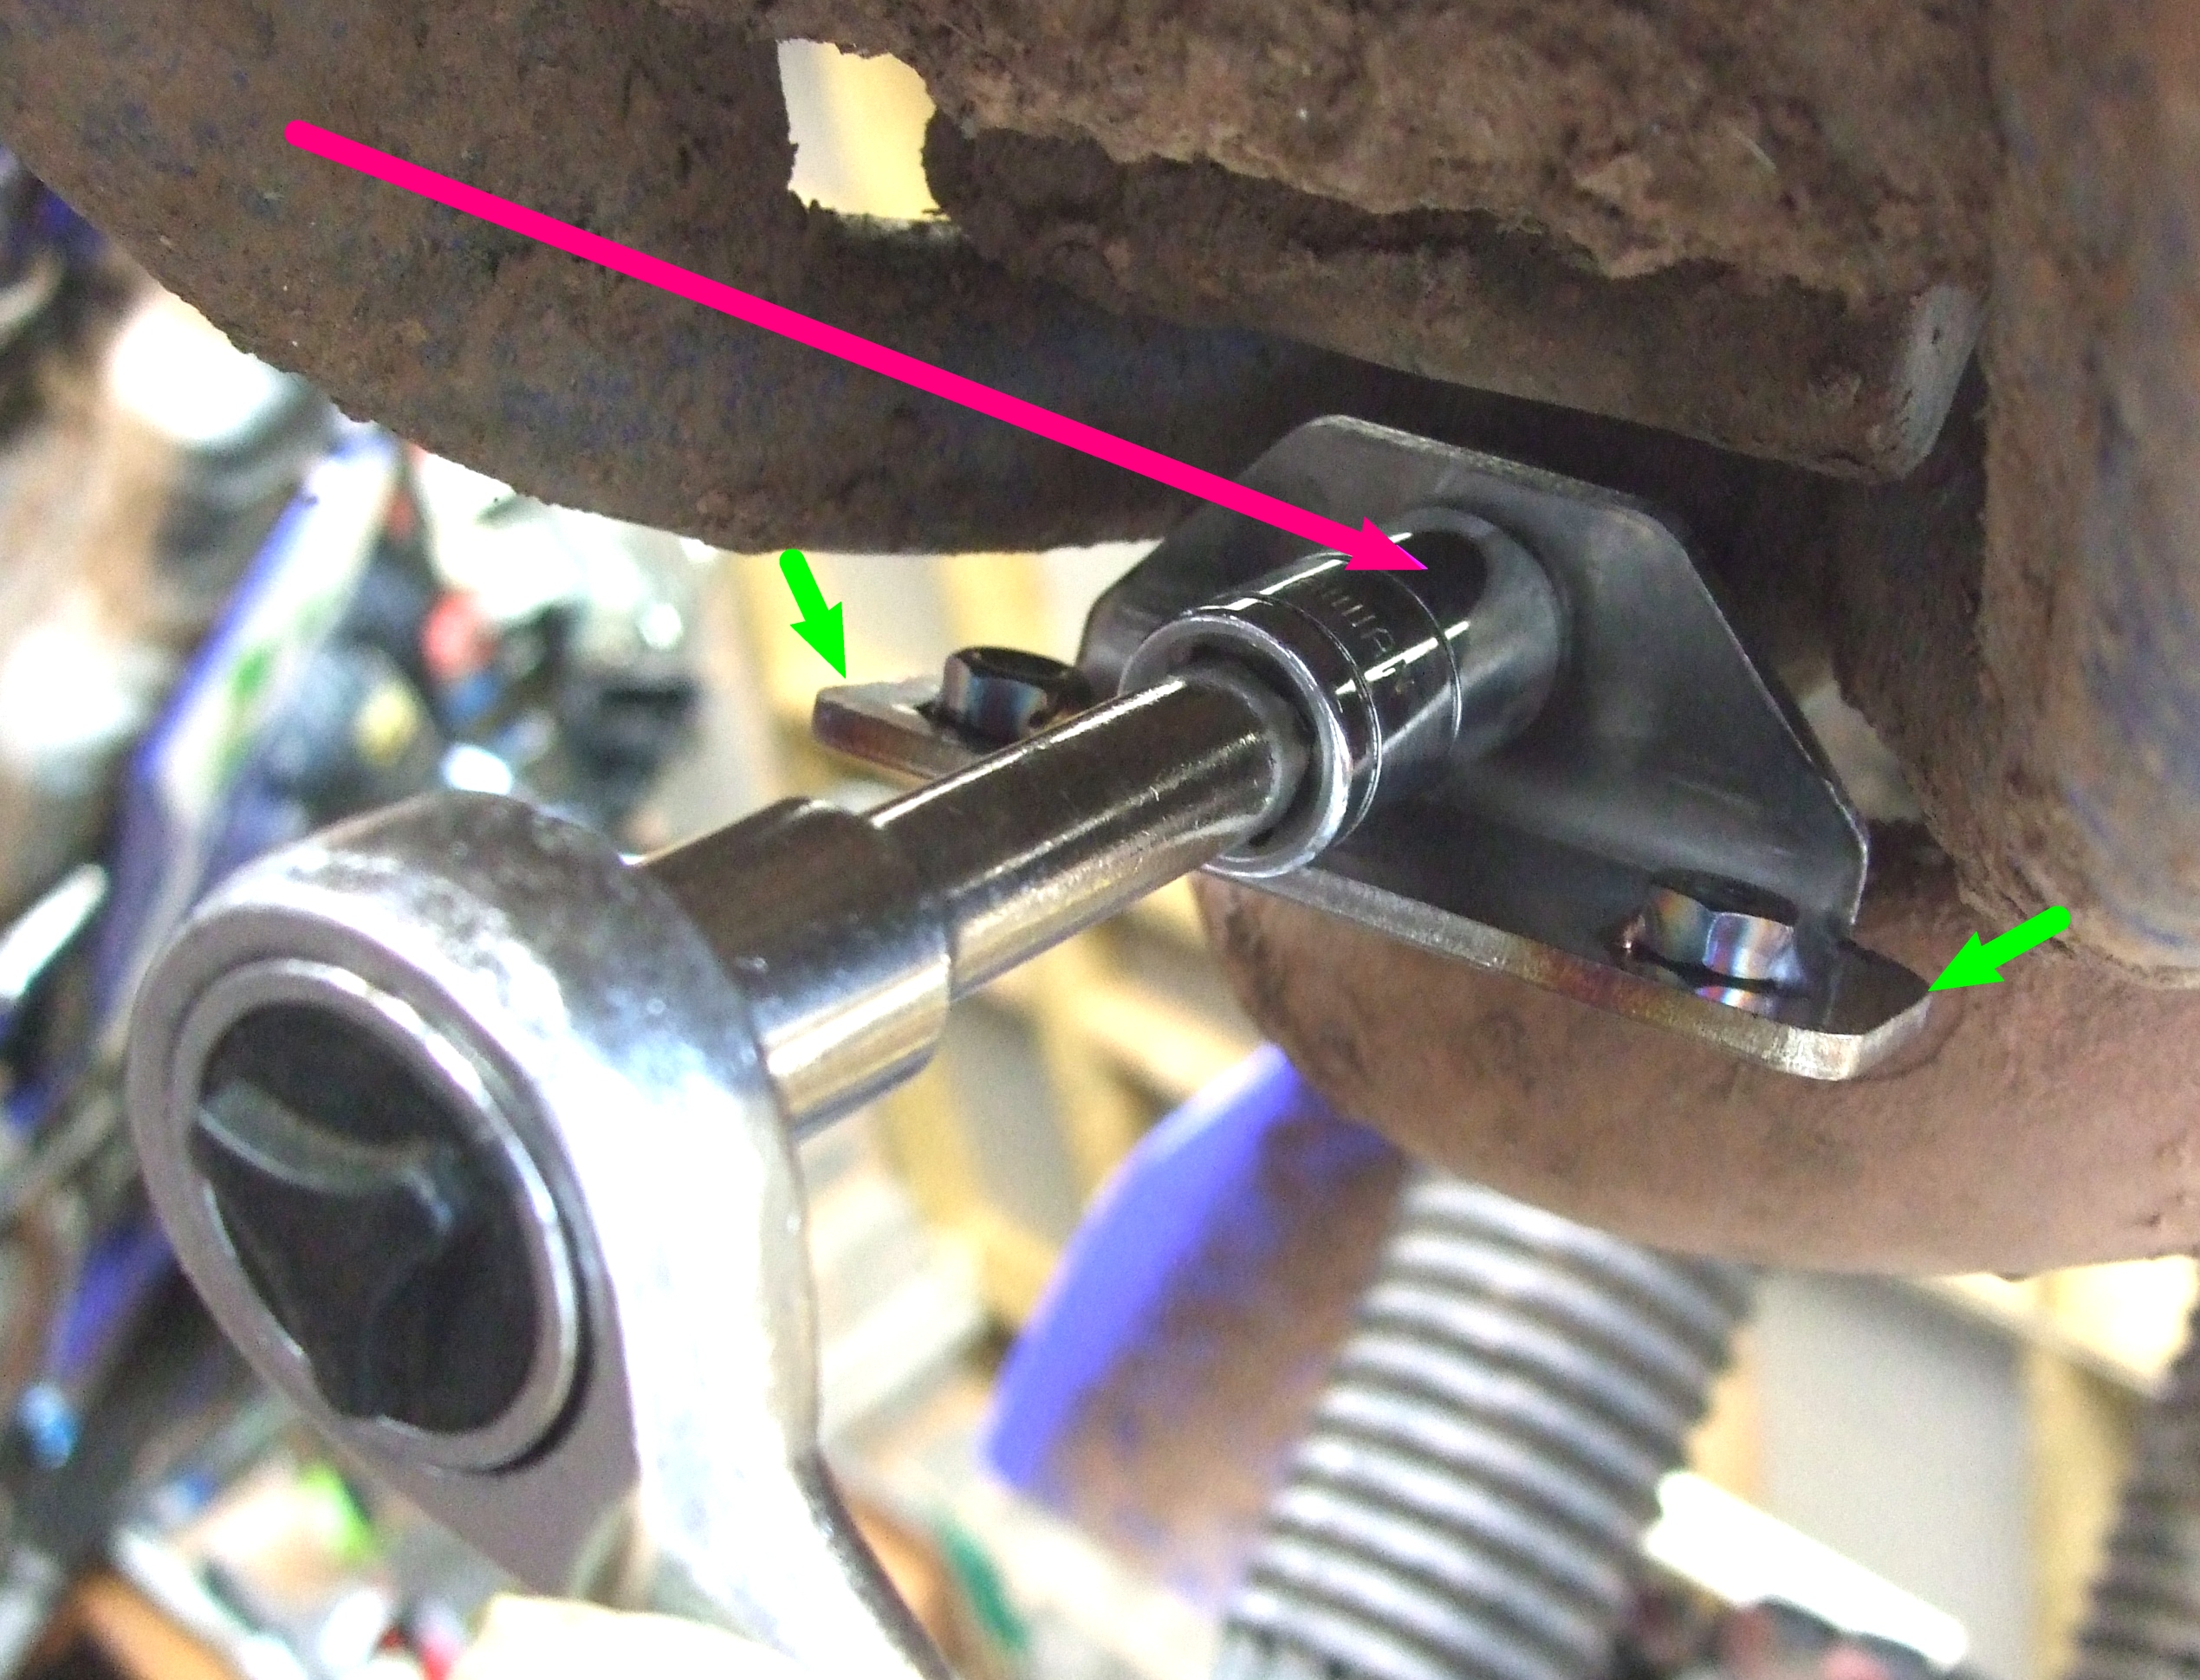
4.Bolt up the front support bracket by re-using the existing bolt (10mm – indicated by long purple arrow) being careful not to over tighten it. Keep the bracket mounted centrally with equal spaces between it and the frame rails as indicated by the small green arrows. I do this by putting a spanner of the right thickness in the gap to stop the bracket moving when tightening the last bit.
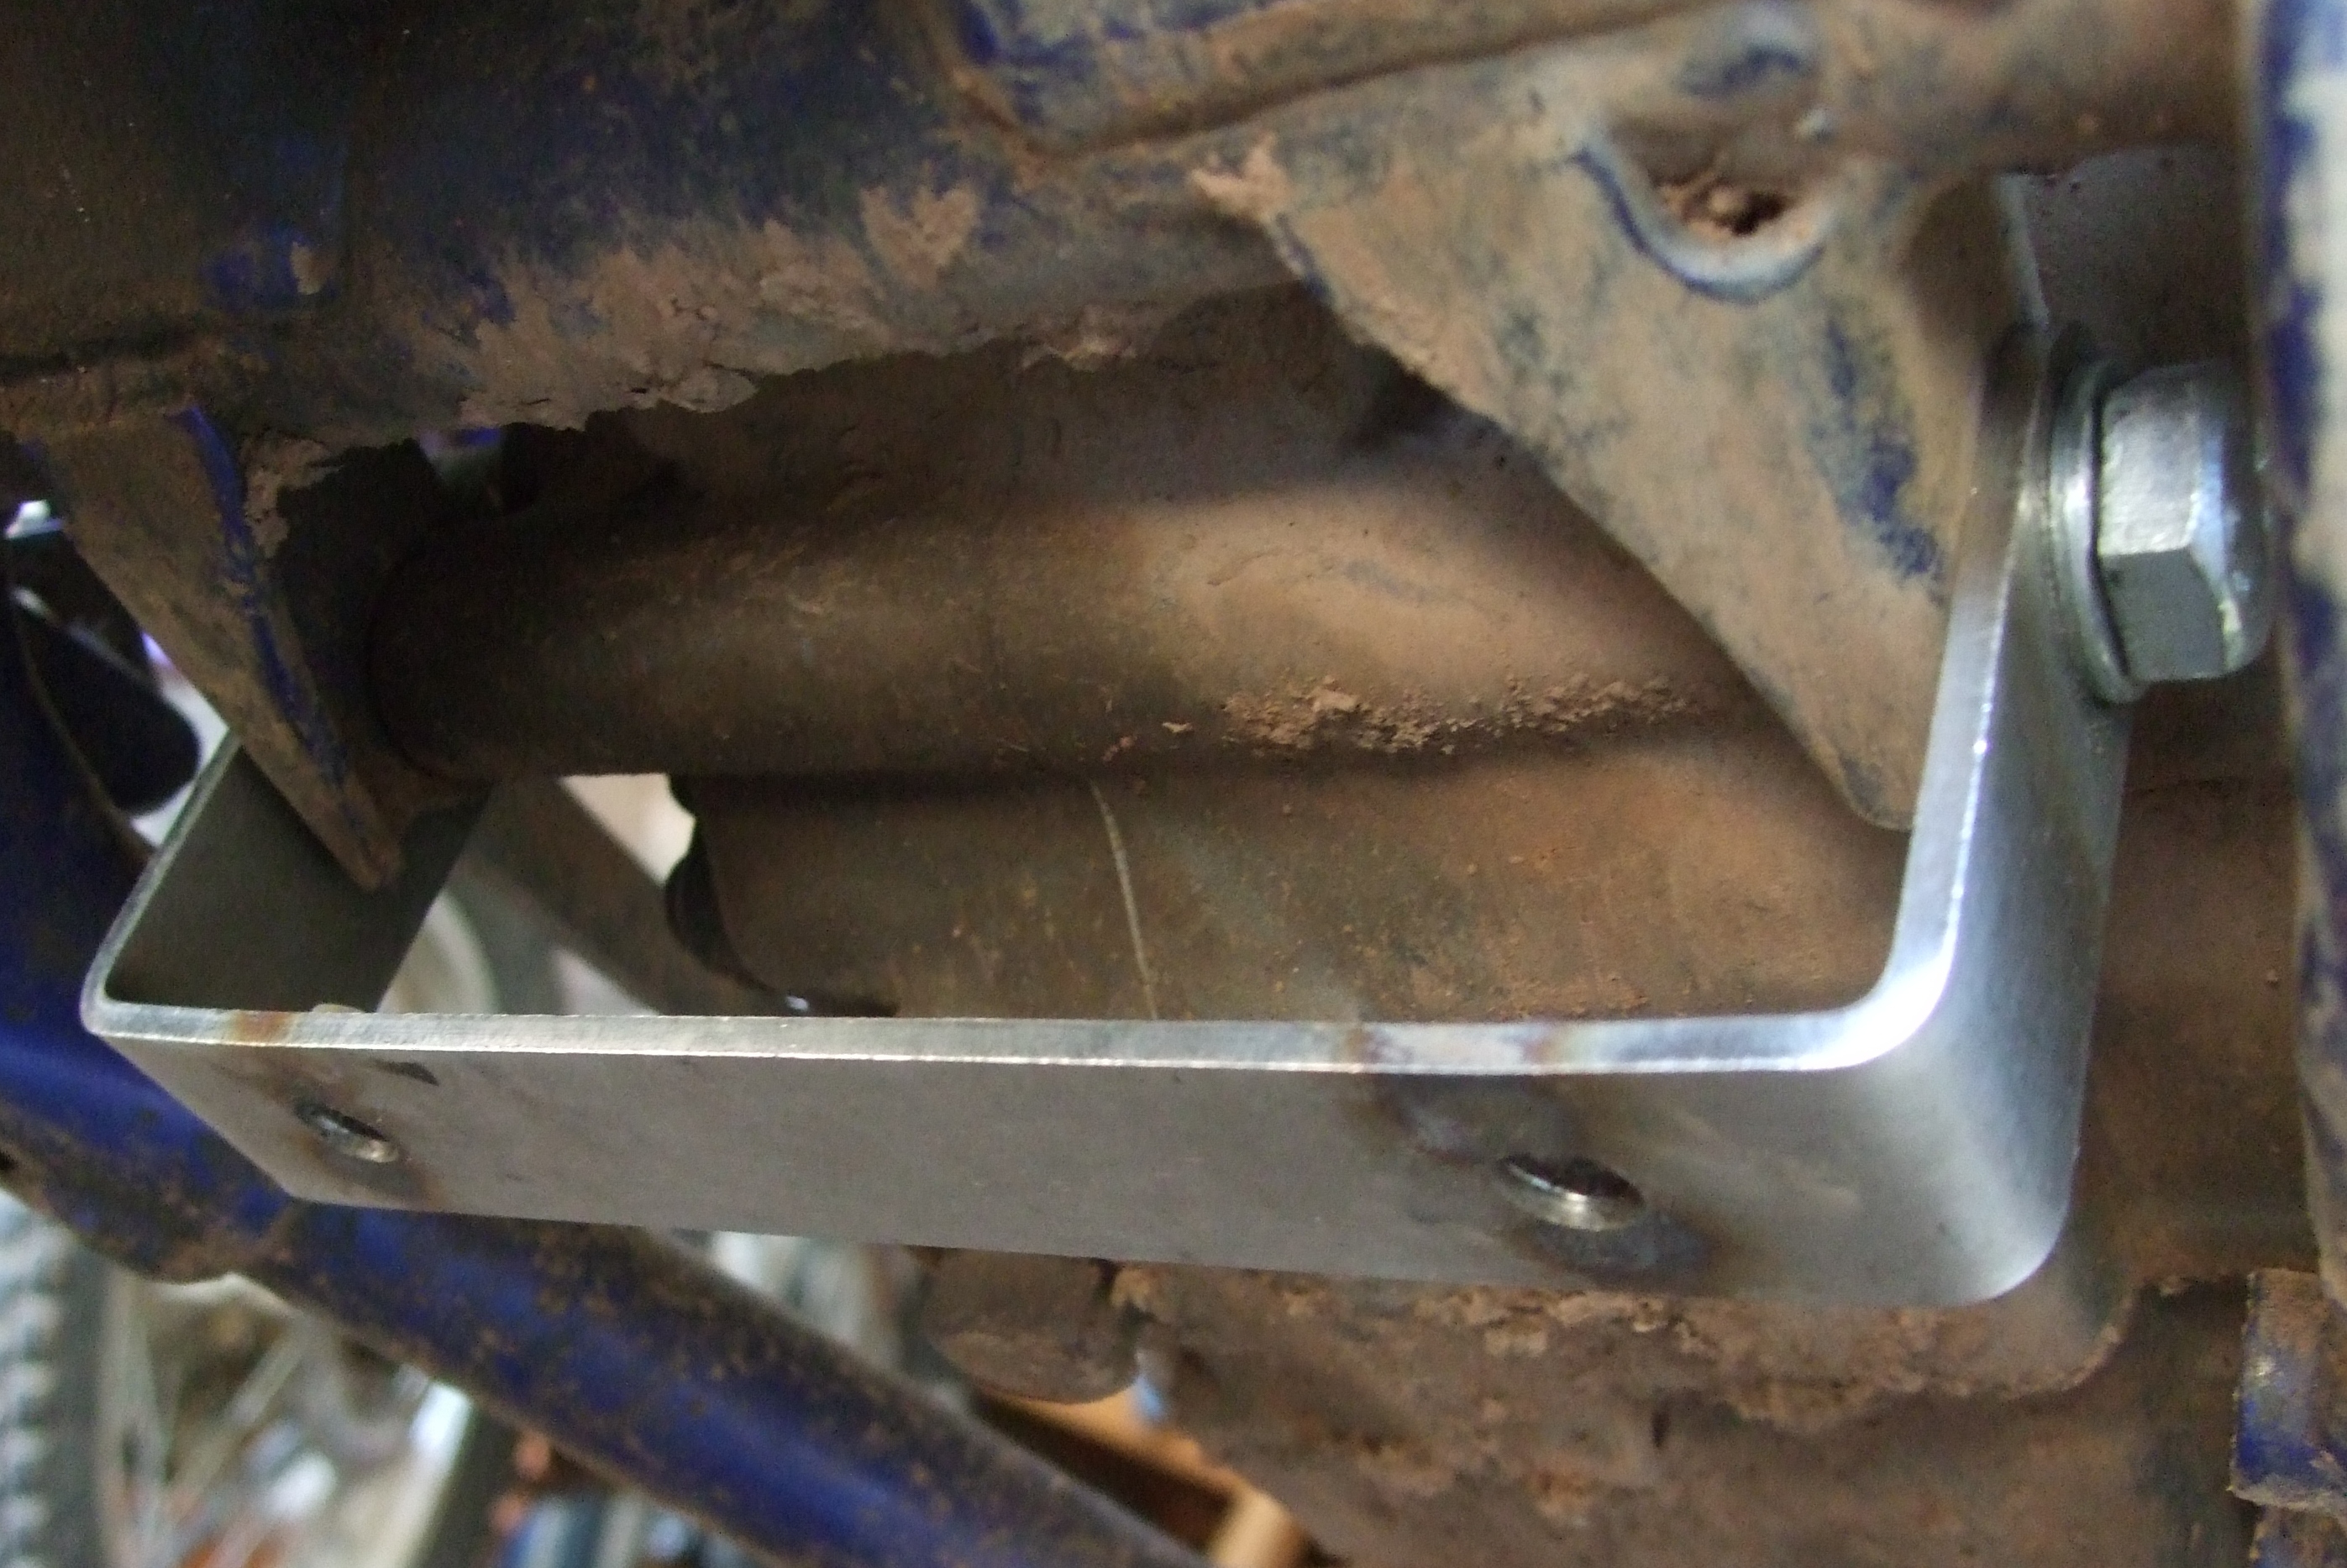
5.Fit the rear bracket using the 17mm bolt, washers and Nyloc nut provided. Leave it slightly loose at this stage.
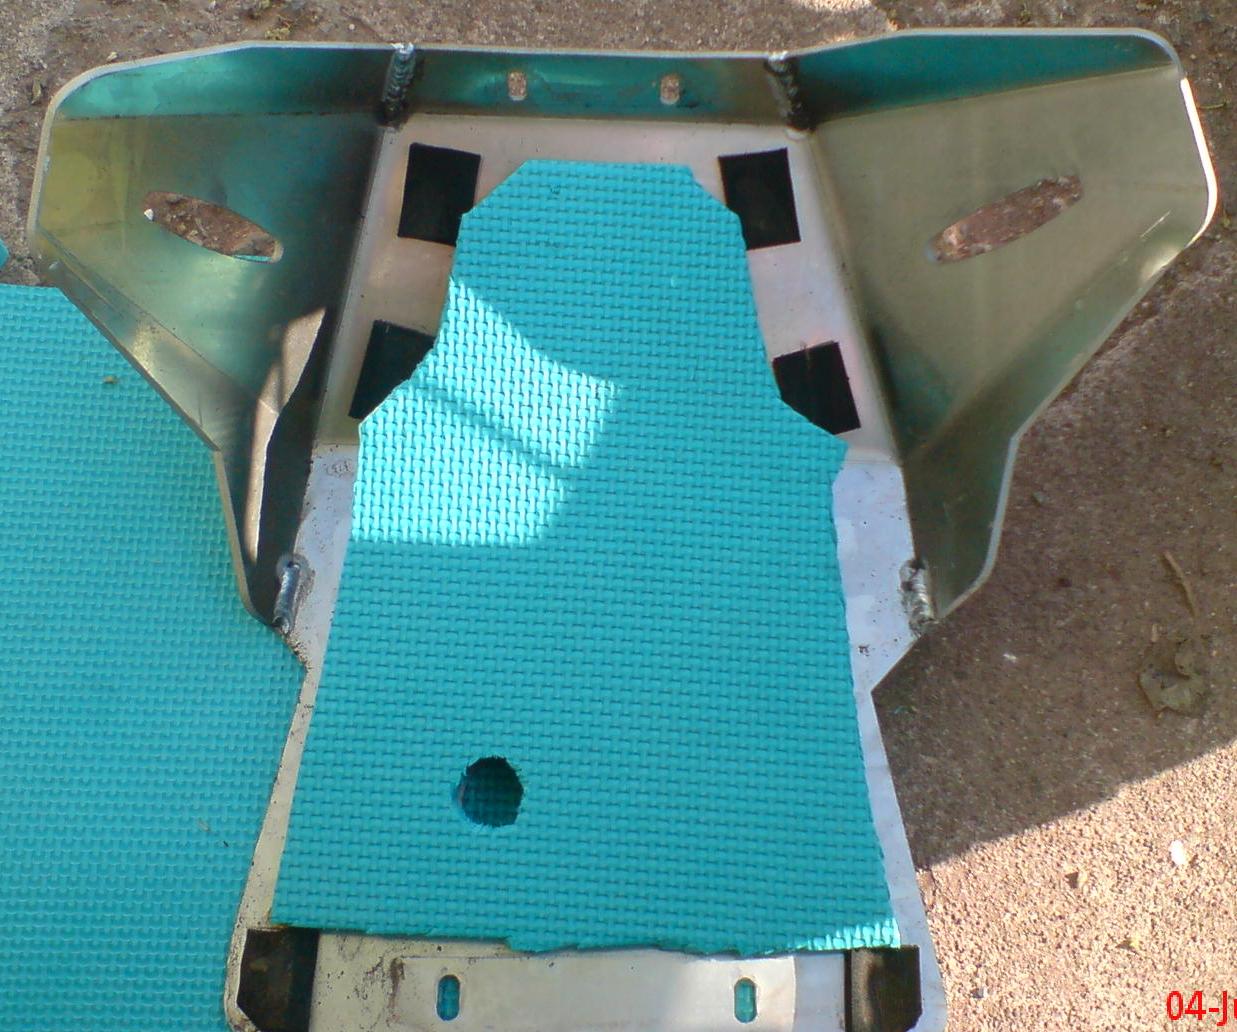
6.Attach adhesive pads where the frame touches the plate as shown in the last picture, making sure you don’t place one over a frame rail drain hole.
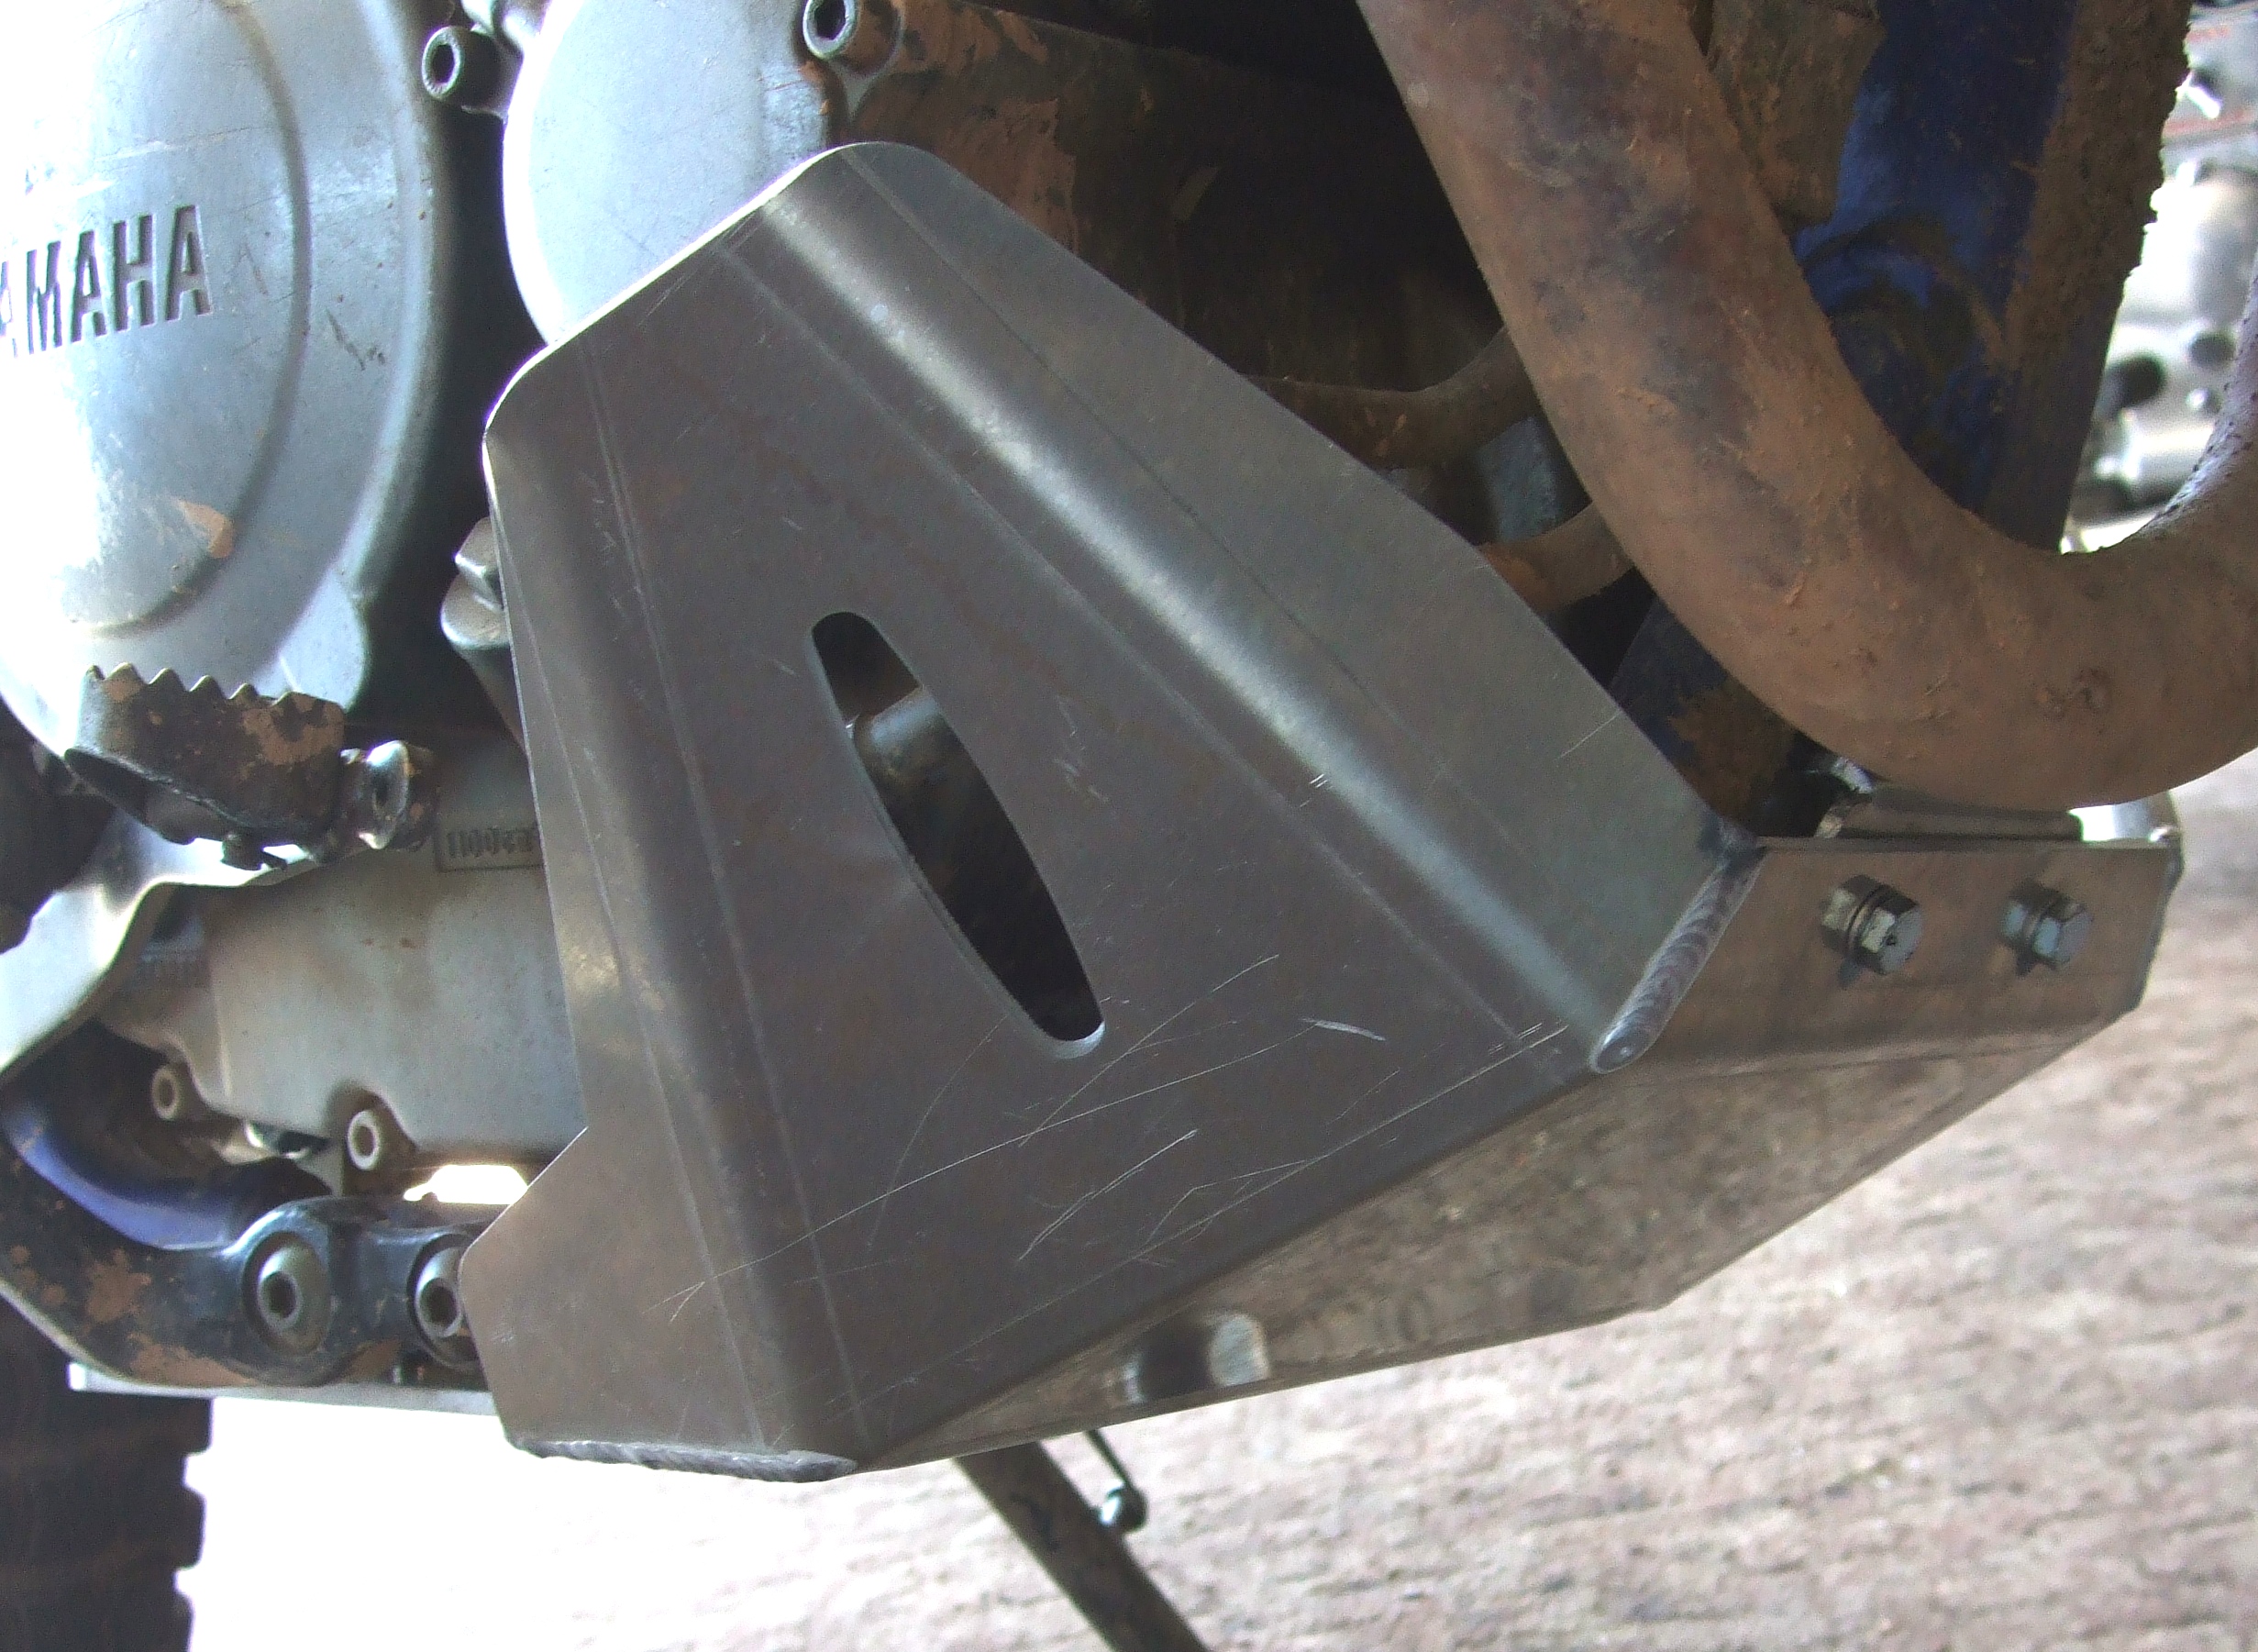
7.Offer up the bash plate and loosely fit the four 10mm bolts and washers. The rear bracket may need to move slightly to help fitting. Nip up the bolts but don’t tighten them until you are happy that the fit is good. Then put some upward pressure on the plate so that the foam pads are pressed against the frame rails and fully tighten up the bolts.
8.Go back and fully tighten the rear bracket with the 17mm bolt and nut – torque 64Nm or 46 ft lbs.
9.Job done!
ADDENDUM: Owners who haven’t used a bashplate before may find it a bit noisy at first as the bashplate reflects some engine and transmission noise upwards. This noise can be reduced by the simple addition of a bit of 10mm foam matting as shown in the pic below.
http://www.totallyttrs.com/
- everything you need (possibly!) for
your TTR250
http://www.ttr250.com/
- all you ever wanted to know
about TTR250s
http://ttr250.activeboard.com/
- the forum for TTR250 owners
http://www.totallywrs.com/
-
for all your WR250R and WR250X after-market parts and accessories
Reference within this site to any specific commercial or non-commercial product, process, or service by trade name, trademark, manufacturer, private individual or otherwise does not constitute or imply an endorsement, recommendation, or favour by Brian Sussex or Totally TTRs