DISCLAIMER: The modifications described in the following text are for educational purposes only. In no way do I recommend that you apply these modifications to your own motorcycle. If you do choose to go ahead and modify your motorcycle based on the information in this document you will accept all responsibility for your own actions. The author(s) of this document, and host(s) providing it for you, accept no responsibility whatsoever. If you are unqualified to make any of the changes described herein but are bent on doing the modification, seek out a knowledgeable friend or professional mechanic for assistance.
Fitting new clutch parts to a Yamaha TTR250
The blue TTRs have 7-plate clutches and the white metal-tanked TTRs have 6-plate clutches fitted.
Replacing the clutch friction plates and/or clutch springs is one of the easiest jobs on the TTR and should take less than an hour.
As usual when going inside the engine it is essential that you have the workshop manual to hand for full details of the procedures, torque settings, etc.
This pictorial guide is just to help you along the way.
Tools needed:- a socket set, torque wrench and hex-sockets.
Parts/supplies:
Friction plate clutch set - see here
IMPORTANT - put the new plates into engine oil to soak - preferably the day before you need to fit them.
plus maybe have a new clutch cover gasket on standby just in case the original gets damaged.
Doing the job.
Before you start, make sure that the petrol tap is turned off and the petrol cap doesn't leak, Otherwise just remove the petrol tank. Lean the TTR over onto a firm surface such as a bike stand or wooden box and make sure it is secured safely. It should then be comfortable to work on the clutch side of the engine.
I usually do the job without draining the oil but if your clutch has been slipping it is best to drain the oil before starting work as the old oil will have been compromised and you should put in new oil once the clutch has been repaired.
Make sure the
floor and working area is clean. I tend to rob the recycling bin of old
newspapers and lay them around to give a clean absorbent surface on which to put
down any parts removed. You are definitely going to lose a little oil.
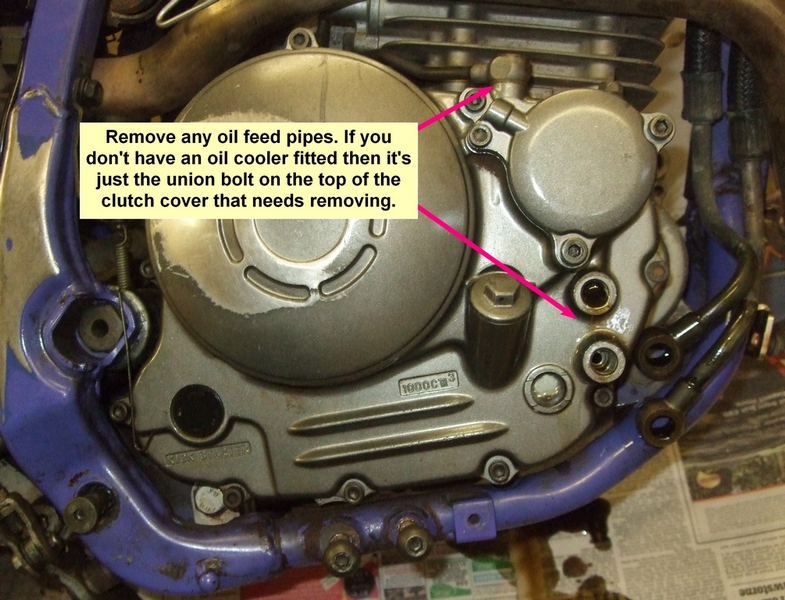
First step is to remove the brake pedal and footpeg to make access easier. Then
loosen the exhaust system to allow access to remove the oil feed banjo bolt at
the top of the casing.
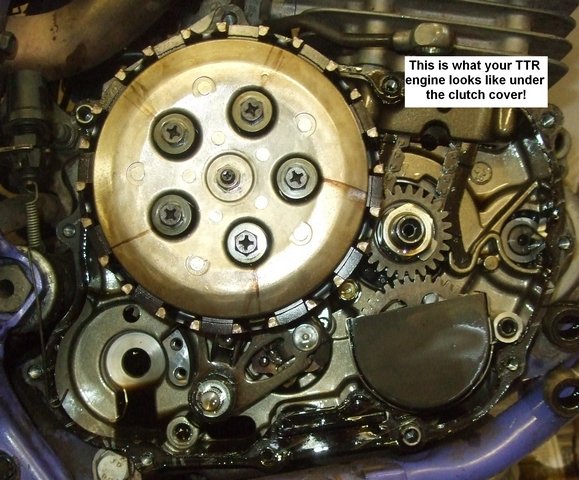
Remove the casing bolts and keep them safely in order as they come out as they are different lengths. Remove the cover carefully to keep its gasket intact.
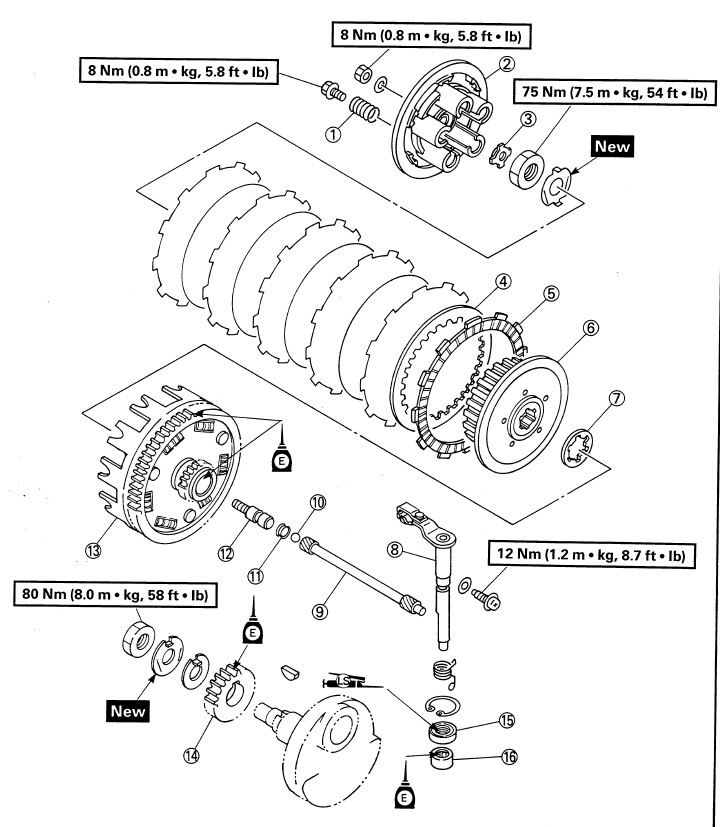
This page from the workshop manual may help make things clearer and provides the
torque settings.
Remove the five 10mm bolts evenly and you will then be able to remove the clutch springs, friction and steel plates from the clutch basket.
Fit the new friction plates alternatively with the steel plates, replace the cover and refit the springs and bolts.
Torque up the bolts to 8 Nm as recommended in the manual.
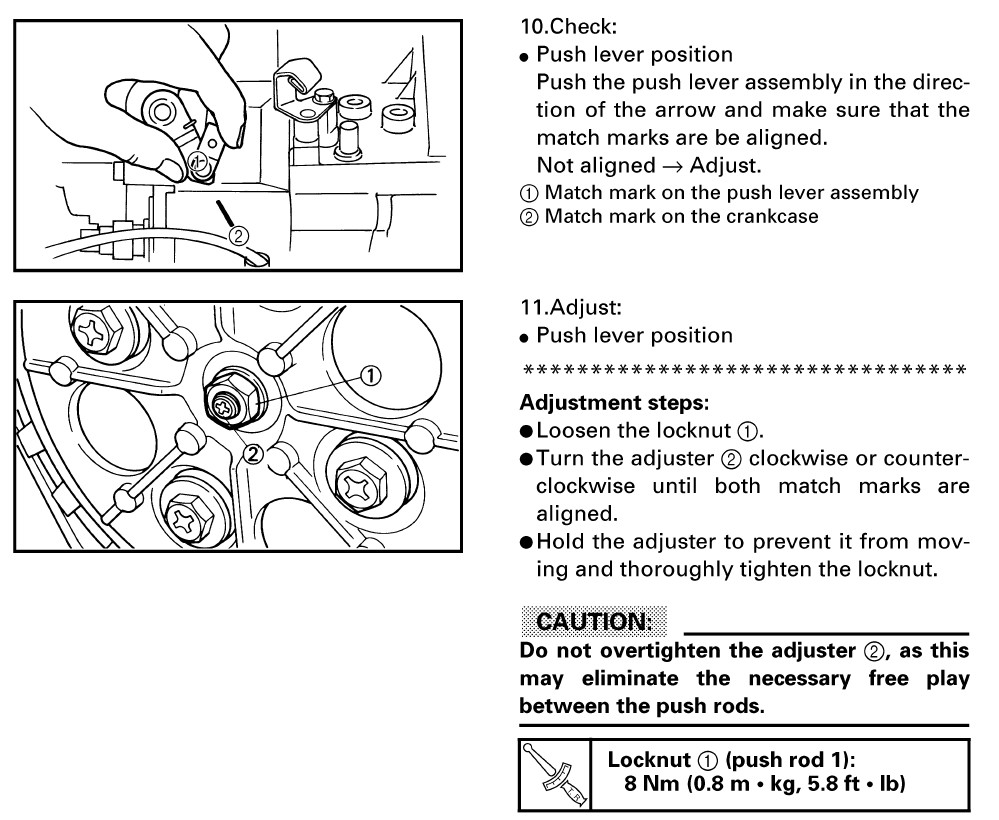
If you need to adjust the clutch, now is the time to do it. See below:
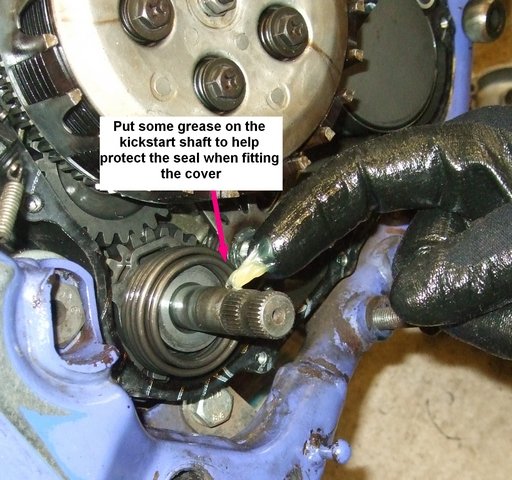
Grease the kickstart shaft (if fitted) to help ease on the cover and protect the seal lips.
Tighten the cover bolts to 10Nm.
Refit the brake pedal, footpeg and exhaust system.
Get your TTR upright, fill up with oil if you had previously drained it and check it all works.
Job done!
Brian Sussex
Compiled by Brian Sussex, Devon, UK
http://www.totallyttrs.com/ - a
web page totally dedicated to TTR250 owners looking for parts and accessories.
http://www.ttr250.com/ -
all you ever wanted to know about TTR250s
http://www.trfdevon.org.uk/ -
the website of the Devon TRF Group