
DISCLAIMER: The modifications described in the following text are for educational purposes only. In no way do I recommend that you apply these modifications to your own motorcycle. If you do choose to go ahead and modify your motorcycle based on the information in this document you will accept all responsibility for your own actions. The author(s) of this document, and host(s) providing it for you, accept no responsibility whatsoever. If you are unqualified to make any of the changes described herein but are bent on doing the modification, seek out a knowledgeable friend or professional mechanic for assistance.
NOTE: This is just a guide; it does not replace a service manual, general mechanical knowledge, specific motorcycle repair experience and good old common sense. With the proper tools, some general experience and this guide most users will be able to successfully check valve clearances and if required replace shims to adjust the valves to service specifications. If you have any problems then stop and ask questions on the forum, take pictures of your point of confusion and get your answers before you start.
Fitting Motrax MicroFairing indicators
General information:
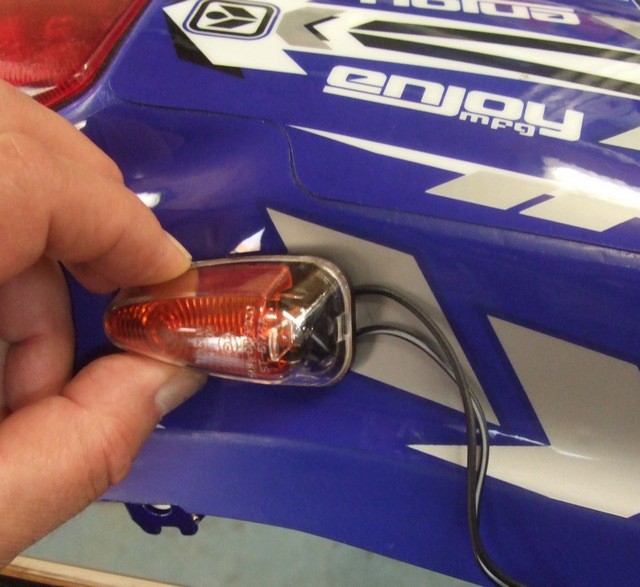
This is pictorial guide on how to to fit a pair of Motrax MicroFairing indicators on your rear mudguard/fender.
I tend to destroy the "sticky outy" type indicators with my boots getting on and off but the flush indicators escape the punishment.
Most American TTRs don't have provision for indicator (i.e. no switch, wiring or mounting brackets) so check your TTR before buying a set of these!
Tools required:
Small crosshead screwdriver
Wire strippers/cutters
Clamping pliers for bullet connectors
Drill
Replacement parts (if needed!):
A set of Motrax MicroFairing indicators. Available from eBay and elsewhere.
I use the type with ordinary bulbs so that they flash properly.
An LED version is also available but will require the fitting of resistors to maintain the correct speed of flash that will satisfy an MOT tester.
The aim of the job might be simple but the execution can get complicated! I started off with one pair of indicators but broke the fixing tab off one of the lenses so had to start again with a new pair so please excuse the change in indicators part way through the photo sequence!
The indicators are "sided" so check where the drain holes are to make sure they face down when fitted.
Choose the indicator you are going to fit first and put the other out of the way so you can't make a mistake!

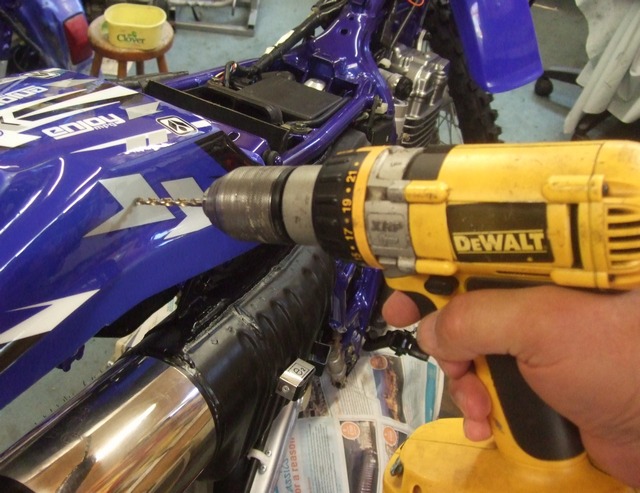
Offer up the indicator to the mudguard and mark where the wires are so that the
hole for the wires can be drilled in the right place.
Because the wires coming out of the indicator are quite widely spaced, I
elongate the hole so that the indicator will fit flush and not be held off the
mudguard by the wires.
Chop the bullet connectors off the indicator wires as they are too small for the TTR connectors and check the indicator will sit flush to the mudguard. You may have to open out the hole in the mudguard to get a good fit.
The indicators attach by some very sticky double sided sticky pads. I wipe the mudguard and back of the indicator with clutch cleaner to get the best "stick" and then fix the pad to the indicator first. The pad may need a bit of trimming if it hangs over the indicator body just to keep things tidy.

Push the indicator hard against the mudguard to get a good fix.

That's the first part of the job done. Wiring next. You need 4 Japanese female bullet connectors:

Fit the bullet connectors to the indicator wires.

Connect the wires and you are ready to test them.
NB On the non-LED type of indicator it doesn't matter which way around you connect the bullets into the TTR's wiring loom but the LED indicators are polarity conscious so, if they don't work on first try, just swap the connectors over!


And, yes, mine worked so job done!

Re-fitting a Motrax MicroFairing indicator
I managed to kick one of my Motrax indicators off on a trail ride and left it hanging too long so mud got on the back of the indicator and killed the stickiness of the fixing pad.
Motrax went out of business several years ago and I haven't found a source of replacement double-sided sticky pads.
I couldn't find any double-sided sticky tape wide enough but managed to sourced a 1" wide roll of 1mm thick tape. When fitted in two halves it is wide enough!
The photo below shows my indicator looking very sad - but it was still working!

I had to chop off the old (red) connectors to get the indicator wires through the small hole I had drilled in the mudguard and was intending to replace them with Japanese bullet connectors as shown in the photo below. However, when I came to do it, the insulators were too loose a fit on the skinny wires and would have let water in so I had to stick with the original type of connectors.
NB Do not fit the connectors until after you have fed the wires through the mudguard. Don't ask why I make this point :-(

The next bit was tricky as I am a bit ham-fisted. I made up a pattern to match the rear of the indicator, folded it in half and then cut two sections of tape to stick to the indicator.
Pictured below is the first half stuck on the indicator and the tape marked ready for the second half to be cut.

Both halves stuck to the back of the indicator and trimmed slightly for a good fit.

The tape seems to be very strong and I got a good fix on the mudguard - but time will tell!

It was then time to fit the new connectors.

And then clean and replace the lens - not forgetting its little gasket.
I am pleased to say that it works fine.

Job done!
Brian Sussex
Compiled by Brian Sussex, Devon, UK
More pictorial guides for repair and maintenance of your TTR250 are available on the TTR250 forum here
http://www.totallyttrs.com/
- everything you need (possibly!) for
your TTR250
http://www.ttr250.com/
- all you ever wanted to know
about TTR250s
http://ttr250.activeboard.com/
- the forum for TTR250 owners
http://www.totallywrs.com/
-
for all your WR250R and WR250X after-market parts and accessories
Reference within this site to any specific commercial or non-commercial product, process, or service by trade name, trademark, manufacturer, private individual or otherwise does not constitute or imply an endorsement, recommendation, or favour by Brian Sussex