DISCLAIMER: The modifications described in the following text are for educational purposes only. In no way do I recommend that you apply these modifications to your own motorcycle. If you do choose to go ahead and modify your motorcycle based on the information in this document you will accept all responsibility for your own actions. The author(s) of this document, and host(s) providing it for you, accept no responsibility whatsoever. If you are unqualified to make any of the changes described herein but are bent on doing the modification, seek out a knowledgeable friend or professional mechanic for assistance.
Replacing a sprag clutch on a Yamaha TTR250
It's a pretty simple operation. Just follow this step by step pictorial guide.
Tools needed:- socket set, Allen socket, big plain screwdriver and torque wrench. It would be preferable to have a flywheel puller and holder but if that isn't available the rear axle can be used instead.
Parts/supplies:
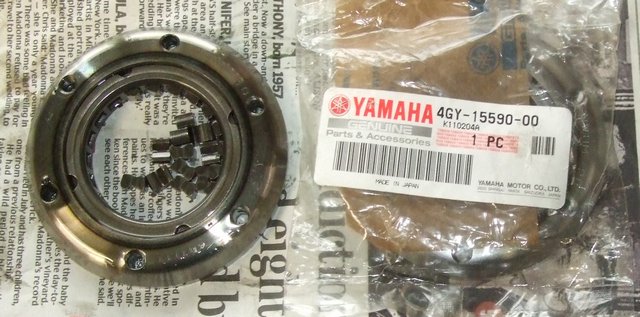
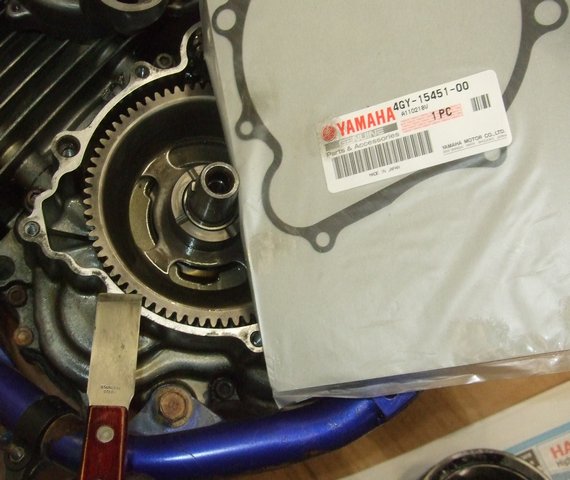
Sprag clutch Part # 4GY-15590-00-00
and possibly
generator cover gasket Part # 4GY-15451-00-00
The sprag on this TTR was making a horrible bang on switch off and was in dire
need of replacement.
Firstly make sure the area around the generator cover is as clean as you can get it (power wash if you can) to help prevent and dirt or grit falling into the engine when the cover is removed.
The photo below shows the area that needs to be clear:
![]()
Probably best to remove bashplate if fitted.
Drain the engine oil if you are going to do the job with the TTR in an upright position. Else turn off the petrol and lay the TTR on its side.
Remove the sprocket cover if fitted.
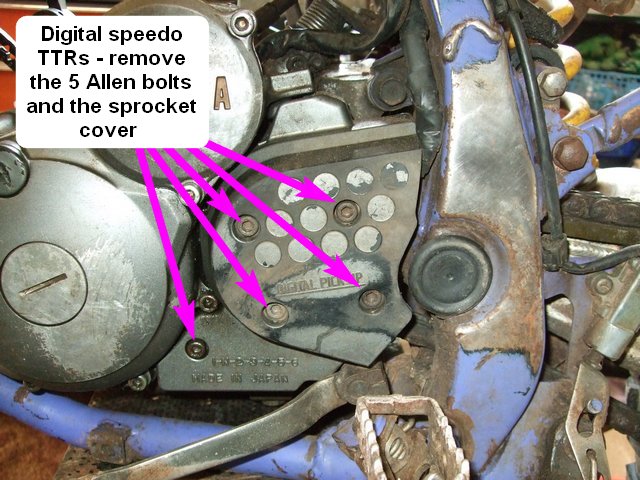
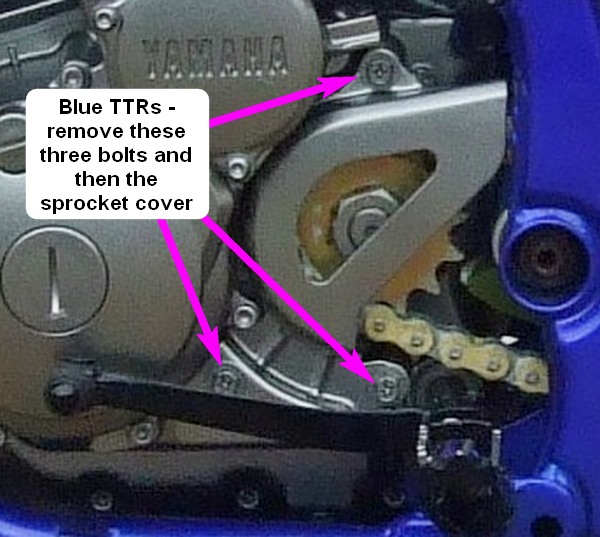
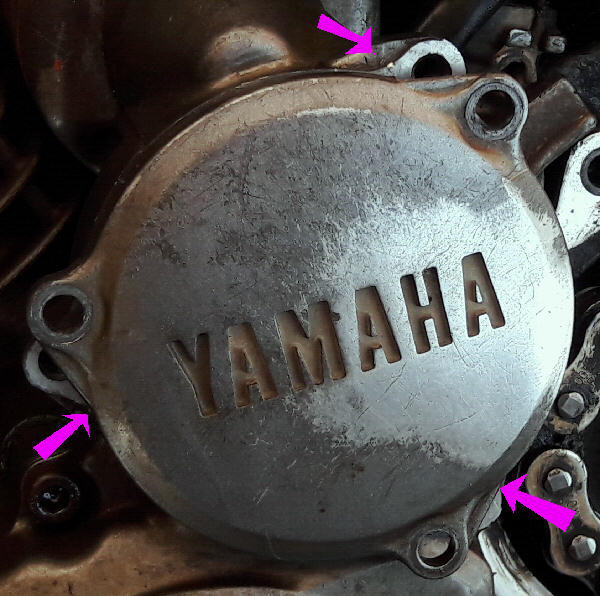
Remove
the starter gear cover. After removing the bolts you can ease it off with a
large screwdriver using the three prise points to the side of the bolt holes as
shown in the photo below.
A previous owner must have stripped it down before as the starter cover's
retaining bolts were butchered and had to be removed with a hammer and cold chisel.
If your gear lever is set very low then you may be able to
get the cover off without removing it - otherwise take it off.
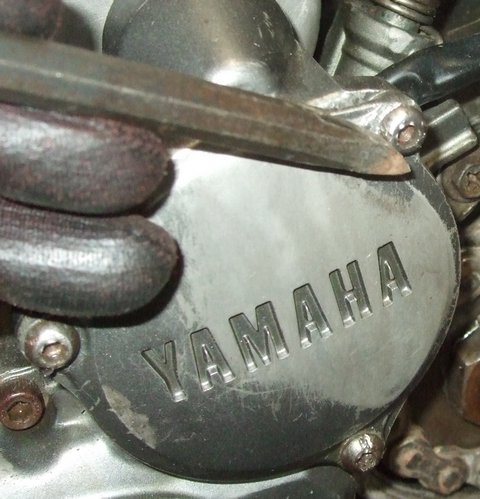
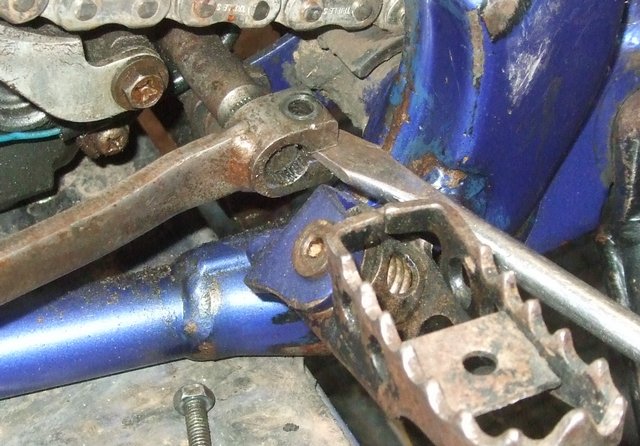
The gear change lever will come off a lot easier if you open it up with a big
plain screwdriver as shown below.
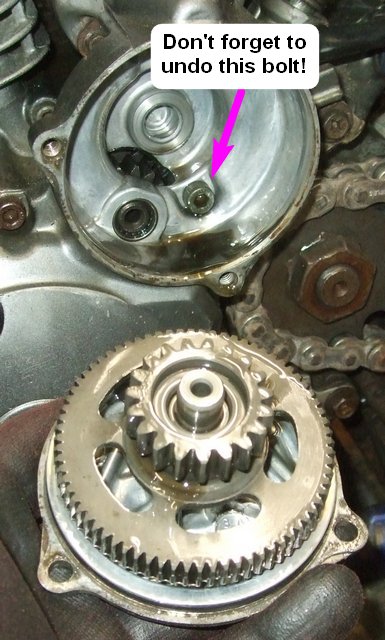
I was lucky as the large idler gear was in excellent condition.
IMPORTANT NOTE - there is an Allen bolt under the idler
gear that needs to be removed with the other cover bolts.
At this point I realised that I hadn't drained the oil so I put the TTR on its side to carry on with the job.
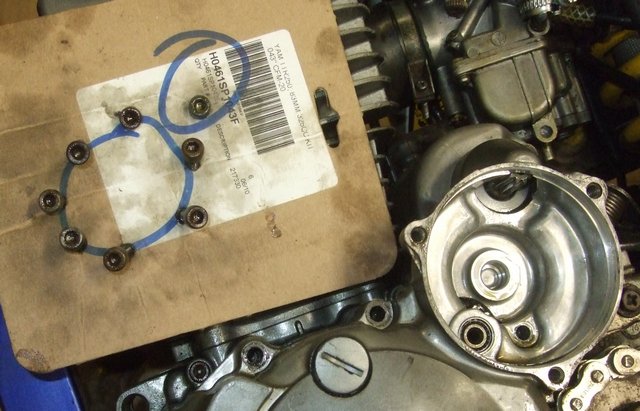
Next, remove the Allen bolts holding on the generator cover.
I made up a
cardboard template to hold the bolts in the correct positions as they are
different lengths.
Remove the generator cover and (a) you are doing the job with the TTR on its side and (b) the gasket stays in one piece and doesn't need replacing, you can swing it back as shown in the photo below.
With the generator cover off, you can examine the small idler gear. It has a thrust washer on both sides so don't lose them!
TIP - if you want to do anything with your starter then it is very easy to remove it from this side of the engine with the generator cover off.
My gear was in perfect condition so I had caught the worn sprag in time.
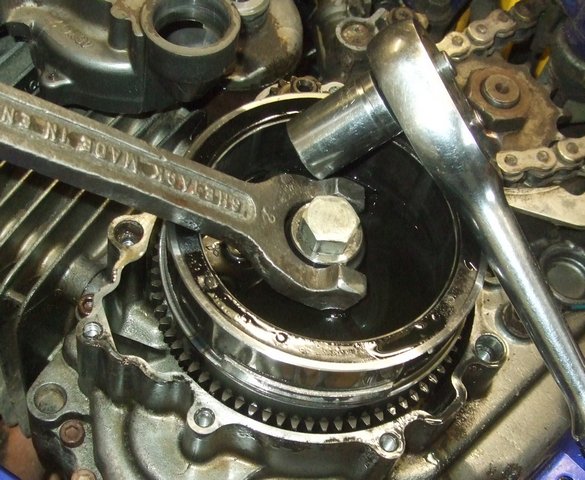
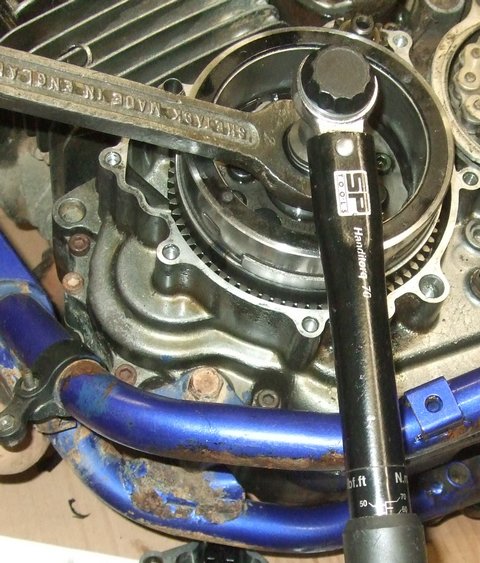
Hold the flywheel and undo the 14mm flywheel bolt.
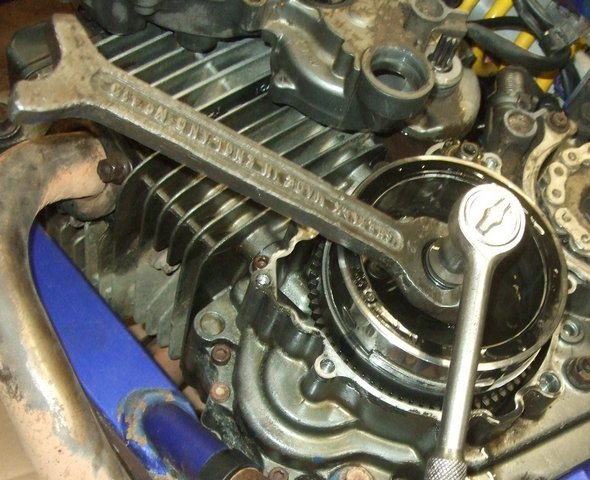
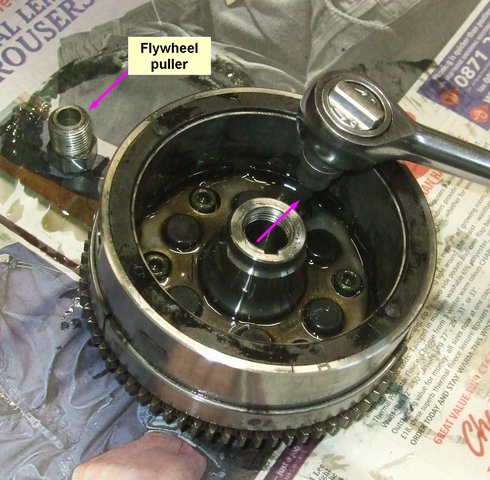
Next use the flywheel puller to remove the flywheel. If you don't have a pucca flywheel puller then you can use the rear axle. In both cases, tighten up as best you can and then tap the end of your pulling device with hammer to release the taper.
If the flywheel proves difficult to remove then try using
a windy (rattle) gun and/or apply some heat on the flywheel boss using a hot air
gun whilst it is under tension with the extractor.
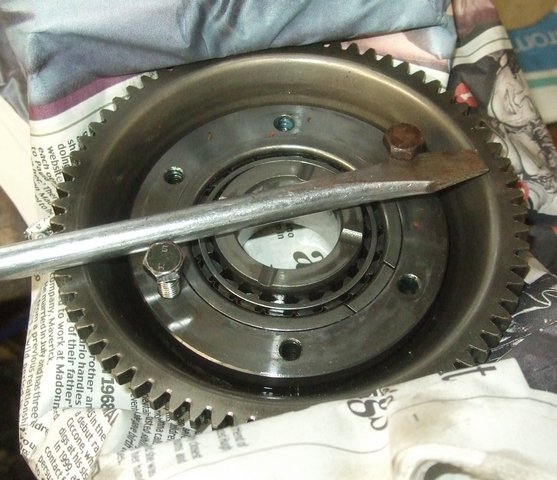
To remove the sprag clutch, undo the six Allen bolts.
The sprag clutch revealed!
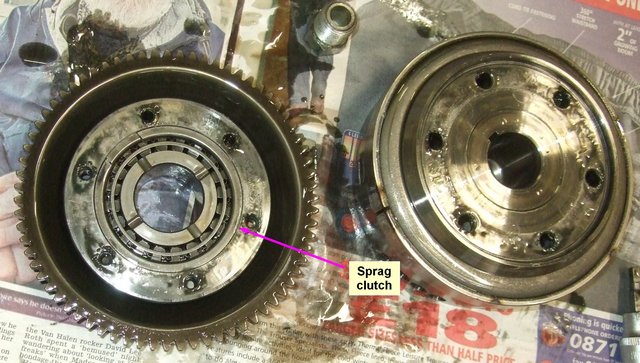
Confirmation that the sprag clutch was in need of replacement was that it had seized on the big gear boss and needed some persuasion to come off.
I put it in the vice and used a large screwdriver
between two bolts to turn the sprag and un-jam its teeth.
Once removed the old sprag fell apart. New sprag in packet
on the right.
Before replacing the sprag have a good look around at the dismantled parts.
Particularly check the boss on the large starter gear.
If the
boss is damaged you will need to
replace the gear.
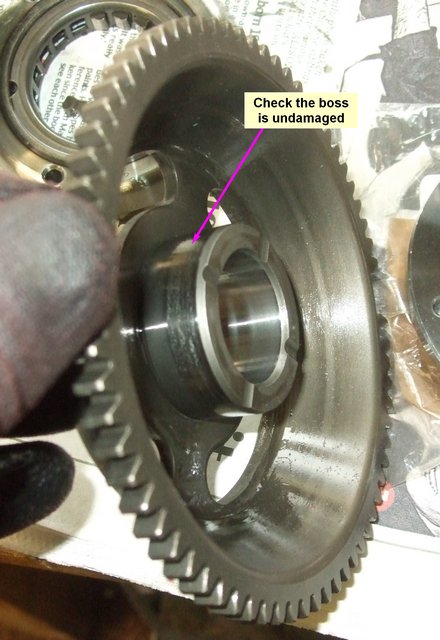
The reason the sprag fell apart was that most of the
retaining tabs had broken off.

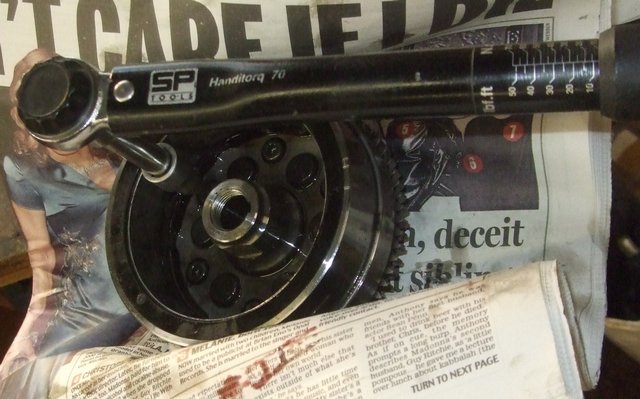
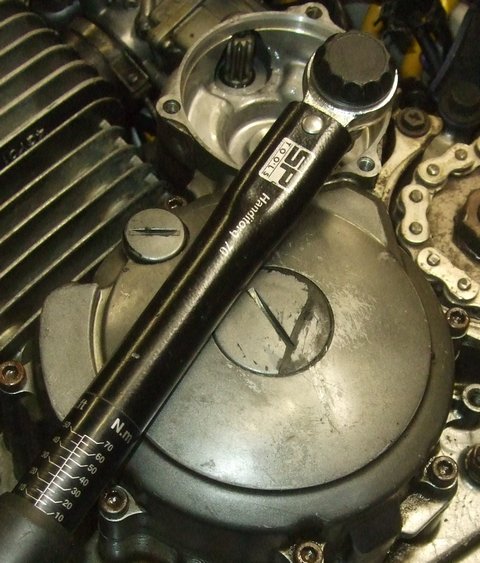
Fit the new sprag and make sure the bolts are torqued up
to 10Nm
Quite often the gasket remains in one piece but I wasn't quite so lucky and had to scrape off bits of the old broken gasket and fit a new one.
Fit the new one "dry".
Use plenty of clean new oil on the new sprag and other moving parts as you
proceed through the reassembly procedure.
Replace the large starter gear and flywheel being careful not to dislodge the Woodruff key on the crankshaft.
Do not force the flywheel onto the starter gear. It should slip on easily by rotating the flywheel a tad to line up the sprag teeth so that they slip over the boss easily. If it doesn't want to go on then you will need to examine the sprag to find the cause.
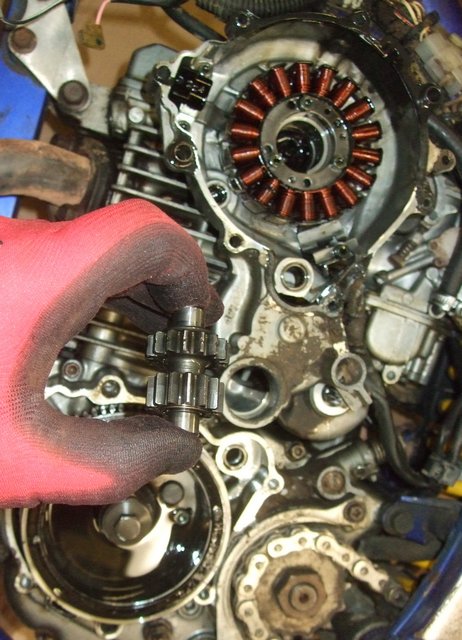
Fit the small starter gear making sure that it has thrust washers on both sides..
Torque the flywheel bolt up
to 60Nm.
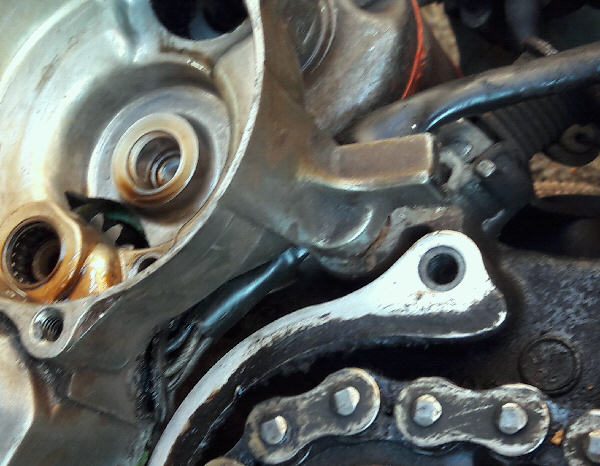
Put the two aligning dowels are into the crankcase side and, if you are fitting a new gasket, put the gasket over them.
Use high
temperature liquid gasket over and under the rubber generator cable bung as this
is liable to be hardened and deformed with age and may leak otherwise. These
parts will then sit happily in place as you fit the cover allowing full
concentration on getting the generator cables routed correctly. They must go
through the U shaped opening and up past the clutch actuator spring as shown in
the photos below.
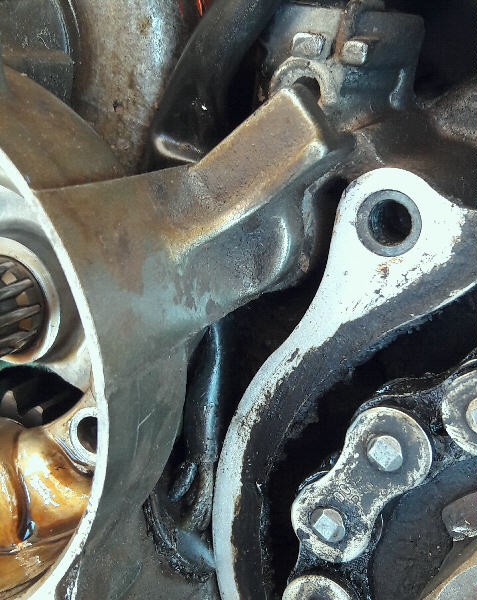
If you don't
get this right the cover will seem to screw down normally but the cable will be
clamped between the cover and the end of the clutch mechanism as the one in the
photo below had been (red arrows). At worst the cables will be damaged, at best
it will hold the cover off just far enough to cause an oil leak.
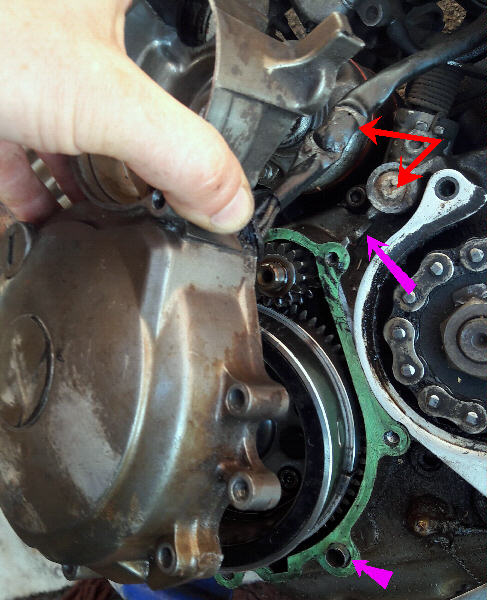
Finally, make sure that the cable is secured so that it is held clear of the clutch actuating mechanism.
![]()
Replace the generator cover and torque up the bolts to 10Nm.
Replace the starter gear with the small pinion facing inwards.
Replace the starter cover. I used hex-headed bolts to make removal easier in the future.
Torque them up to 10Nm.
Replace the sprocket cover and gear lever.
You are now ready to refill with oil if you had drained the engine and start the TTR up and test your new sprag. Hopefully the bang has been replaced with a gentle clunk.
Job done!
Brian Sussex
Compiled by Brian Sussex, Devon, UK
http://www.totallyttrs.com/
- everything you need (possibly!) for
your TTR250
http://www.ttr250.com/
- all you ever wanted to know
about TTR250s
http://ttr250.activeboard.com/
- the forum for TTR250 owners
http://www.totallywrs.com/
-
for all your WR250R and WR250X after-market parts and accessories
Reference within this site to any specific commercial or non-commercial product, process, or service by trade name, trademark, manufacturer, private individual or otherwise does not constitute or imply an endorsement, recommendation, or favour by Brian Sussex