DISCLAIMER: The modifications described in the following text are for educational purposes only. In no way do I recommend that you apply these modifications to your own motorcycle. If you do choose to go ahead and modify your motorcycle based on the information in this document you will accept all responsibility for your own actions. The author(s) of this document, and host(s) providing it for you, accept no responsibility whatsoever. If you are unqualified to make any of the changes described herein but are bent on doing the modification, seek out a knowledgeable friend or professional mechanic for assistance.
TTR250 steering head bearing inspection/maintenance/replacement
NOTE: This is just a guide; it does not replace a service manual, general mechanical knowledge, specific motorcycle repair experience and good old common sense. With the proper tools, some general experience and this guide most users will be able to successfully service, replace or repair their starter motor . If you have any problems then stop and ask questions on the forum, take pictures of your point of confusion and get your answers before you start.
General information:
Worn or damaged steering head bearings can cause the steering to be vague but, if the needle roller bearings are rusted or seized, the steering will be stiff.
Either way, fitting new bearings can transform the steering - in a good way!.
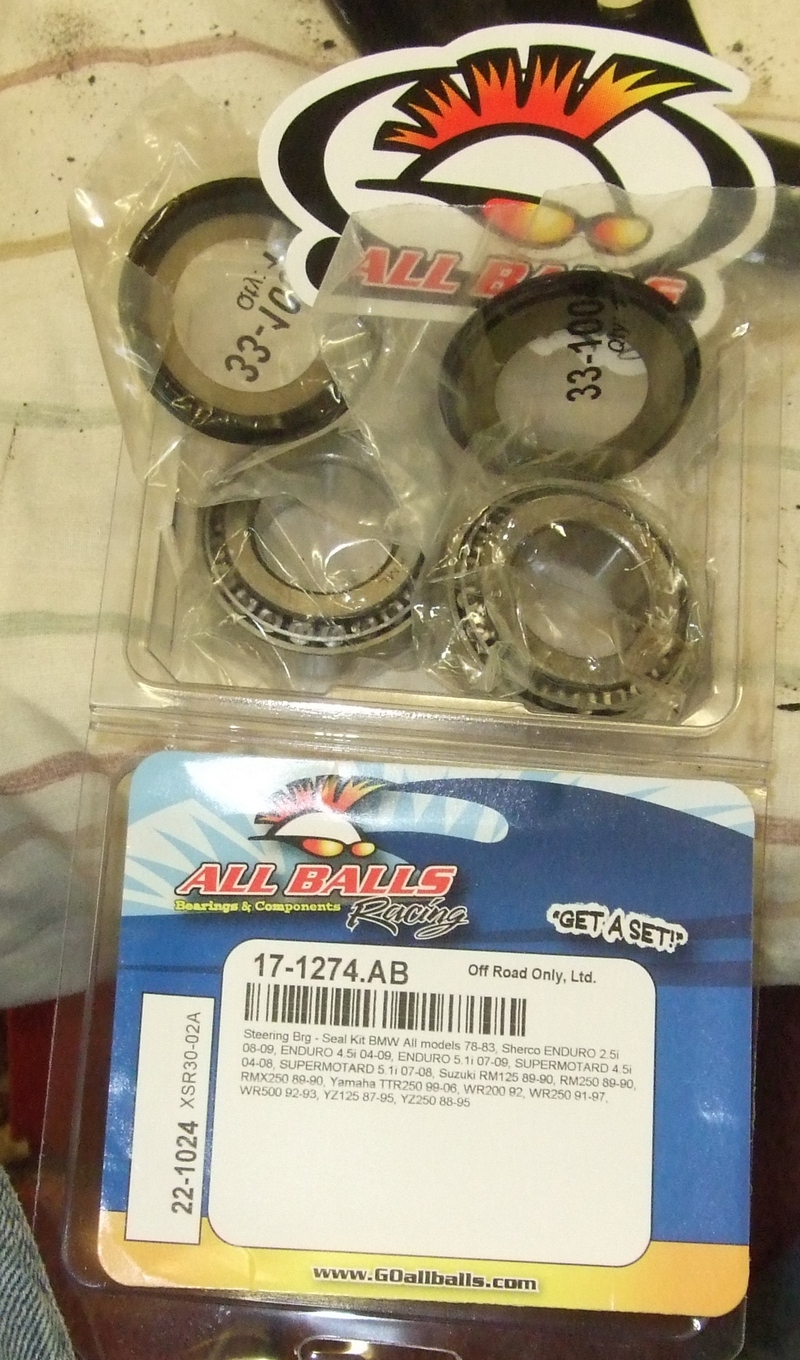
Replacement parts (if needed!):
This guide includes how to replace the steering head bearings using an AllBalls kit available from Totally TTRs here
The kit consists of two bearings and two seals.
Inspection and maintenance
Ideally this job should be done by 2 people.
Set bike up on stand with front wheel about 100mm off the ground.
Remove the
headlight, undo the 3 bolts holding speedo assembly, unscrew speedo cable and unclip wiring, then remove
it.
Place a rag over the front mudguard as the handlebars and other bits will
soon rest there. Keeping everything intact on the handle bars, just remove the 4
bolts and pull the bars forward and lay them on the front mudguard. The
wiring harness is long enough to accommodate this.
Next undo the 4 bolts holding the front indicators to the forks, lay these
indicators also on the front mudguard.
Remove the main nut securing the top fork/head stem bracket, then using a large
screw driver, pry open the fork clamps on the top fork/head stem bracket. This
bracket can now be removed.
Place a block of wood under the front wheel so it is JUST supporting the weight.
With one person standing in front of the wheel making sure it doesn't roll
forward (it will want to very soon) remove clip/lock nut and main nut.
The whole
front fork assembly will want to roll forward at this point. Supporting the
weight of the wheel, carefully lower the wheel
to the floor and stop it rolling away with a chock of wood . As the whole thing wants to roll forward be careful not to damage
the thread.
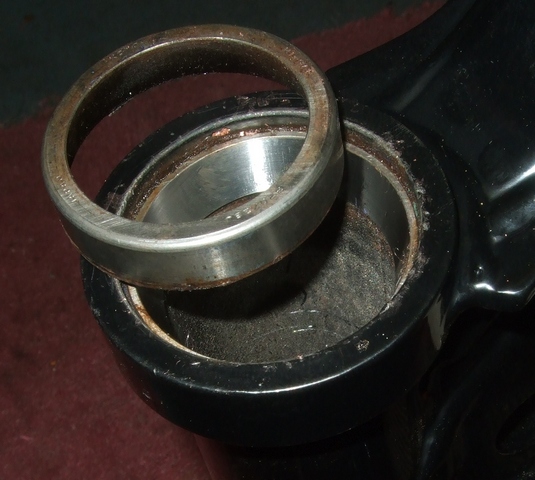
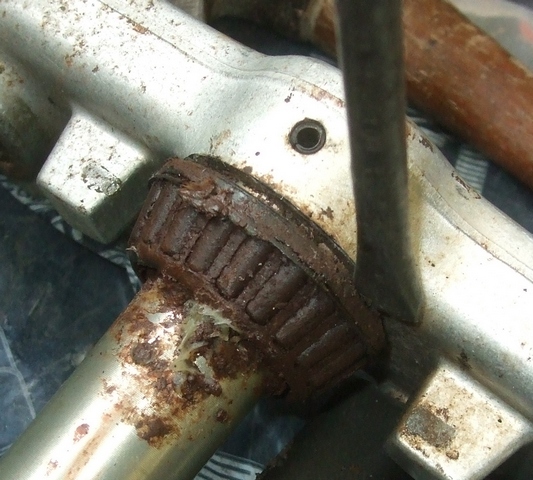
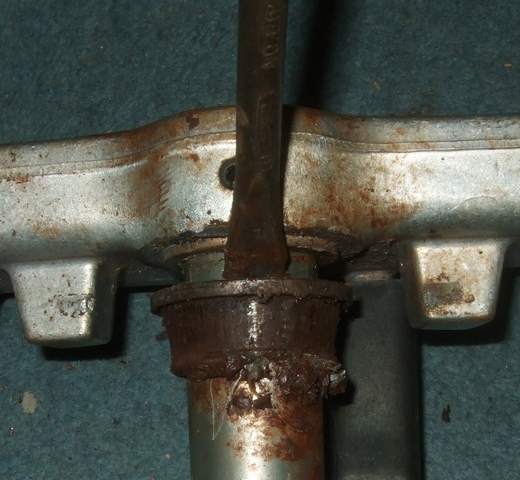
Both the top and bottom bearings and races are now completely exposed for
examination. If the races are worn then this is sometimes obvious with them
looking and feeling "wavy" or ridged. If the bottom bearing is rusted then it
make sense to replace it along with the top bearing whilst you have the steering
assembly this far disassembled.
If replacement bearings are needed then jump to the guide below.
Otherwise the bearings can be greased. One
person can service the bearings while the other stops the wheel coming forward.
When finished, lift the front wheel up (careful of the thread) so that the forks
go back into position and, preferably with the help of an assistant, install the top bearing and nuts
and fit things back in reverse order of the way they came off. If you have
muddled the parts then scroll down this page to see photos showing the
correct order that the washers etc have to go back in.
The torque setting for the fork pinch bolts is 23Nm – the same as the handlebar clamp bolts.
Once all parts have been refitted,
turn the handlebars from one lock to the other and make sure that nothing is
binding and the wiring and cables aren't pulling. If they are, adjust as
necessary.
Steering head bearing replacement
Firstly remove the old outer bearing races.
The top race usually taps out easily with a hammer and chisel or punch but the lower one is often seized on.
If the lower bearing race will be scrap then the easiest way to remove it if you have access to someone with an arc or MIG welder is to put a blob of weld on its surface and the race will drop out when it cools and contracts.
I used a special tool made for the job.
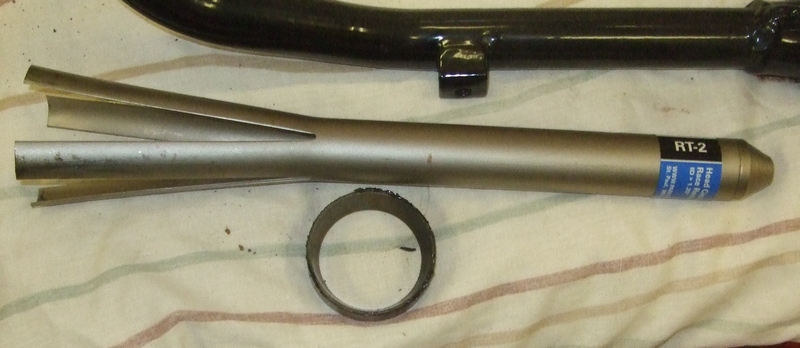
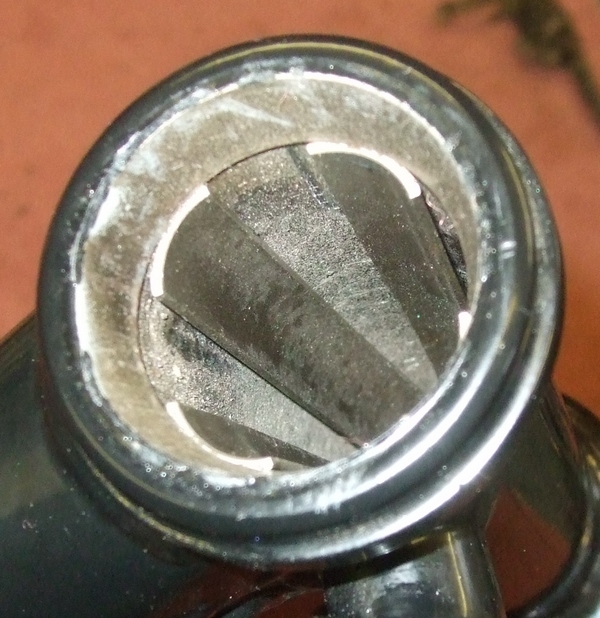
It is a pretty solid bit of stainless steel with four sprung "tongues" that sit
under the races and allows them to be driven out with a hammer. The following
pic shows the tool in place ready to drive out the top race.
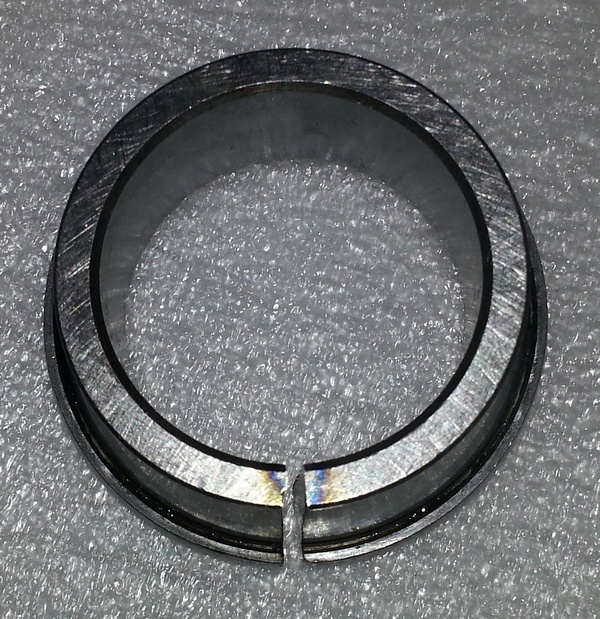
Now clean the inside of the fork tube and fit the new inner races. The top race is easy as it fits flush. I used a copper headed hammer to
tap it in.

The bottom race is recessed so use an old inner race to tap it home.
The next job is the most difficult and that is getting the old bottom bearing off.
In this example it was
incredibly tight. I used a chisel to get in between the bearing and
yoke to start to drive it off.
Once it had started to move it was a case of continuing to drive it off with the hammer and chisel. The job is easier with the old roller bearings removed.
Use a Dremel to cut the bearing off if you have one as that is probably a lot easier!
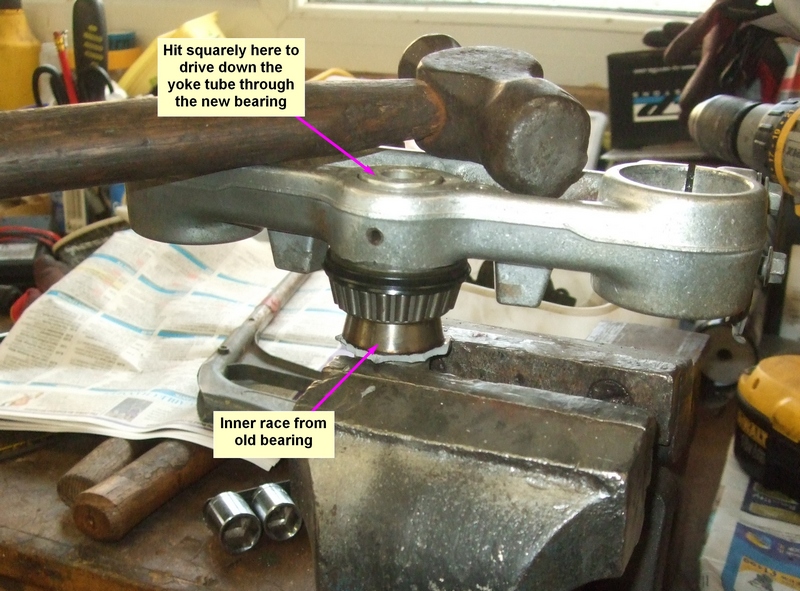
I guess I should have realised that if the old bearing was tight the new one
would be as well - this was the case 
If you can warm the bearing and chill the yoke then the job is easier. I fitted mine by putting the yoke in the vice and, using the old inner race to protect the new bearing, hitting it on with a hammer. Cut across the old bearing first so it won't be such a tight fit, can't jam and will easily come off again.
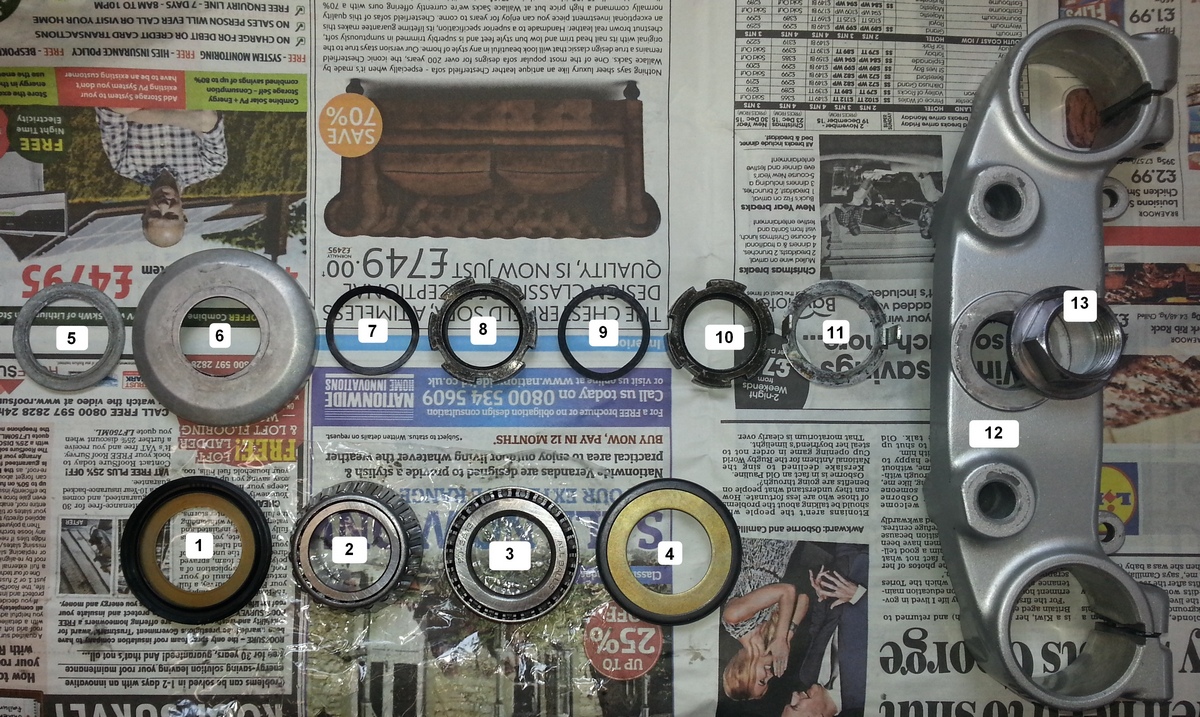
Grease the bearings well and put the yokes back in the frame with all the washers etc all in the correct order as shown in the photos below:
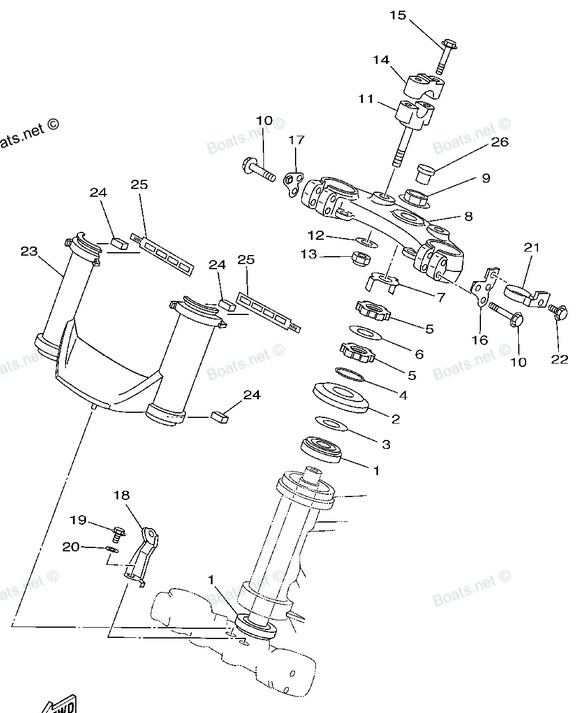
This is the fiche pic:
Assuming that you have the forks and front wheel in, now torque up the top nut.

Job done!
Brian SussexCompiled by Brian Sussex, Devon, UK
http://www.ttr250.com/
- all you ever wanted to know
about TTR250s
http://ttr250.activeboard.com/
- the forum for TTR250 owners
http://www.totallyttrs.com/
- everything you need (possibly!) for
your TTR250
http://www.totallywrs.com/
-
for all your WR250R and WR250X after-market parts and accessories
Reference within this site to any specific commercial or non-commercial product, process, or service by trade name, trademark, manufacturer, private individual or otherwise does not constitute or imply an endorsement, recommendation, or favour by Brian Sussex