DISCLAIMER: The modifications described in the following text are for educational purposes only. In no way do I recommend that you apply these modifications to your own motorcycle. If you do choose to go ahead and modify your motorcycle based on the information in this document you will accept all responsibility for your own actions. The author(s) of this document, and host(s) providing it for you, accept no responsibility whatsoever. If you are unqualified to make any of the changes described herein but are bent on doing the modification, seek out a knowledgeable friend or professional mechanic for assistance.
Replacing swing arm bearings and seals
Play in the swing arm bearings is not only a sure fire MOT failure but also ruins the handling on the TTR so, if you detect play it's time to replace them!
Tools needed:- plain screwdriver, hammer, drift, socket set and/or range of spanners. A blow torch or hot air gun might also be useful.
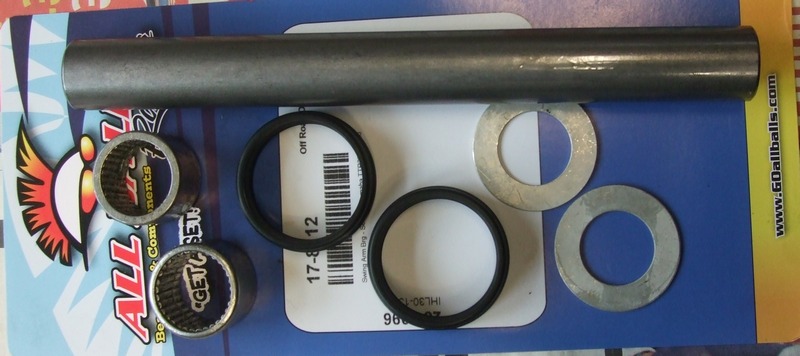
Parts/supplies: New swing arm bearing and seal kit - see here - which looks like this:
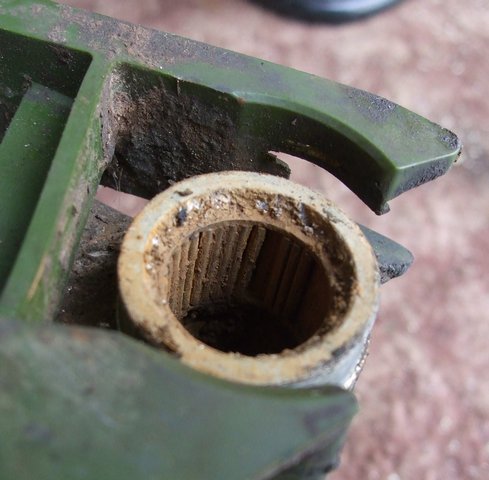
It is usual fairly obvious when the bearings need replacement either because there is sideways movement of the swing arm when its in the TTR or when the bearing shaft and bearings look like this!
.jpg")
The usual cause of the problem is water getting in through a bearing cover damaged by a worn chain seal. This allows the chain to wear into the cover as shown below.
.jpg")
If your chain has started to wear through the swing arm as in the photo below,
the grooves can be filled with Chemical Metal or similar to give the new seal a
good surface to sit on..jpg")
This is what a repaired swing arm might look like:
.jpg")
Because I dislike this job, and don't like to struggle unnecessarily, I had a stainless steel bar made up specifically to drive out the swing arm bearings. However, old screwdrivers, punches and steel tube/bar can be improvised as drifts to do the job!
.jpg")
It will help if you can get the swing arm hot before tackling the bearing removal using a blowtorch or hot air gun to heat the bearing housing up. Apparently aluminium expands three times that of steel as you warm it up.
The procedure is to put your drift into the swing arm from the opposite side to the bearing to be removed, locate the drift on the inner bearing race edge and drive out the bearing keeping a lot of sideways force on the drift to make sure it doesn't slip off the bearing edge.
.jpg")
Having removed the bearings and cleaned up the swing arm the bearing and seal kit can now be fitted.
I have refined my fitting process as my vice doesn't open wide enough to easily accommodate the swing arm, bearings and sockets needed to press the bearings in.
I used a length of 10mm threaded bar, two large washers, one 17mm Nyloc nut, an ordinary 17mm nut, and a 21mm 1/2" drive socket.
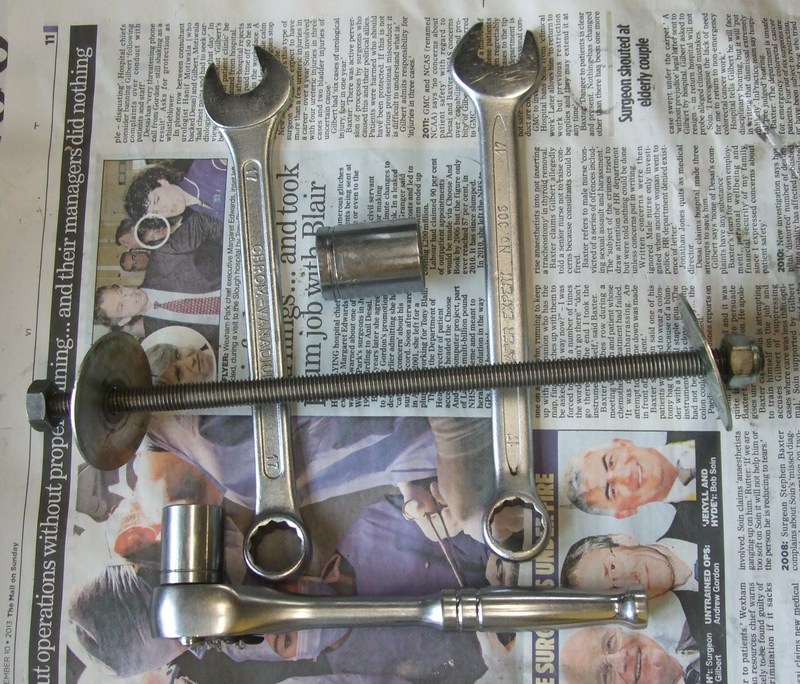
I fixed the Nyloc nut onto one end of the bar and then threaded on the washers and bearings as shown in the pic below. It's important the the "square" end of the bearings are on the outside to give a good surface to press on.
Tighten until the washers are flush with the swing arm.
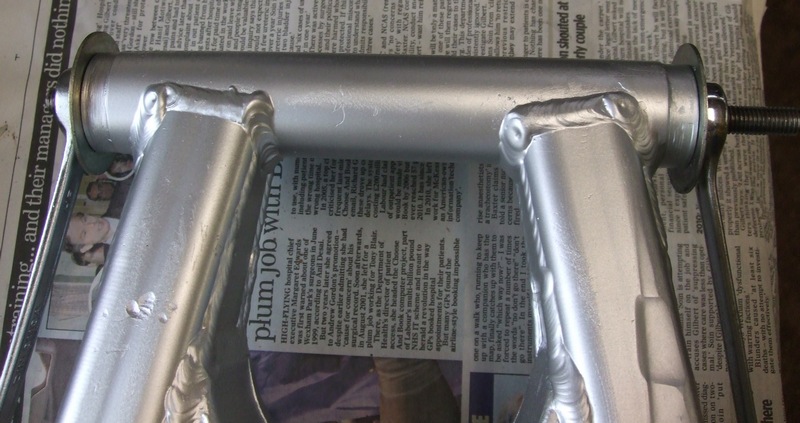
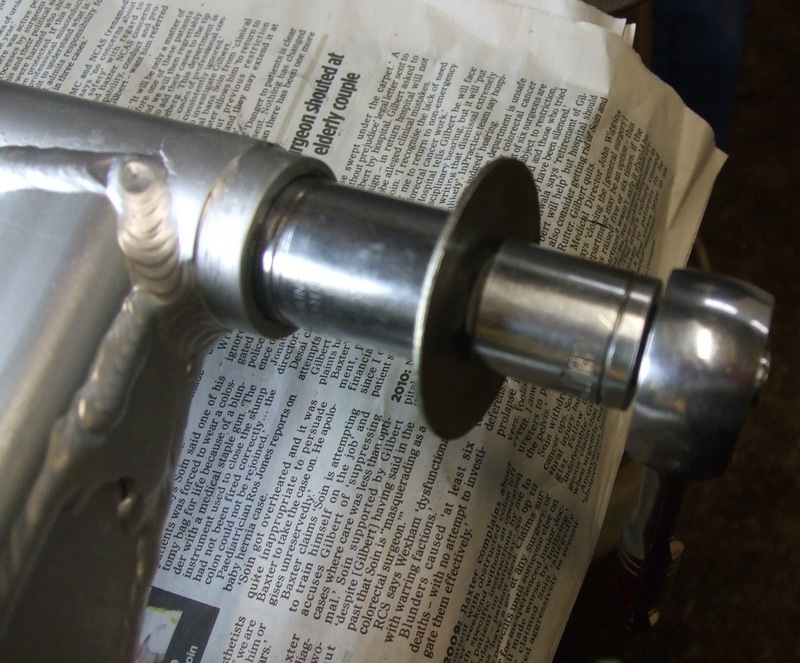
A socket was then needed to push the bearings in a further 3mm.
.jpg")
Use plenty of grease on the bearings and bearing tube and slide in the tube being careful not to dislodge any of the bearing needles. Then assemble the end cap as shown below. I find it easier to put the seals in the caps and then fit them to the swing arm as they are quite a bit chunkier than the originals
.jpg")
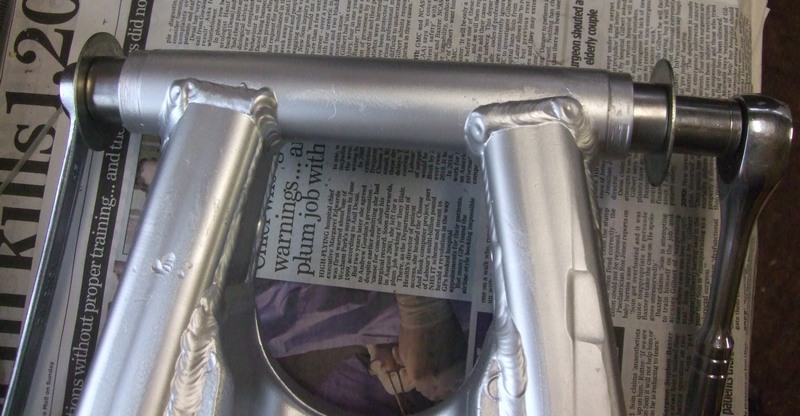
Finish assembling the swing arm and don't forget to put the chain slider on before fitting the swing arm. If you had taken it off, make life easier by re-fitting the linkage arm BEFORE installing the swing arm.
.jpg")
.jpg")
Push the bolt through from the RHS, fit the nut and washer and torque it up to a hefty 105Nm.
.jpg")
Fit the link arm to the swing arm and torque to 59Nm.
Job done!
Brian Sussex
Compiled by Brian Sussex, Devon, UK
http://www.totallyttrs.com/
- everything you need (possibly!) for
your TTR250
http://www.ttr250.com/
- all you ever wanted to know
about TTR250s
http://ttr250.activeboard.com/
- the forum for TTR250 owners
http://www.totallywrs.com/
-
Reference within this site to any specific commercial or non-commercial product, process, or service by trade name, trademark, manufacturer, private individual or otherwise does not constitute or imply an endorsement, recommendation, or favour by Brian Sussex or Totally TTRs