DISCLAIMER: The modifications described in the following text are for educational purposes only. In no way do I recommend that you apply these modifications to your own motorcycle. If you do choose to go ahead and modify your motorcycle based on the information in this document you will accept all responsibility for your own actions. The author(s) of this document, and host(s) providing it for you, accept no responsibility whatsoever. If you are unqualified to make any of the changes described herein but are bent on doing the modification, seek out a knowledgeable friend or professional mechanic for assistance.
Valve clearance checking and adjustment.
NOTE: This is just a guide; it does not replace a service manual, general mechanical knowledge, specific motorcycle repair experience and good old common sense. With the proper tools, some general experience and this guide most users will be able to successfully check valve clearances and if required replace shims to adjust the valves to service specifications. If you have any problems then stop and ask questions on the forum, take pictures of your point of confusion and get your answers before you start.
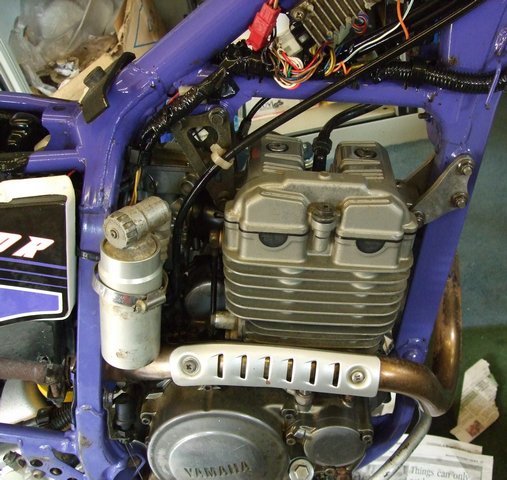
Then make sure that the bike is safely on a stand and at a comfortable working height - if at all possible. Make sure the floor and working area is clean. I tend to rob the recycling bin of old newspapers and lay them around to give a clean absorbent surface on which to put down any parts removed.
Next remove the three Allen bolts and take off the cam cover being careful not to damage the rubber gasket.
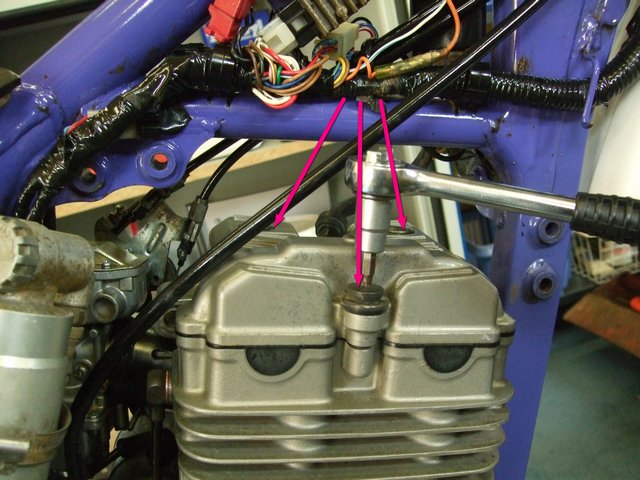
Take out the timing access plug.
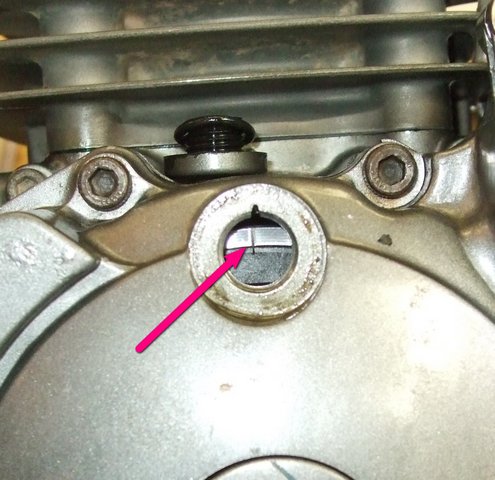
No kick start on this TTR so I put the engine in 6th gear and turned it to the
TDC mark using the rear wheel. TDC is the SINGLE mark
and not the H shaped mark about half an inch away.
Ensure the alignment markers and both cam lobes are
pointing away from each other as shown in the pics below.
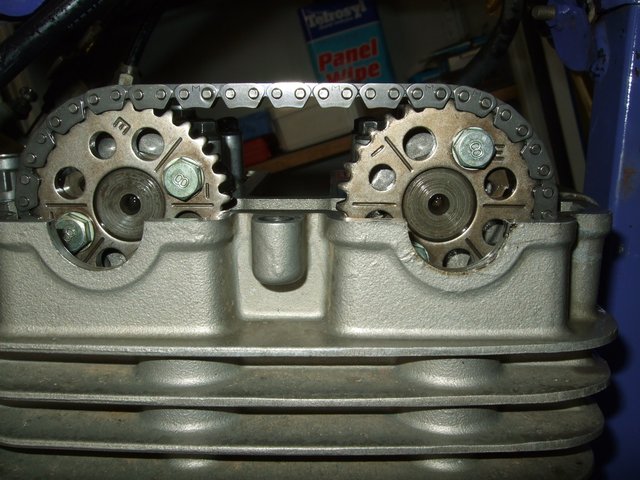
The engine is at TDC on compression stroke now and you can check the
valve clearances.
Take a quick look at the timing mark, and make sure the crank has not rotated
and the index line is still in the centre of the sight window (this is a
repetitive step, but key to getting good readings off valves).
I use a laminated guide with the cam lobe positions and clearance ranges written on it along with an essential bit of kit - a set of metric feeler gauges with individual gauges from 0.02mm to 0.10mm and then in stages of 0.05mm. Stack two blades where necessary.
![]()
The OEM service limits for clearance is:
Intake 0.09mm ~ 0.19mm
Exhaust 0.19 ~ 0.27mm
So starting with any valve and bucket, pick the feeler gauge blade of the
minimum service limit and see if it fits cleanly, without force between the shim
bucket and the cam face.
![]()
Starting with an intake valve try a 0.10mm blade, if it does not fit in, your
clearances are too tight. Go to the next size down blade in your feeler gauge
set until you find one that fits, and write down the size. If the 0.10 blade
fits, go up one size at a time until you get to a blade that does not fit. Write
down the last blade size that fits.
Do so for the remaining three valves. Bottom line, your job here is to find the
blade that fits the valve clearance gap, it should be a slight drag as you pull
it though..
If your clearances are too small (below service limit) you will need a smaller
(thinner) shim. Swapping to a thinner shim under the bucket will move the bucket
farther away from the cam and increase your clearance.
If the clearance was too large (above the service limit) you will need a larger
shim (thicker shim) In order to move the valve bucket closer to the cam face.
If your clearances are within the service limit. You’re done, put everything
back together and go ride.
Remember as the valve face wears, they recede into the head and the valve
clearances get smaller (less) So if you are measuring a clearance close to the
minimum service limit,, consider adjusting them now.
Once the hard coating on the valve face starts to wear, the valve clearances
will close up in just a few hours. You can adjust them again to service limits,
but they will rapidly continue to wear. It’s time for a valve job.
Removing the Cams and
Adjusting Valve Clearances
In order to remove the cams to gain access to the valve bucket and below it the
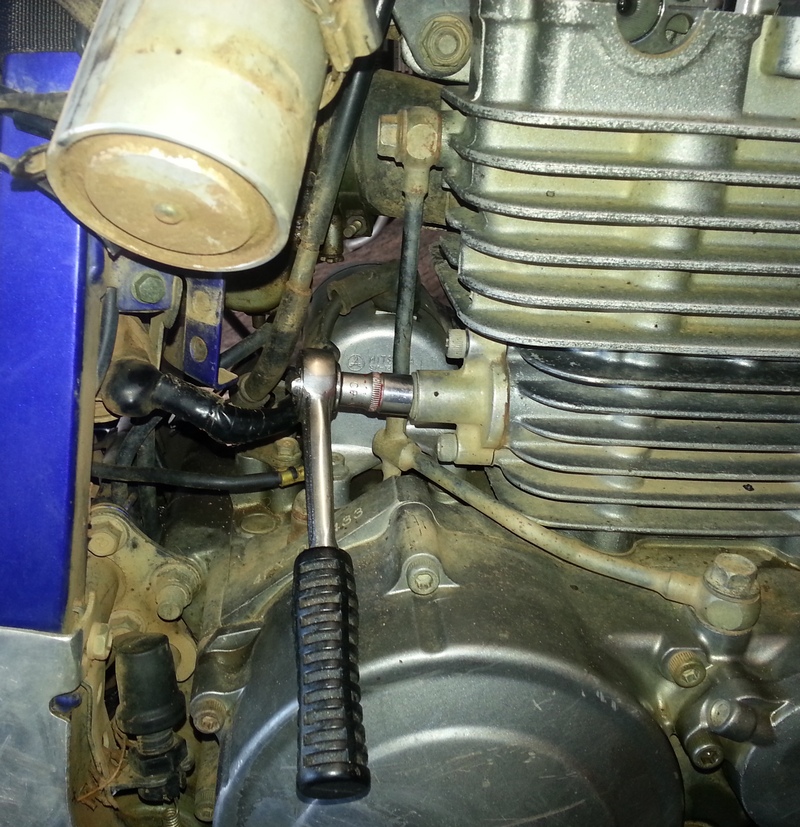
shim, you will need to remove the cam chain tensioner.
Loosen the access bolt on the end of the tensioner whilst the tensioner is still fitted. Much easier than when the tensioner is off!
The valve bucket is now accessible, remove it with a magnet or, as I do, use an old valve lapping tool (suction cup).
CAUTION: the small shim (9.48mm dia)
may stick to the underside of the bucket, it may come part way out of the valve
top, or it could stay in place.. Be careful it does not come off with the bucket
and then drop free to be lost in the engine. Retrieving a shim from the engine is
possible, but time consuming, and often requires further disassembly and or
removal of the engine from the frame. Many hours may be lost doing this. So
spending a few extra minutes to stuff clean lint free rags in the open parts of
the head is well worth it till you understand what is happening.
What shim do I need to
fix my clearances?
Now that you know what the clearance is for each valve, you have the shims out
and know what size each is, and you know the service limits it's time to do some
math and figure out what shim you need to install.
The OEM service limits for clearance are:
Intake 0.09mm ~ 0.19mm
Exhaust 0.19 ~ 0.27mm
Shims come in two types, The OEM has increments of 0.01mm
(so you could have 181 or 186), and the
aftermarket ones come in .05mm increments only. You can use either to correctly
adjust the clearances.
The diameter of a TTR valve shim
is 9.48mm.. and then the shim thickness is noted on the shim itself.. Typically
they start at about 1.80mm and go up to 2.80mm or so. Normal shims used in a TTR
are in the 1.90mm to 2.20mm. Less than 1.60 or so will often be so thin that the
shim would be below the surface of the valve spring top causing the bucket to
push down on the top and not the shim. This will damage the bucket, and often
cause the valve colletts to come loose.
Here are some examples assuming
you want the clearance to be in the middle of the spec. and you’re using an
aftermarket shim from Hotcams
Intake valve, measured clearance of 0 .05mm
Valve shim is a 2.50mm
Service limit is 0.10mm to 0.20mm (you decide you want it in the middle of the
spec at 0.15mm)
So you need increase the clearance .10mm
That means you need a 0.10mm THINNER shim.
If you install a 2.40mm shim you will end up with a clearance of 0.15mm. Your
desired end state.
One more:
Exhaust valve, measured clearance of .25mm
Valve shim is a 2.85mm
Service limit is 0.20mm to 0.30mm (you decide you want it in the far end of the
spec at 0.30mm)
So you need increase the clearance 0.05mm
That means you need a 0.05mm THINNER shim.
If you install a 2.80mm shim you will end up with a clearance of 0.30mm. Your
desired end state.
You may find it easier to work from this chart:
![]()
Timing the cams
This is a very easy thing to do, but often misunderstood or over complicated.
Brian Sussex
Compiled by Brian Sussex, Devon, UK
http://www.totallyttrs.com/
- everything you need (possibly!) for
your TTR250
http://www.ttr250.com/
- all you ever wanted to know
about TTR250s
http://ttr250.activeboard.com/
- the forum for TTR250 owners
http://www.totallywrs.com/
-
for all your WR250R and WR250X after-market parts and accessories
Reference within this site to any specific commercial or non-commercial product, process, or service by trade name, trademark, manufacturer, private individual or otherwise does not constitute or imply an endorsement, recommendation, or favour by Brian Sussex or Totally TTRs