
My 1959 BSA C15 Star - I have now sold the finished bike so the blog has ended. I will leave it here in case it helps any other owners!
Index:-
Part 1 - getting stuck in! Tank, chainguard, carburettor and battery holder
Part 3 - carb, air filter, fitting an in-line fuse and first start up
Part 4 - first ride on the C15
Part 6 - rebuilding the engine
Part 7 - everything but the engine!
a) Petrol tank
d) Cleaning and plating fasteners
After getting my mate's Bantam running after 40 years in storage and delivered back to its owner, the workshop was looking decidedly empty. I needed another project!
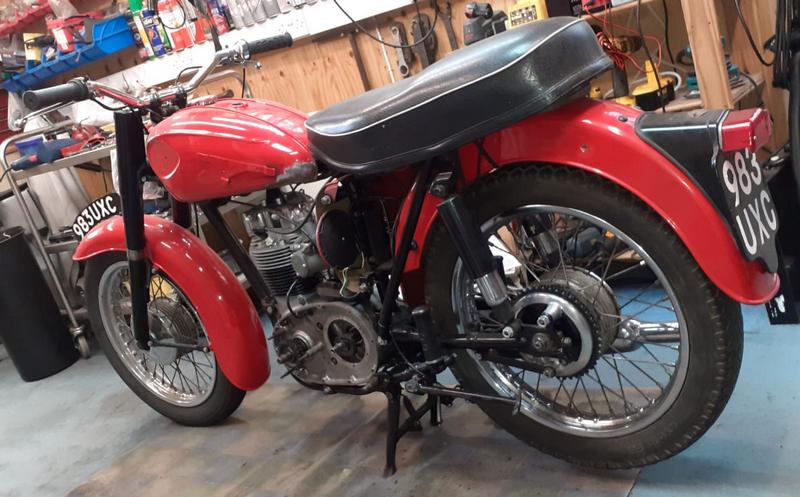
I decided that it would be sensible to start off with a four-stroke single and read up on the available Brit bikes in Steve Wilson's book "Practical British Lightweight Four-Stroke Motorcycles". I have always fancied a Tiger Cub having envied a mate's back in my teenage years but the book made it clear that the C15 was a much improved bike that fixed a lot of the Cub's inherent faults plus it was 50cc bigger. I am not a small man so that seemed a sensible option! Also, like for Bantams, there are always plenty of C15s for sale ranging from piles of what looks like scrap to mint examples costing anything up to £3K! After watching some real shonkers go for silly money on eBay, I stumbled upon one in a mate of a mate's shed. It looked complete, had a powder-coated frame & fittings and good tinware so I did the deal and got it home. Its last MOT was on 5th September 2007 with the speedo reading 26,480 miles. It came to me with 26,512 miles on the clock so I am guessing it was parked up in 2007, not long after its MOT.
I sent off a fiver to the BSA Owners Club's dating officer together with frame and engine numbers and got back an interesting certificate showing that mine was indeed made in 1958 and despatched to a dealer in Bath in November 1958. At which time it was, apparently, finished in green which was quite a surprise bearing in mind how red it now is! The engine is a later 1960 model, despatched to Chase E Cope and Sons Ltd in Wolverhampton in October 1960 - presumably after the owner had blown up the original!
Part 1 - getting stuck in! Tank, chainguard, carburettor and battery holder
I have started work on it with the priority being just to get it running so that I can check out the engine. I can then decide on the next stage, either to do a full nut and bolt restoration or a simple tidy up job.
First off was the seat and petrol tank. The seat base and cover look good but the "eyebrow" tank had an ominous rustling noise. The bike had been stored unused for 8 or 9 years and the petrol had all but evaporated away leaving only a tiny amount in it. After a good shaking and emptying, I got more rust flakes than petrol out of it but, after washing it out with a petrol/diesel mix, I tried some clean petrol and no sign of leaks so am keeping my fingers crossed as it is the original "eyebrow" tank which I think looks a lot better than the later plain-sided ones.
t
he standard original 375/34 Amal carb has been swapped out for a 375/33 from an Ariel Leader or Arrow for some strange reason. Fortunately the 375/33 has the same 7/8" bore and I have been reassured that its body will the same as the 375/34 and it'll be OK so long as it has the right needle, jets, etc. The carb has had an initial bath in the ultrasonic cleaner and, after a bit more cleaning up, will be put back together with a new gasket set and refitted. I hope this one doesn't leak from the float bowl cover like the Bantam's Monobloc did!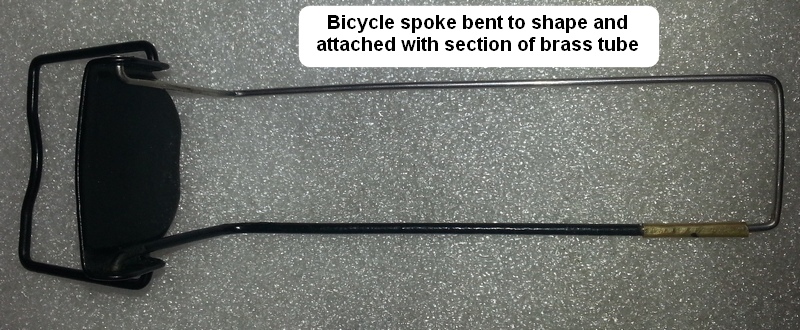
I bought a copy of the Rupert Ratio Unit Single Manual (Volume 1) which covers the engine very comprehensively. I am awaiting Volume 2 which covers everything BUT the engine. This has recently been updated and is about to be re-printed and I am happy to wait for the new version. I have also joined the BSA Owners Club and am making use of their forum and on-line library. Also, I have had some great help from the "BSA C15 Restoration & Preservation" Facebook Group and Stewart, the Chairman of the Exeter British Motorcycle Club which I recently joined.
The bike hasn't run for over 8 years so I don't underestimate the issues I will find trying to start it - watch this space.
Part 2 - more progress. Sump cover, tank, throttle
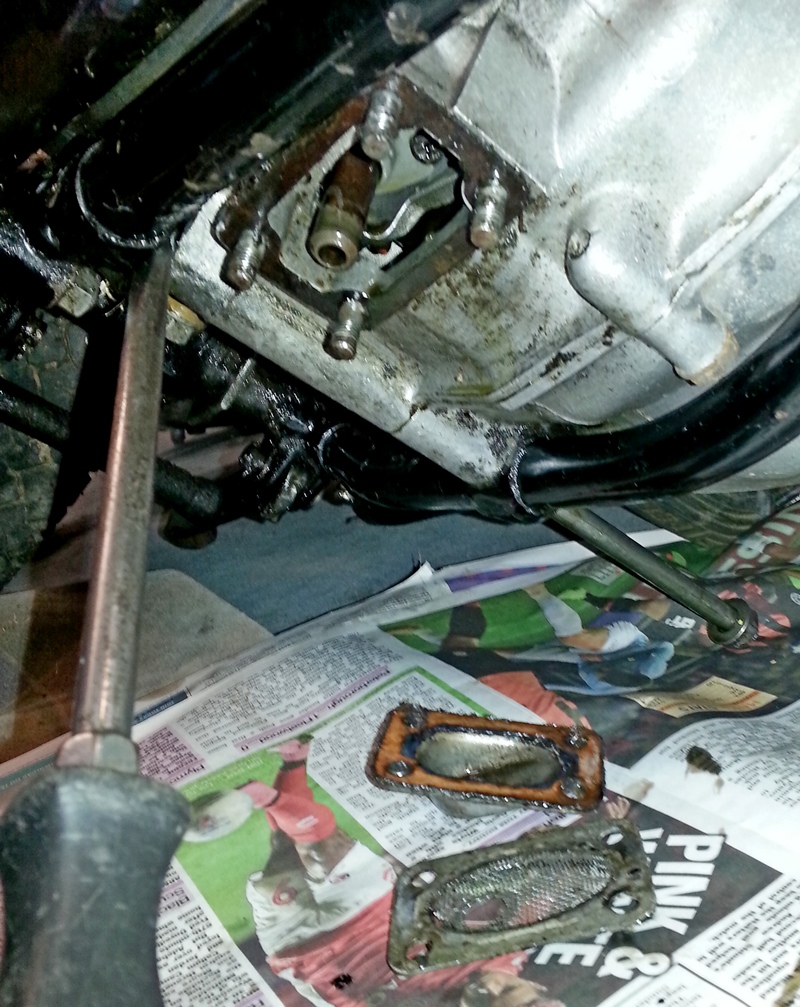
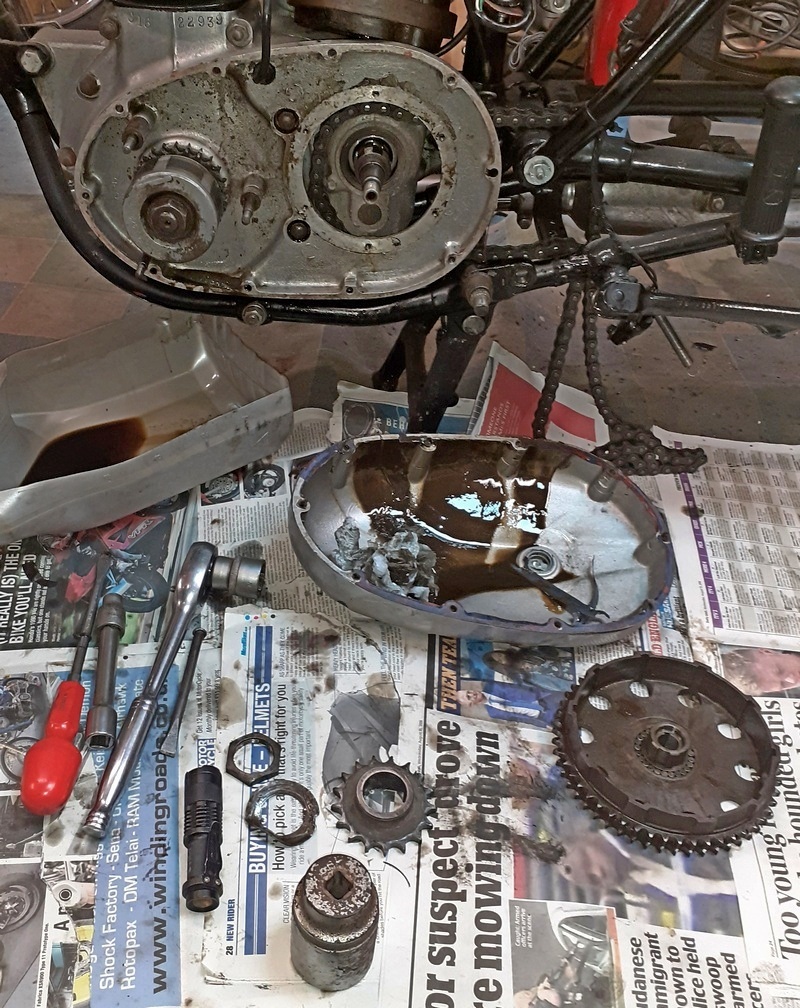
Having drained and cleaned the oil tank it made
sense to remove the sump cover to drain any oil remaining and to clean the gauze
filter.
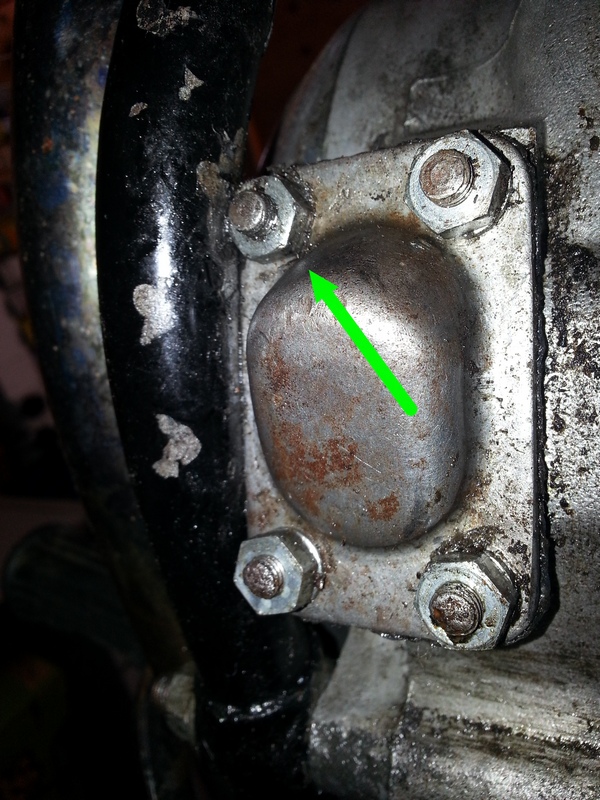
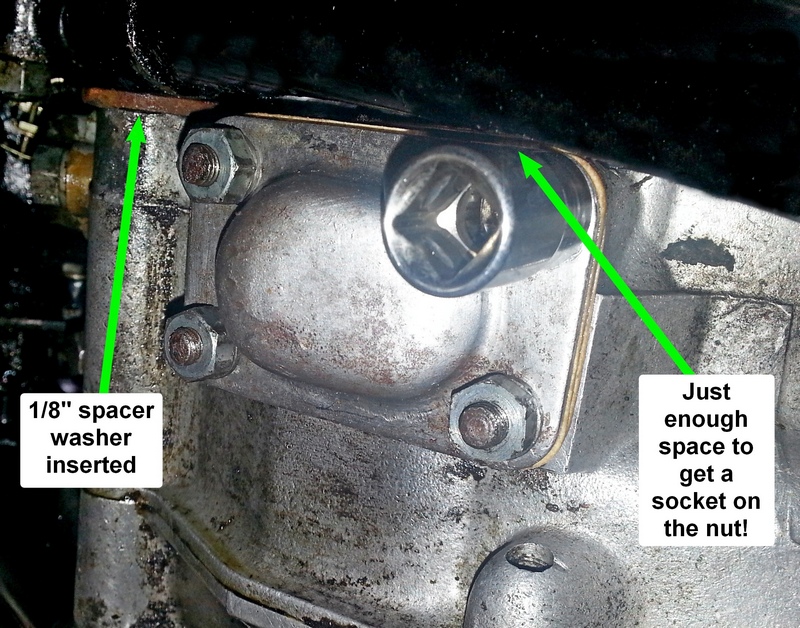
This turned out to be quite a challenge as I was unable to undo the front right
nut. It seems that the bike has suffered from a common C15/B40 problem - an eighth-inch spacer between the engine and frame
(part number 40-4080) had been left off the
engine bolt which resulted in the frame rail getting bent in against the
nut!
I managed to drive a screwdriver in between where the washer should sit and
moved the frame rail enough to get the nut off. I cleaned up the gauze filter
and cover and fitted them back on with new gaskets. After an overnight think, I
decided to drive out the screwdriver with my spacer washer and was relieved that
the frame rail stayed out enough to get a socket on the difficult nut with a
little bit of room to spare. Another small battle won!
Part 3 - Carb, air filter, fitting an in-line fuse and first start up
The 375 Amal Monobloc carb is very simple. It was originally set up for a different bike but with 140 main jet, 25 pilot, cutaway 4, needle B in position 3, and needle jet 1055 it was the correct specification for the C15. It cleaned up quite well and looks better in real life than in the photos. The chrome plate was peeling off some parts and so I took them back to brass and they look good. A new set of gaskets and manifold O ring was fitted.
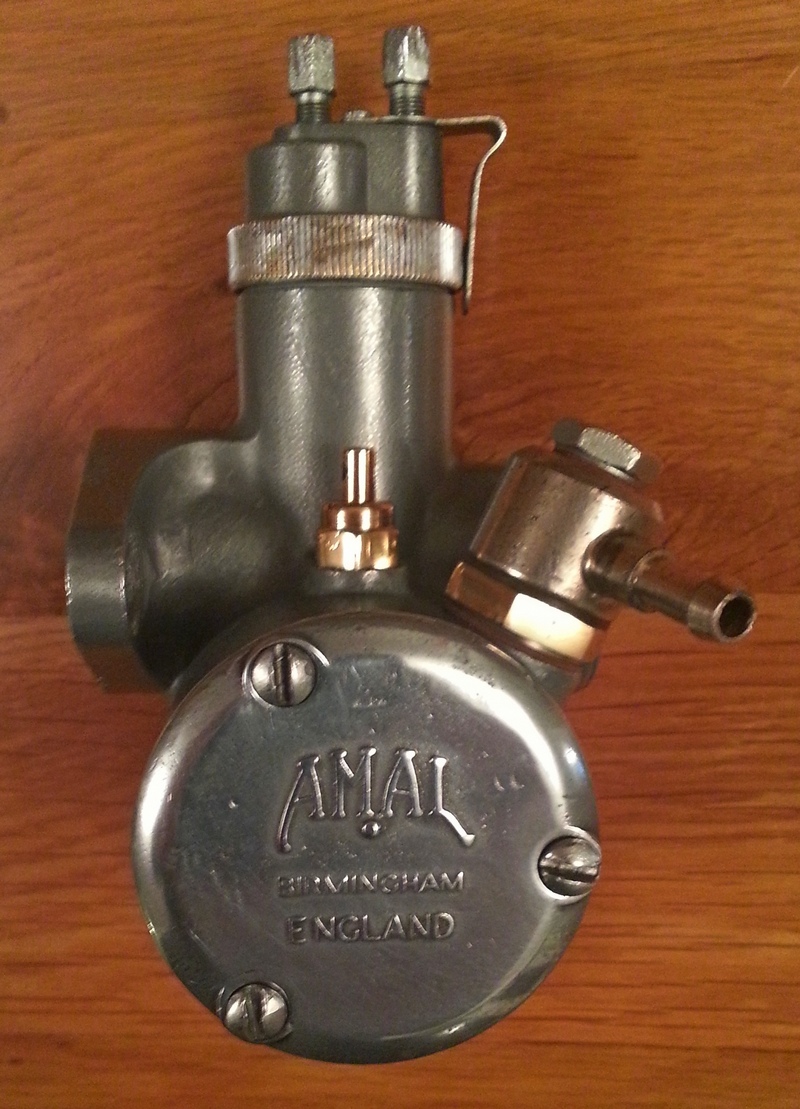
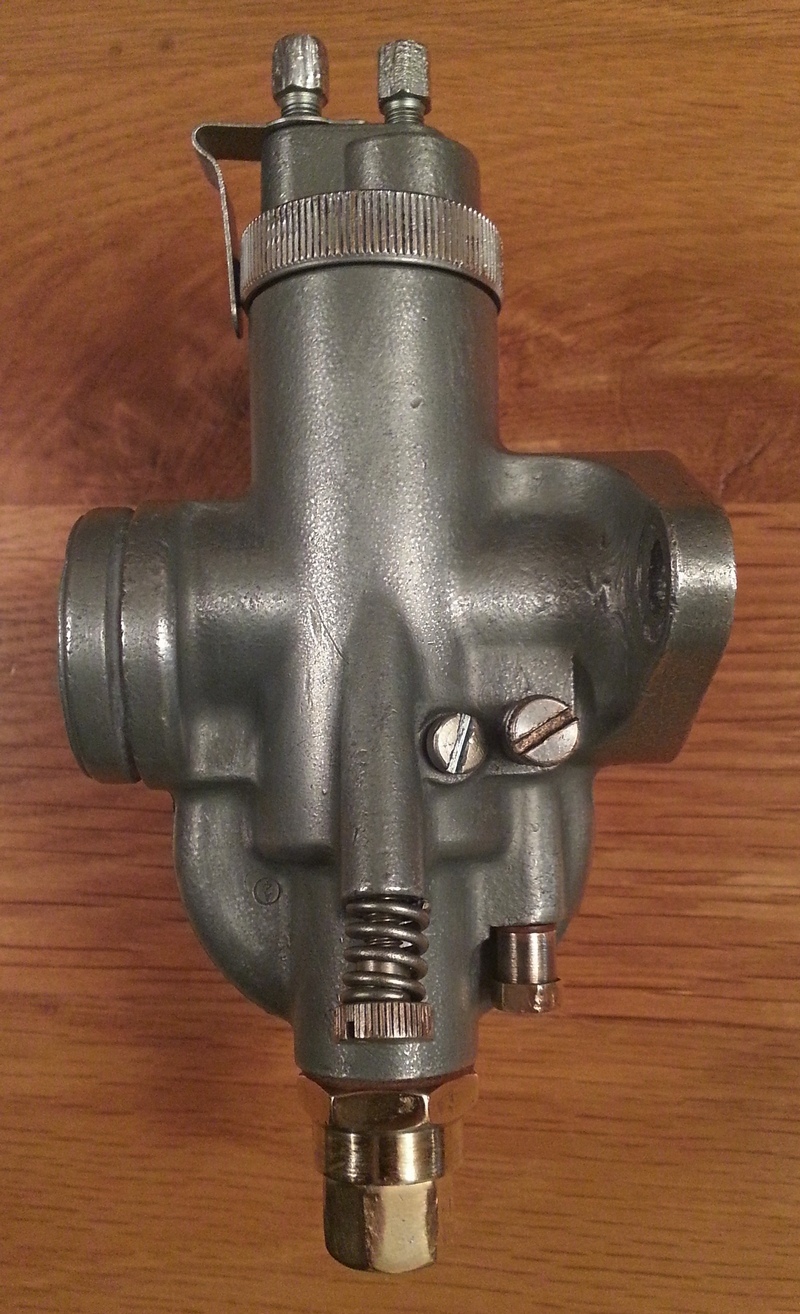

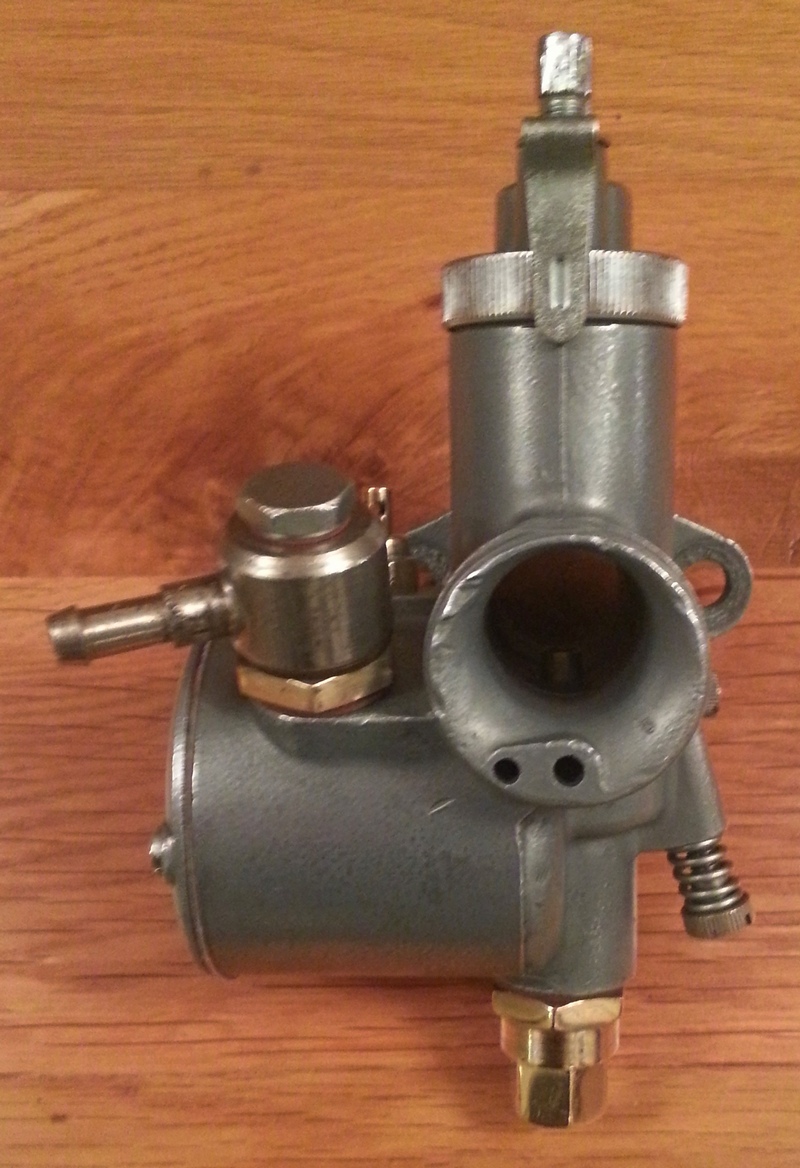
However, the float cover was distorted and wept petrol and required a bit of fettling and two gaskets to stay dry. The photo below shows the gap before the cover was straightened out.

A knowledgeable friend gave me this advice on Amal carbs:
The Monobloc is a good carb and, generally, leak free. Check face of carb where cover goes and rub it gently on a sheet of fine wet/dry paper on a true surface. Also, put a slight chamfer on the threaded hole ends using something like a 8mm drill bit twisted by hand, and ensure cover is flat around screw locations. A fine file used carefully will work. Use a new gasket and do not over tighten the cover screws. BUT, do check for a common error for upsetting the fuel height. On the old Birmingham-made Monoblocs, the float needle boss is originally screwed direct into the carb body but many people, in error, put a fibre washer under the seat, hence wrongly raising the fuel height . However, the seat area on the Monoblocs in current production are machined differently and come fitted with a fibre washer as standard which means that the float height can be adjusted through the use of shims which Amal supply.
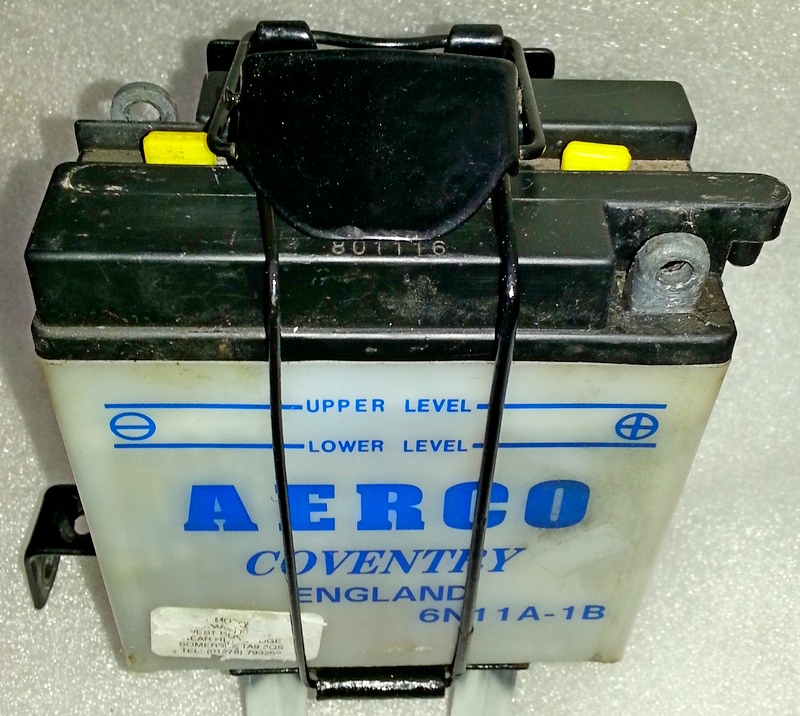
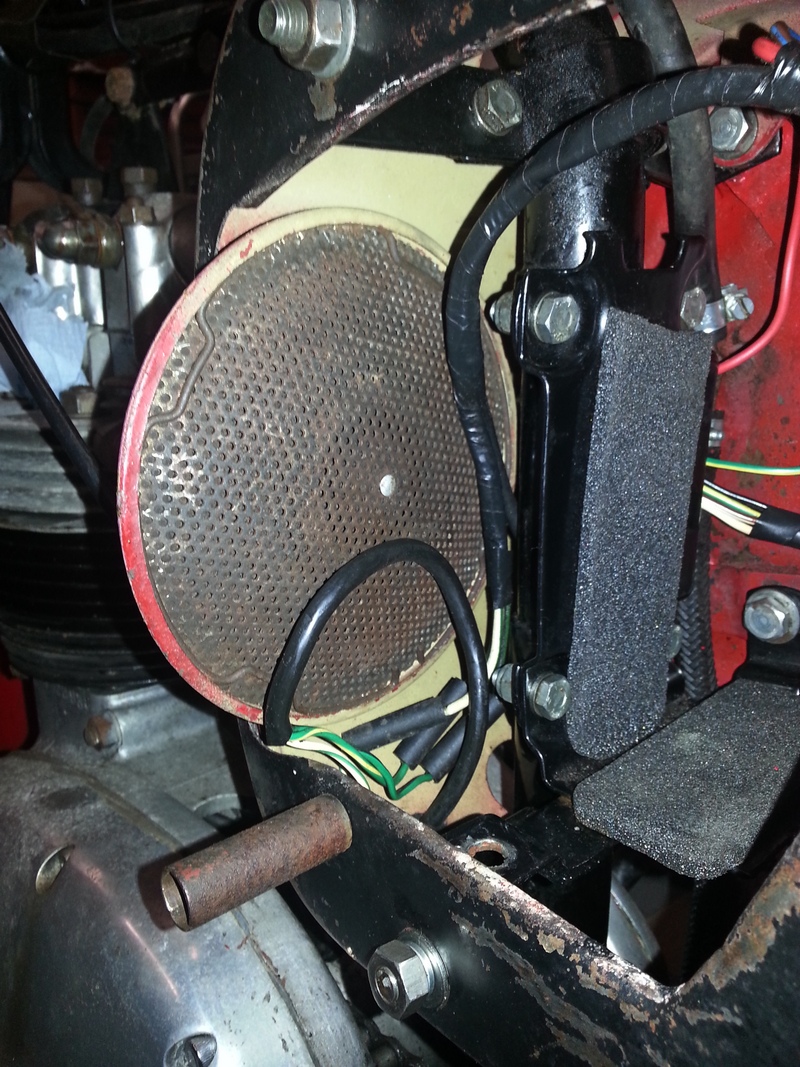
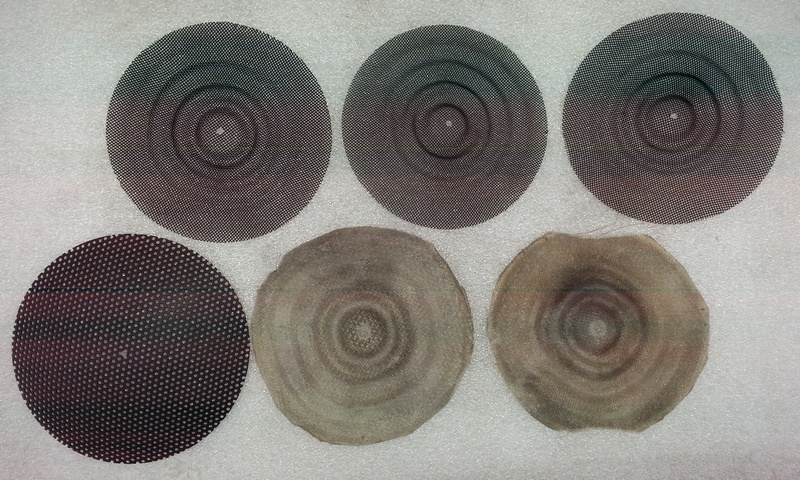
The air filter on the C15 is quite a simple "multi gauze" affair that sits in the battery space and comprises two layers of open weave mesh cloth (bottom row on right of photo below) sandwiched between three fine mesh discs. It is held together by one pop rivet so easy to take apart for cleaning and to put back together again. It was worth doing as a considerable amount of dirt came out into the petrol I used to clean the discs and cover.
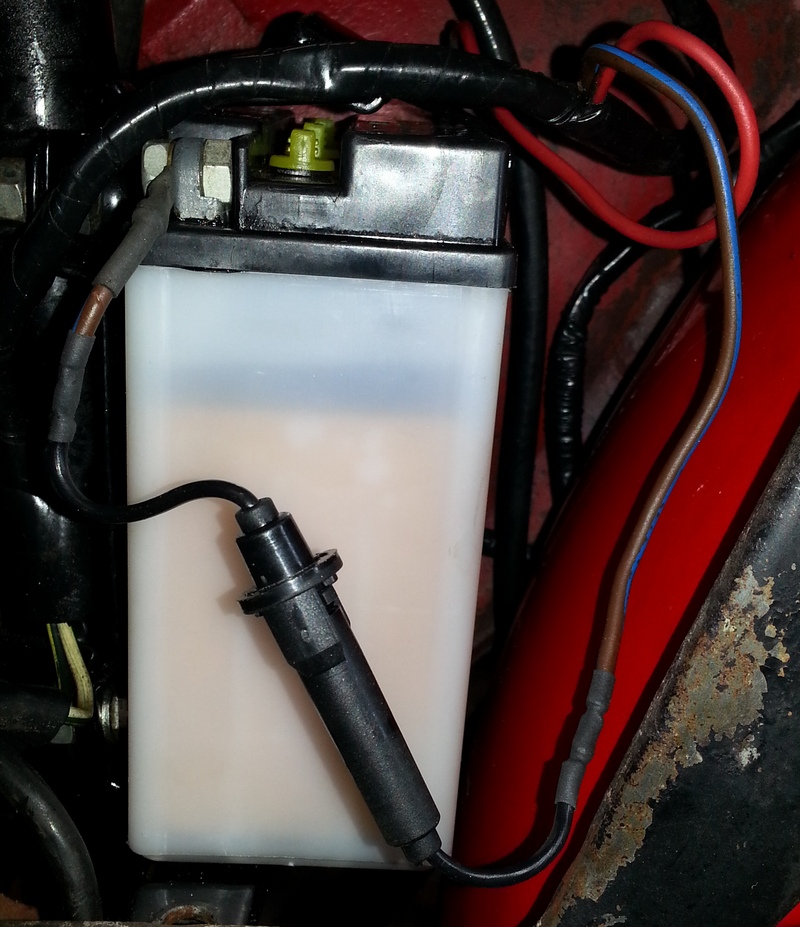
The wiring loom looks really good and might be a recent upgrade but, just in case there might be any wiring issues, I decided to fit an in-line fuse - 5 amp continuous with 10 amp blow. Plenty of room for it and it gives peace of mind. With the battery fitted, I was pleased to find all the lights work as they should do, even the brake light!
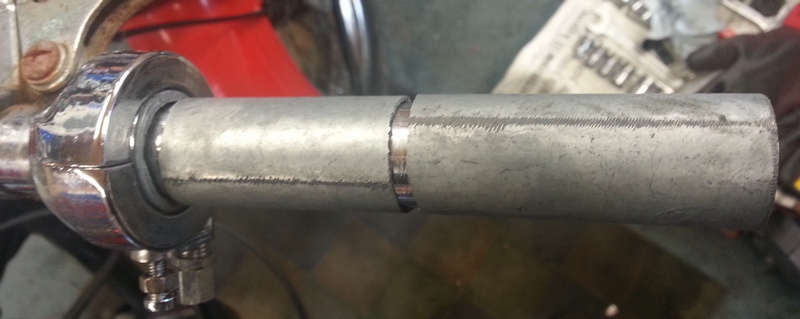
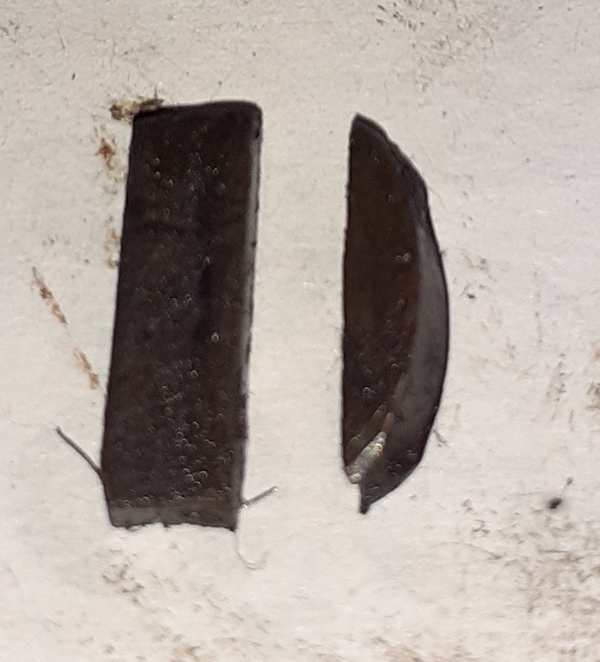
The throttle grip had perished and split revealing that the throttle tube was broken in two places - very odd! A new throttle was ordered from the interweb, arrived quickly and was easily fitted along with a pair of new grips. This is a photo of the old throttle.
I checked that I had tightened all the oil line fittings and then put 4 pints of SAE30 into the tank. I kicked it over many times with the plug out to get the oil circulating (having remembered to switch on the tap in the supply line) and checked the spark at the same time. My luck was in and there was a nice big fat blue spark! I fitted a new spark plug, flooded the carb (no choke on the early C15s) and it started in a couple of kicks. Excellent as I had been told that it wasn't an easy starter. It ran very rich but, before I could have a go at tuning the carb, the shed had filled with fumes so I opened the door and window, remembered to switch off the oil tap to stop wet sumping, and went indoors to warm up and have a brew. If it's dry tomorrow then I will try and get the bike running a little bit better and try taking it for a run. I know the head gasket is spitting out oil at the front but need to know if anything else major needs doing i.e., does the clutch and gearbox work as they should, does the engine smoke/rattle/bang or whatever? It's not worth fitting a new head gasket only to have to strip out the engine to do other work.
Part 4 - First ride on the C15 Overnight I fathomed out why the C15 was running rich. I had watched a carb rebuild on YouTube a while back and recalled the guy screwing the pilot jet into the carb body and then screwing on the cover. I thought I had screwed the pilot jet into the cover and then screwed it into the carb body meaning it wasn't fully seated. It was a bit awkward to get to but I checked it out and I was right. Beginners error which was easily rectified.
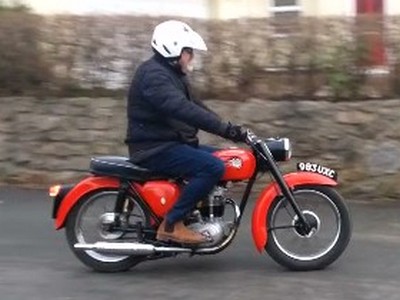
The bike started easily and ticked over nicely plus the engine wasn't smoking so we were off to a good start! Click on the image below to see the video.
I am dead chuffed as the clutch, gears, brakes, speedo, ammeter and lights all worked as they should! So, the next step is to get the bike back in the shed and replace the head gasket. There is some oil being spat onto the front mudguard. Not a lot but enough to warrant attention.
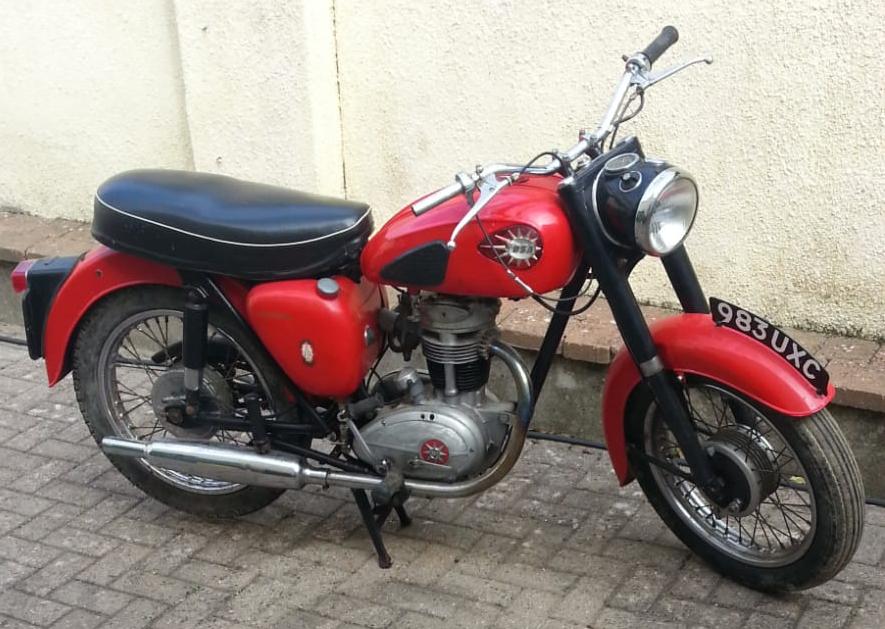
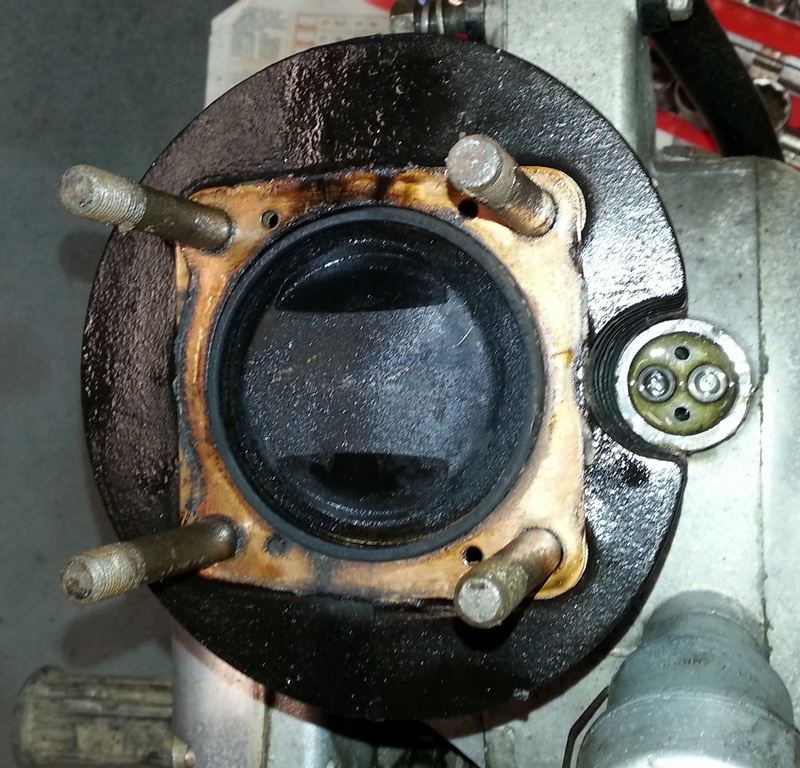
The C15 is surprisingly easy to work on. It didn't take long to remove the seat, petrol tank and carb to get to the cylinder head. The RH side head nuts were a bit difficult to access and I am worried about tightening them up properly when the head goes back on. Do I need to grind the head of an open-end spanner to get it to fit on nicely? The nuts hadn't been done up very tight and I think this was the cause of the head gasket blowing. I need to dig out my Rupert Ratio book and see if perhaps the head needs to be re-tightened after a few miles of running. Apart from the stains from the oil blow by, the head looks to be in good condition. Need to give it a good clean but do I go the whole hog and strip it down? Oh yes!
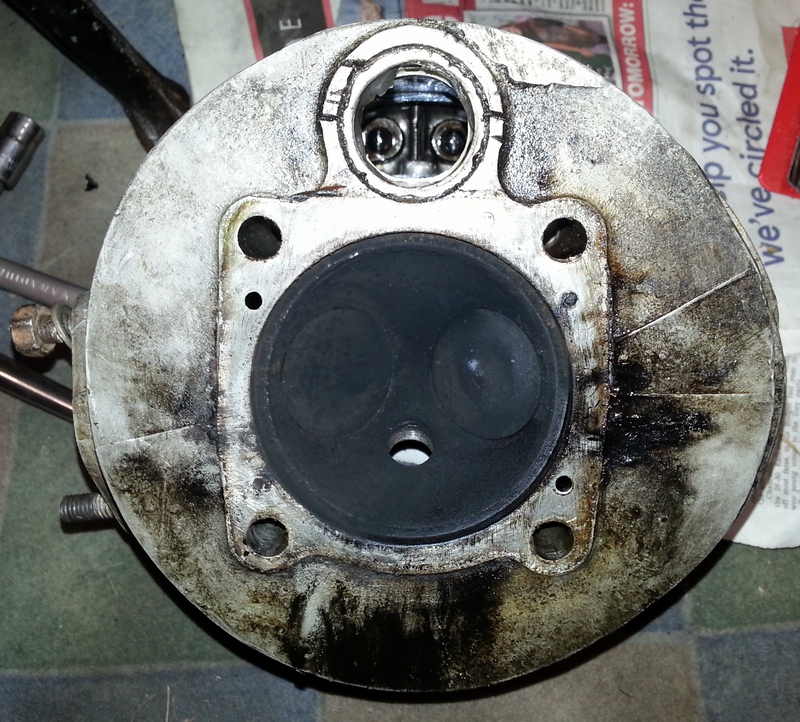
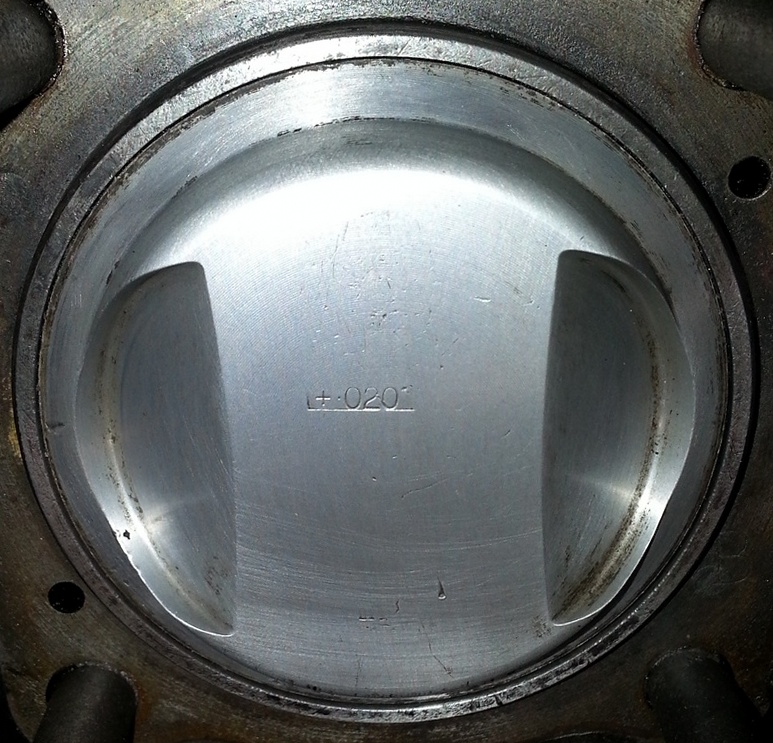
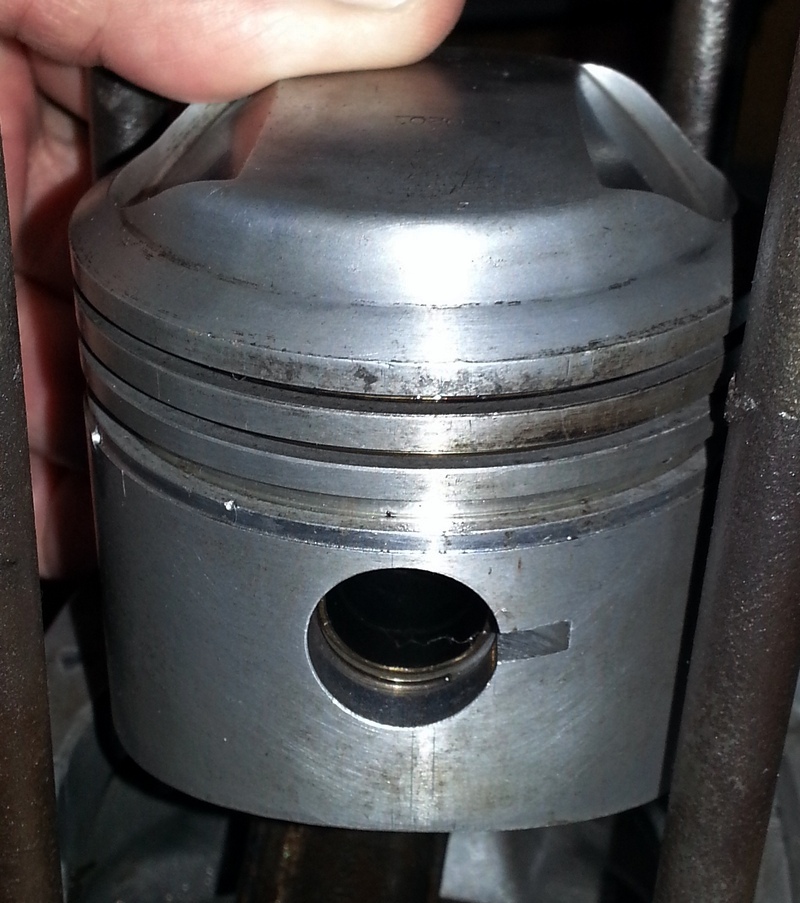
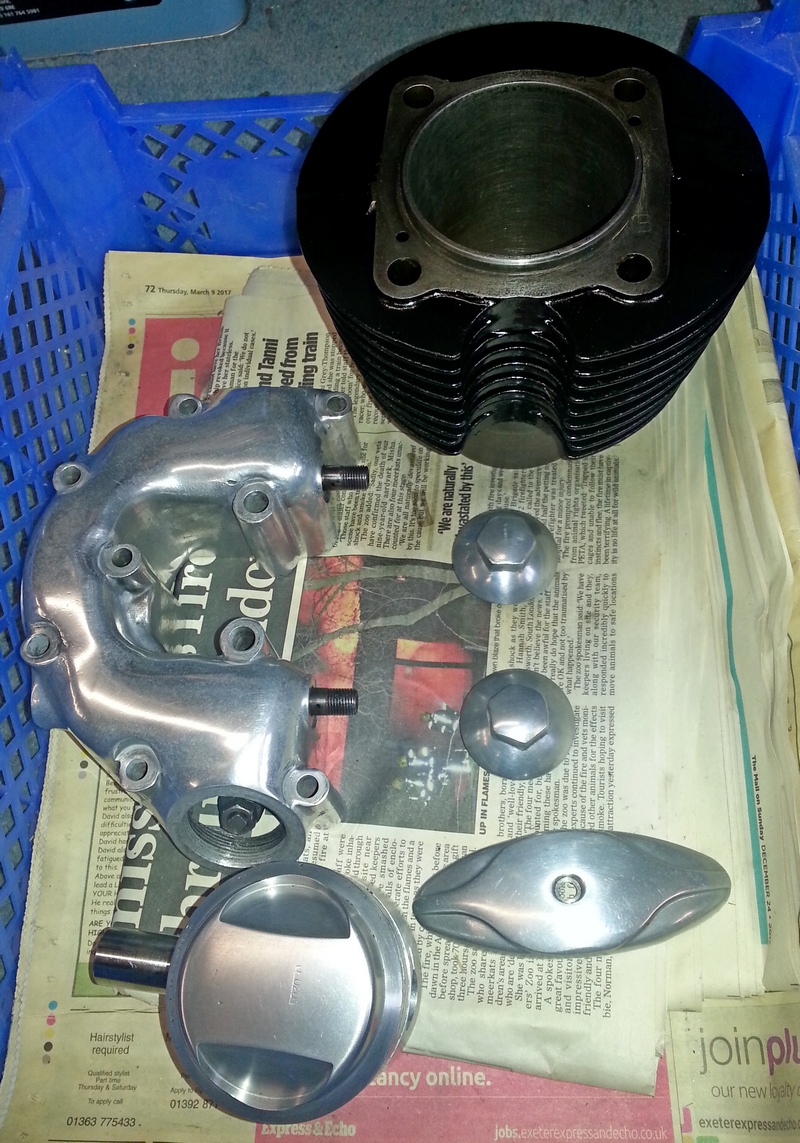
The piston cleaned up nicely and is on its first oversize +0.20". It looks as though it hasn't done many miles as the hone marks are still clearly visible in the bore and absolutely no lip at the top of the bore. However, looking through the engine manual to make sure I get the rebuild right, I spotted a comment that C15 pistons are flat topped whereas mine is domed. I posted a photo of it on the British Motorcycle Mechanic's forum and I now know that my piston is a "15123 Hepolite Piston for Triumph T100 500cc (9-1) 1958-67". I found a set of +0.020" R13570 rings for it on eBay and am awaiting their delivery. Meanwhile, I have cleaned, honed and painted the barrel, polished the piston and rocker box cover and stripped out the head.
Both valves need replacing as they are slightly stepped as are the valve seats. I will probably need to get the valve seats re-cut but I think the guides are OK. Probably best to source the new valves first and then check their play in the guides. This is going to take longer than I thought.
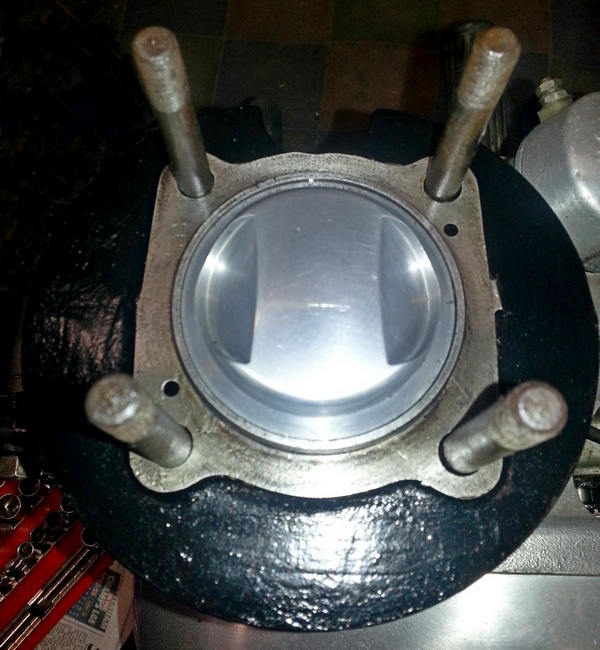
Meanwhile, the NOS rings have arrived, the ring gaps have been checked and the piston and rings fitted to the conrod. There is no chamfer on the bottom of the barrel's sleeve and I struggled to get the piston in. Having thought about it overnight, I chamfered the bottom of the sleeve and it worked a treat! Just as well as I couldn't find a Jubilee clip big enough to use as a ring compressor.

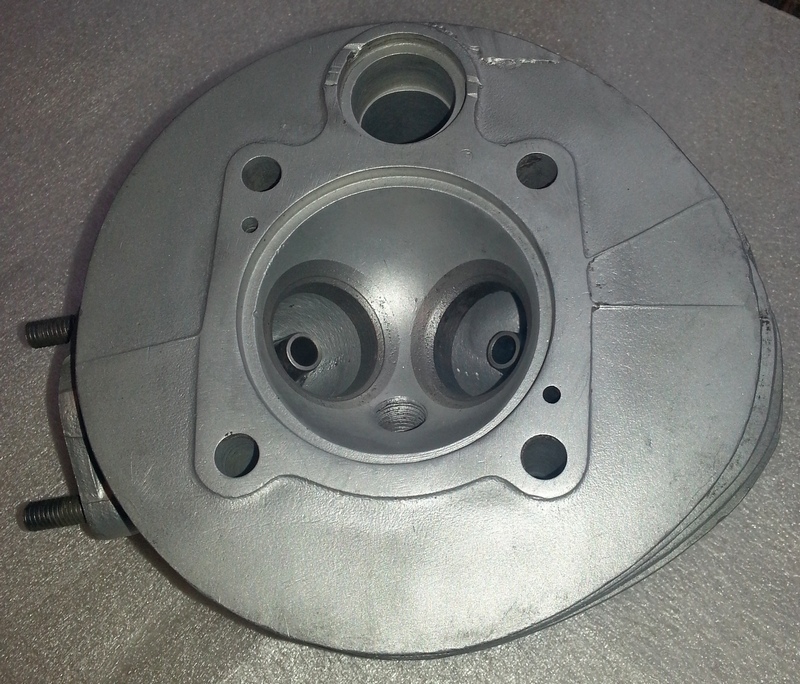
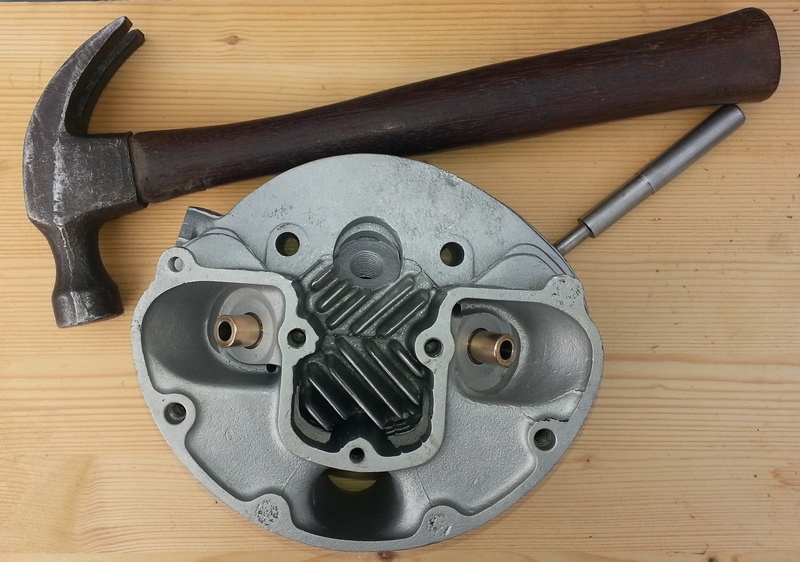
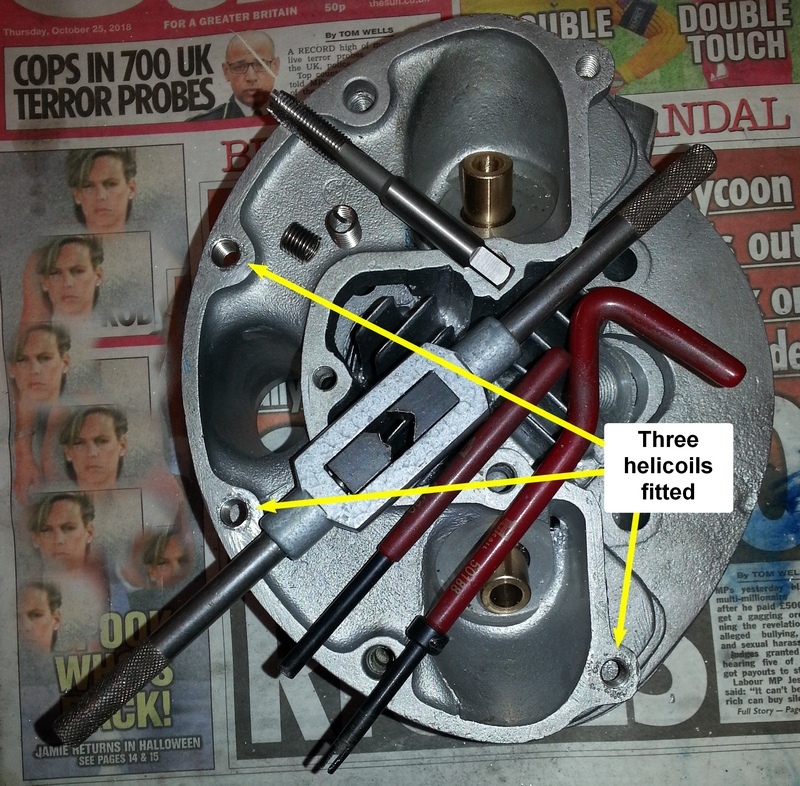
The cylinder head cleaned up quite nicely. Needs one rocker box stud thread Helicoiling, new valves and valve seats re-cutting. The valve guides are good. No hurry to do this work as it's the original Star head and I am replacing it with an SS80 one that I have bought.
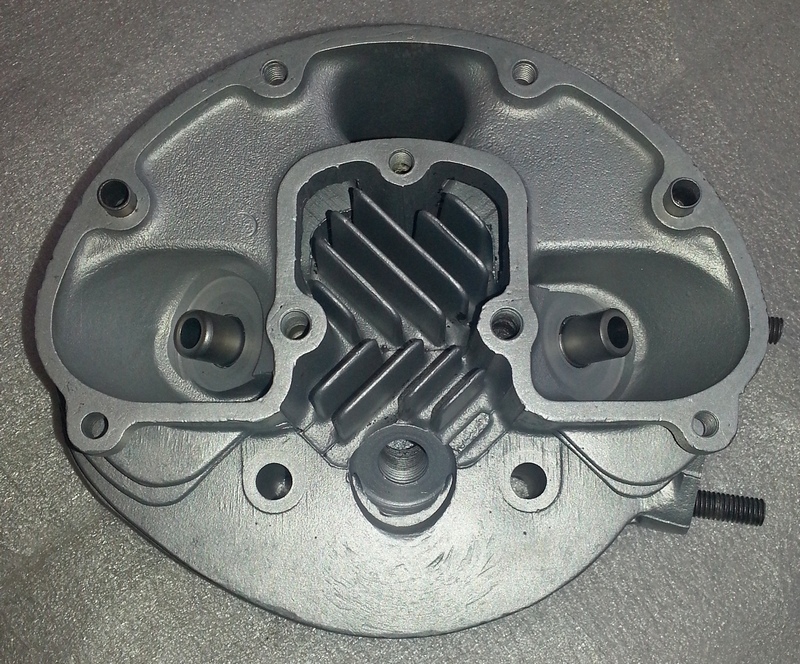
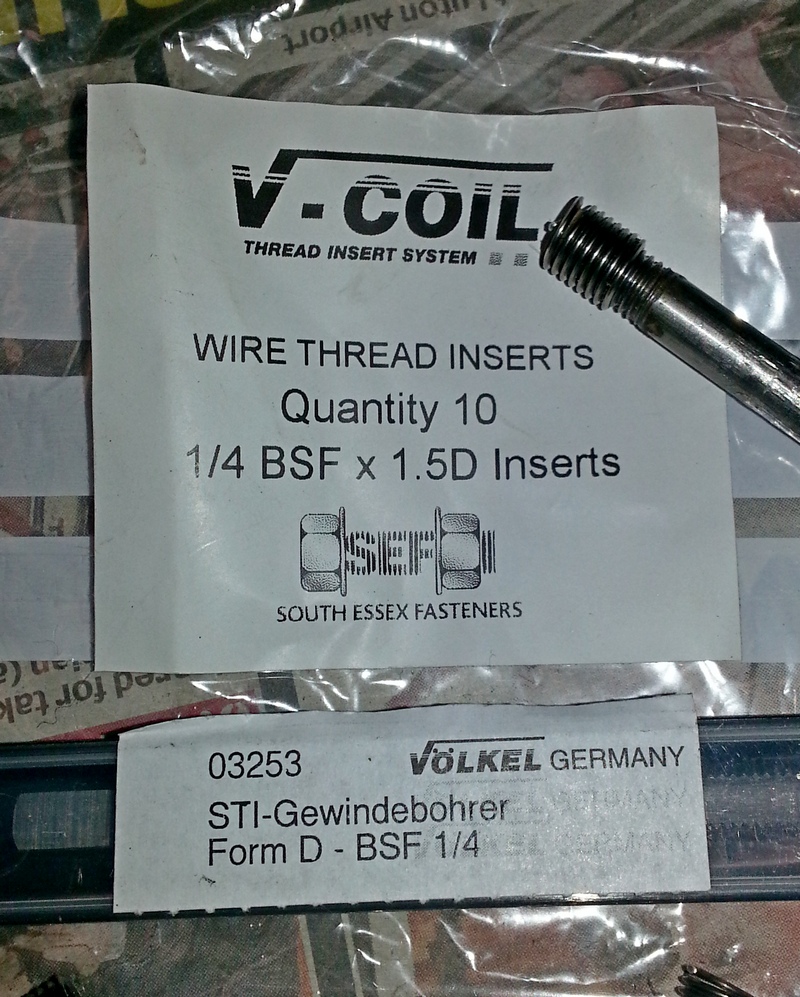
The Helicoiling (actually, I used V-Coil parts!) didn't go well. The wire thread
repair insert was really tight and damaged the thread on the stud when I screwed
it in. My fault as I tried using a 6.5mm drill rather than the 6.6mm drill
recommended. Hard to believe that 0.1mm would make that much difference.
Fortunately, I was able to get the insert out so now need to buy or borrow the
correct drill bit and try again!
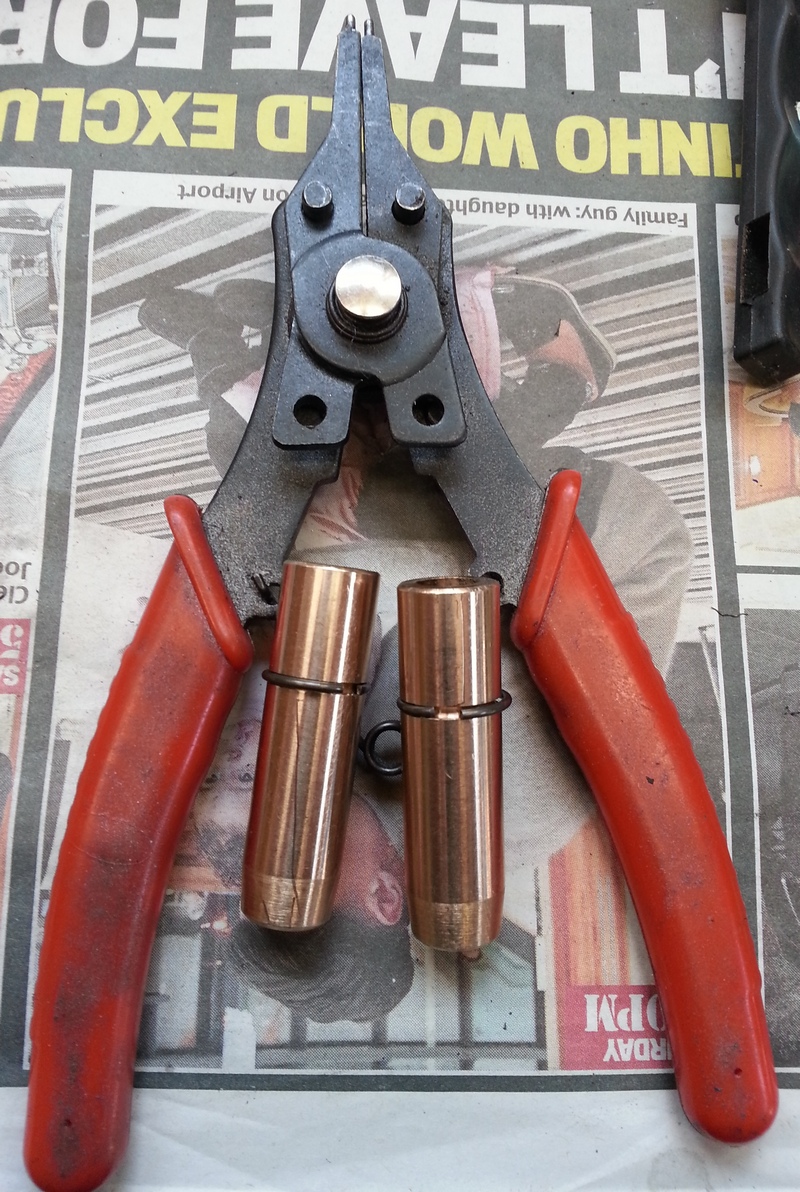
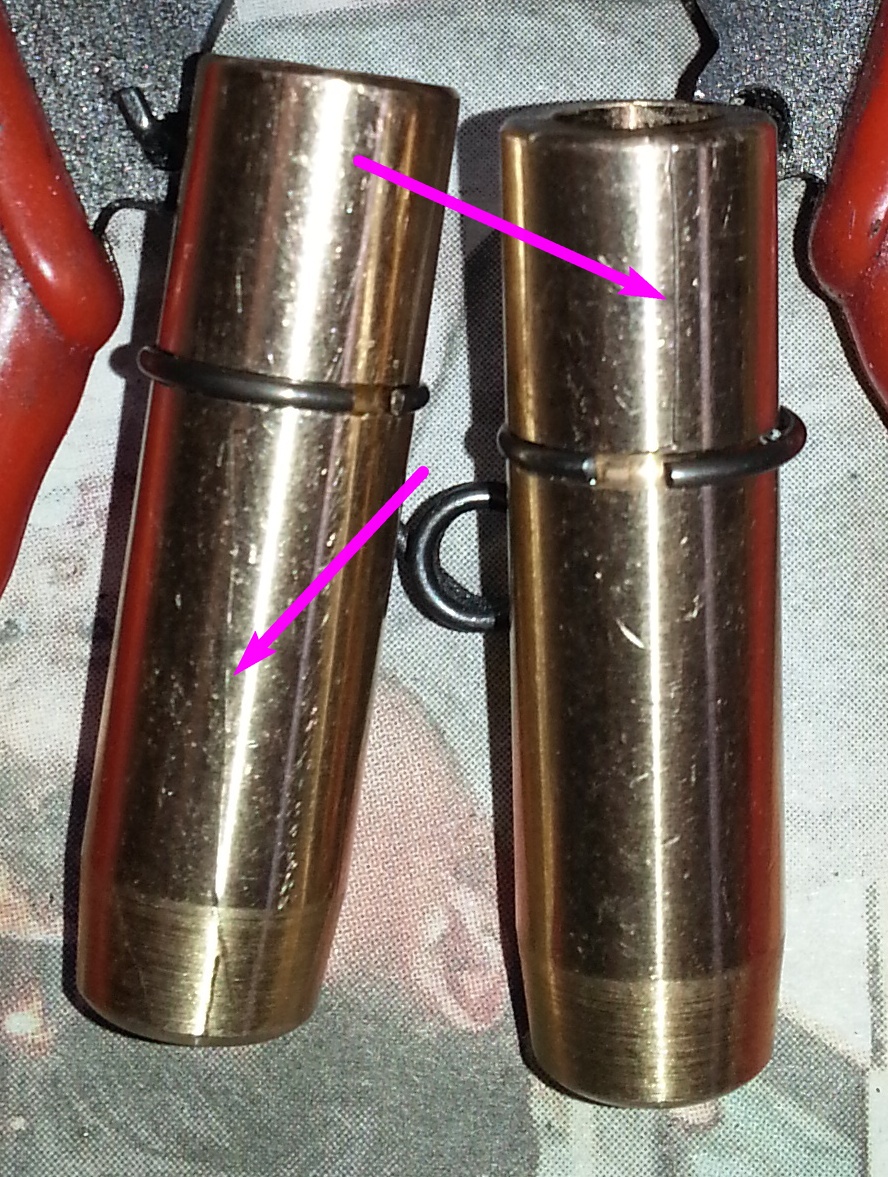
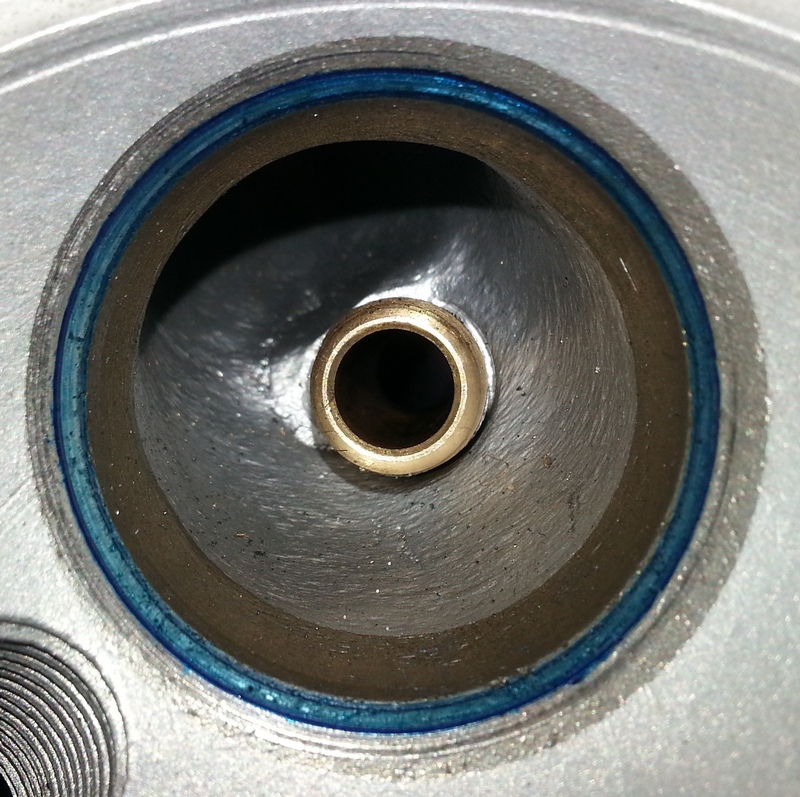
In advance of the SS80 head arriving, I bought a set of phosphor-bronze valve
guides and circlips as the head hasn't got any fitted. I found fitting the
circlips quite a challenge! First off I took off the sharp edges on the
inside of the circlips to reduce damage to the guides. I used a pair of circlip pliers
to expand the circlip on the first valve guide and, with a lot of fiddling,
managed to push it on with my fingernails. However, despite expanding the
circlip the minimum to get it on, it seemed slightly loose on the guide so I
decided to push the other one up from the tapered end. I still managed to get a
scratches on the sides of the guide as shown in the photos. But the scratch
below the circlip on one of them is just that, a scratch rather than a gouge so
I am sure that it'll be oil tight once fitted as it's an interference fit in the
head.

The SS80 cylinder head arrived along with a spare stud, a brand new inlet valve
and a stepped drift for inserting the valve guides. Looks to be in excellent
condition. It has been vapour blasted and painted in VHT clear lacquer. Followed
the advice, I put the head in the oven for about 40 minutes and the
guides in the freezer for about an hour. They didn't quite drop in as I expected
and needed some persuasion using the supplied drift. The
new valve stem is a bit of a tight fit in the guides, especially at the top, so
I guess that there is a small amount of distortion from drifting them in.
I now need to work out how to ream them to the correct clearance and to re-cut
the valve seats to suit.
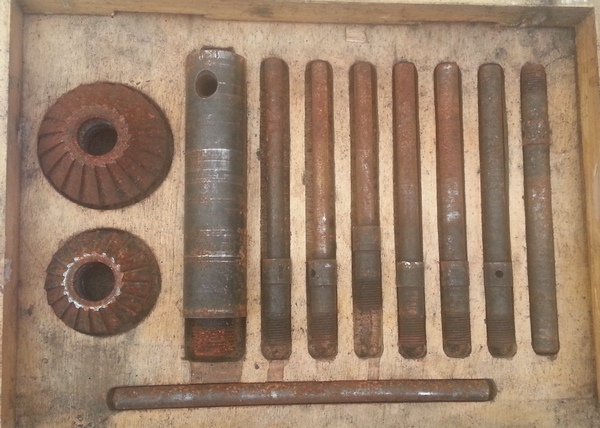
After taking advice from the C15 Facebook Group and a knowledgeable mate, I have ordered an adjustable 9/32" to 5/16" adjustable reamer to fettle the guides and another mate has dropped off a valve seat cutting kit which looks like it was rescued from the bottom of the sea so will need bead blasting before I can see what it is and whether it might work for the C15 head.
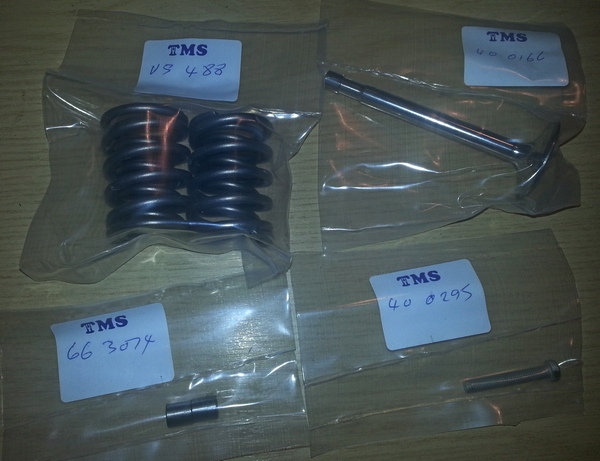
Meanwhile, some new parts ordered yesterday morning from TMS of Nottingham have arrived - SS80 valve spring set, inlet & exhaust valves, head dowels and rocker cover screw. Excellent service from TMS and good prices!
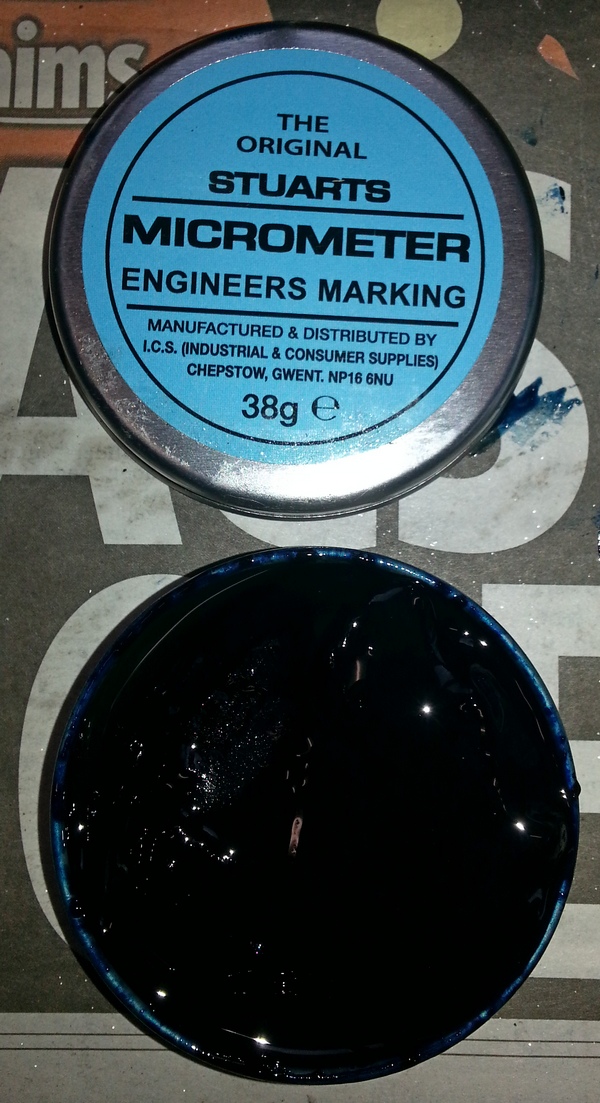
I used some engineers blue for the first time and its good stuff! It looks like my valves are seating pretty good but I think that some of the pitting and a couple of burrs on the valve seat (see last photo below) mitigates against just lapping the valves in so a bit of valve seat cutting/grinding is definitely needed!


Unfortunately, the borrowed valve seat cutting kit didn't work on the C15 seats. Apparently BSA seats in alloy heads are normally of a tough austenitic material and require modern cutters that are up to the job. The set I had apparently will only cut the seat material used in iron heads. I researched buying my own set of cutters. Neway equipment is the way to go but it would have cost me over £200 for the kit. Although I want to do as much on the C15 myself as possible this seemed a bit steep. I phoned the two UK Neway distributors and neither had the cutter kit I needed so the decision was made for me and I have taken the head to a local engineer to get the work done!
I dropped my SS80 head off to have the valve seats recut on Monday afternoon and picked them up Thursday morning - great service and a good job done. I lapped the new valves in with some fine grinding paste and my clever little reciprocating gadget that fits in a drill chuck, checked they were seating properly and that's another little job done! I sorted out a couple of stripped rocker cover bolt threads with 1/4" BSF V-Coil thread inserts. I used the correct 6.6mm dill before tapping the holes and fitting the inserts but I had an issue with the studs binding on the inserts. Strangely, if I wound the inserts right through and put them in again, the studs screwed in OK - very odd.
I then fitted the valves in and am getting dangerously close to getting the head back on!

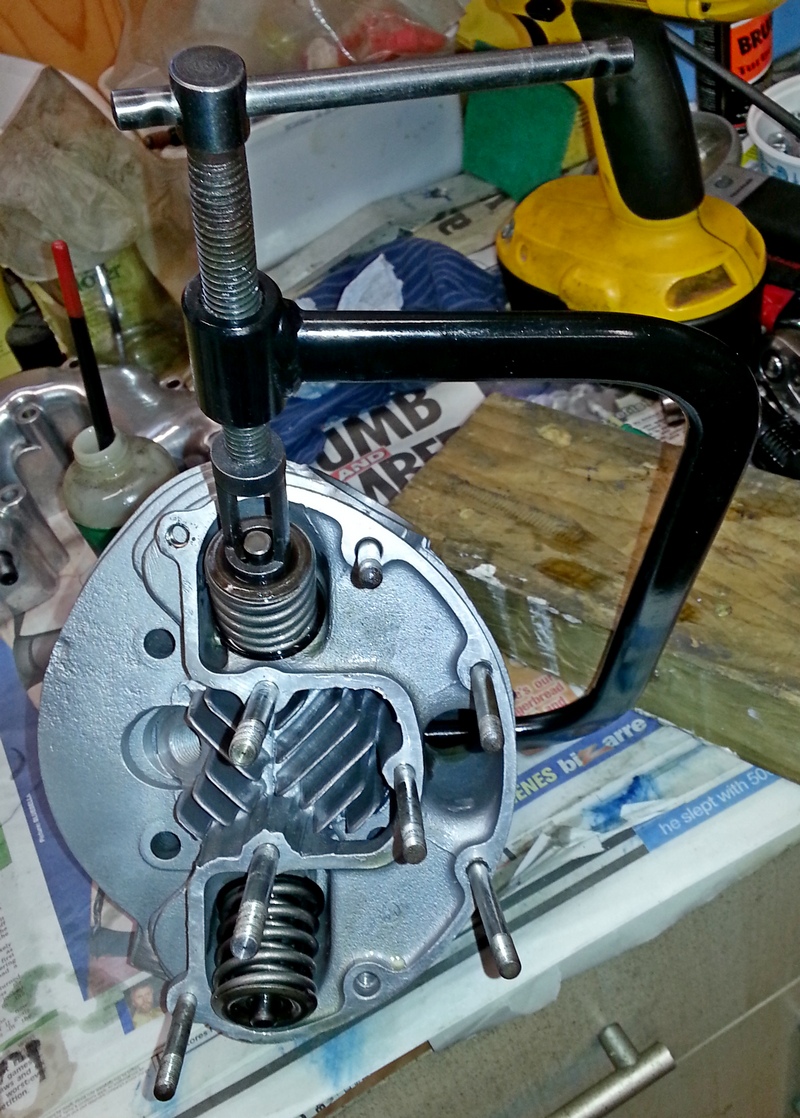
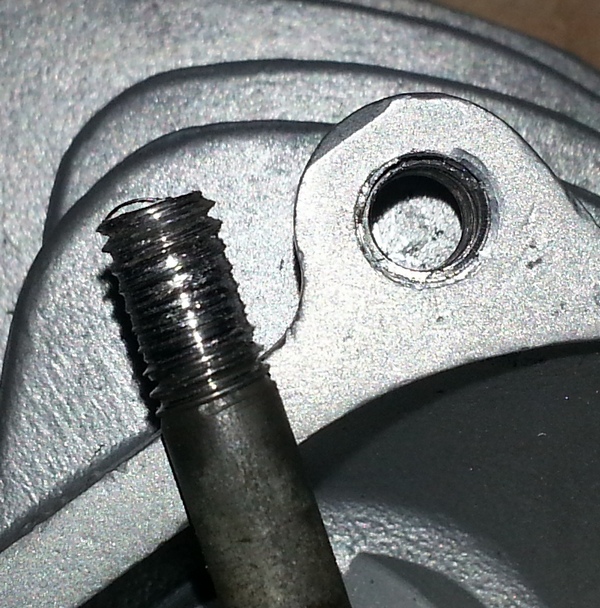
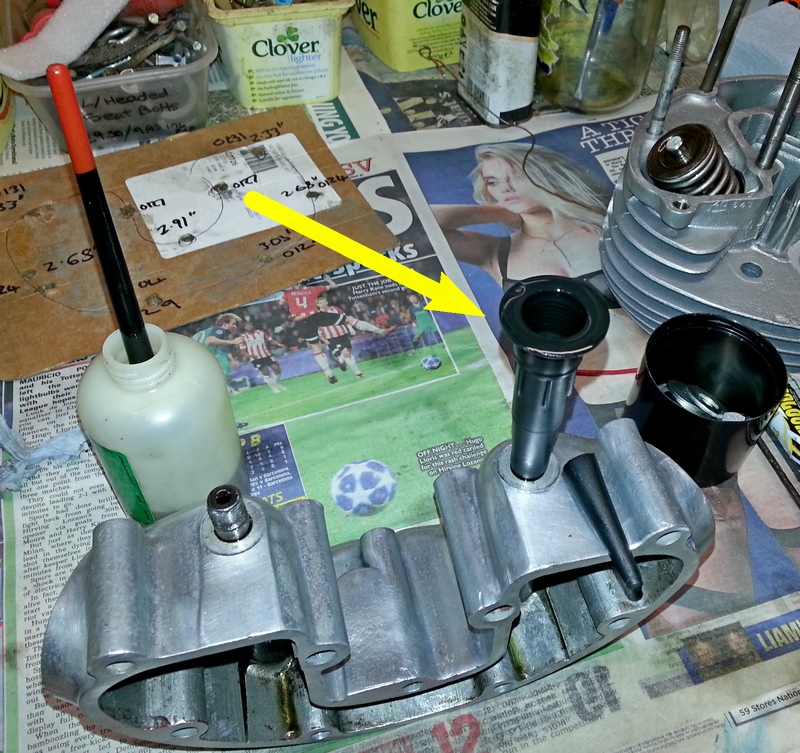
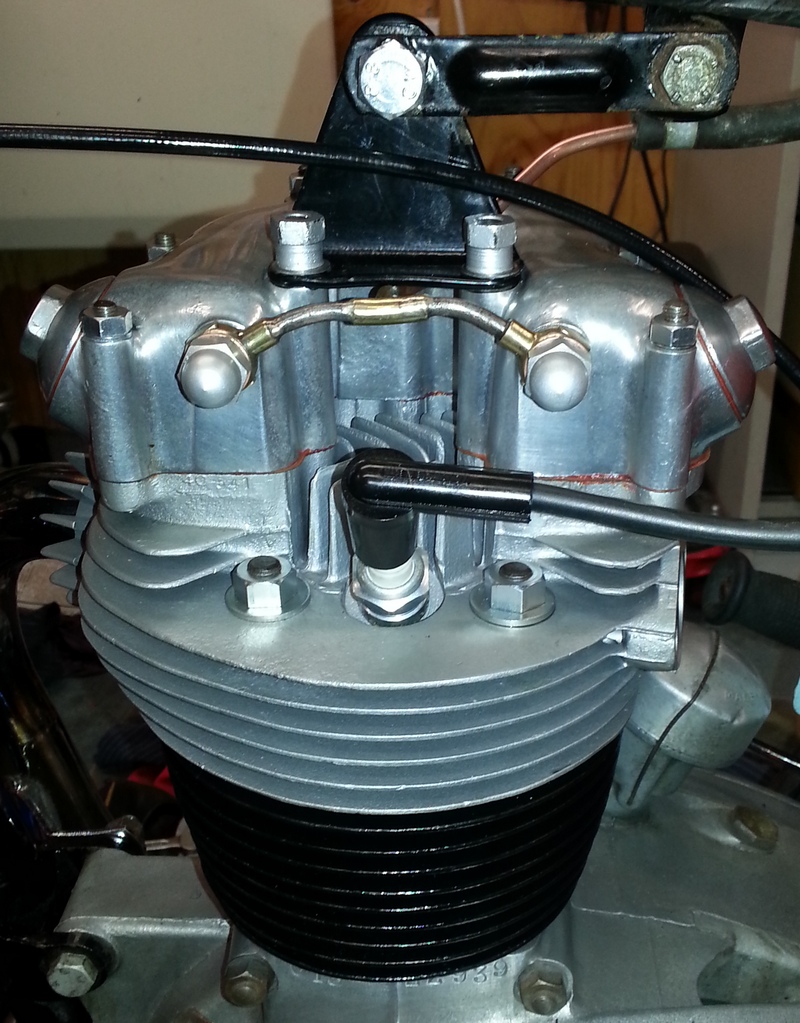
With the head back together, the next job was to fit the rocker cover which holds the spindles and rockers. I couldn't blow through the rocker spindles and thought there may have been some sort of blockage but, after a bit of poking with a long red WD40 application tube, a good squirt of WD40 and application of the airline I managed to get a healthy spray out of the holes in the tappet screw. In order to re-introduce proper oil (can't find my oil can anywhere!) I hit upon cutting the end off a sealant tube and screwing that down over the "banjo" as shown in the photo below. I half filled the tube with oil and left for an hour or so and satisfied myself that oil was going through.
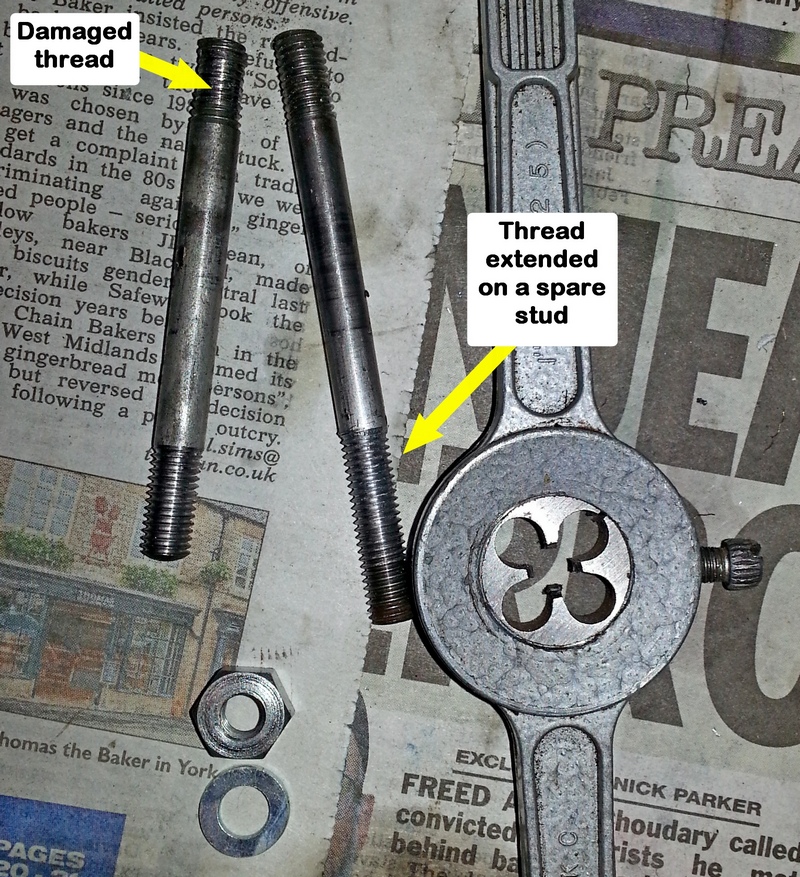
One of the studs had a damaged thread that goes into the head. I had a spare stud but it was a bit too long so I extended the 1/4" BSF thread with a die and removed the extra length to match the original.
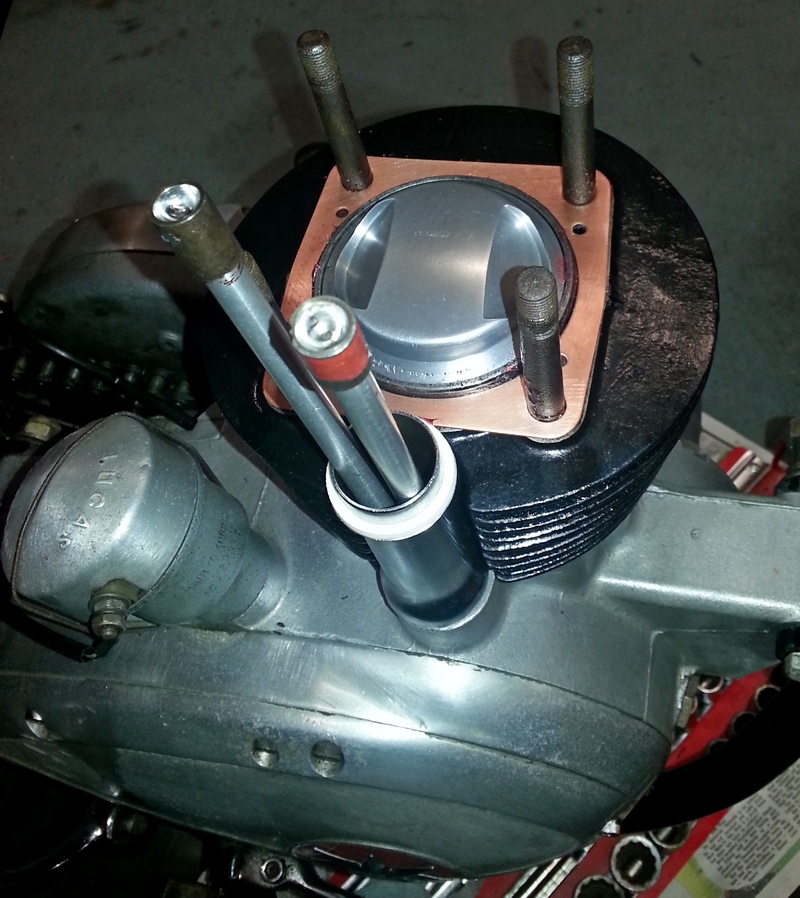
I painted the top of the exhaust pushrod red to help get the pushrods located correctly when fitting the head.
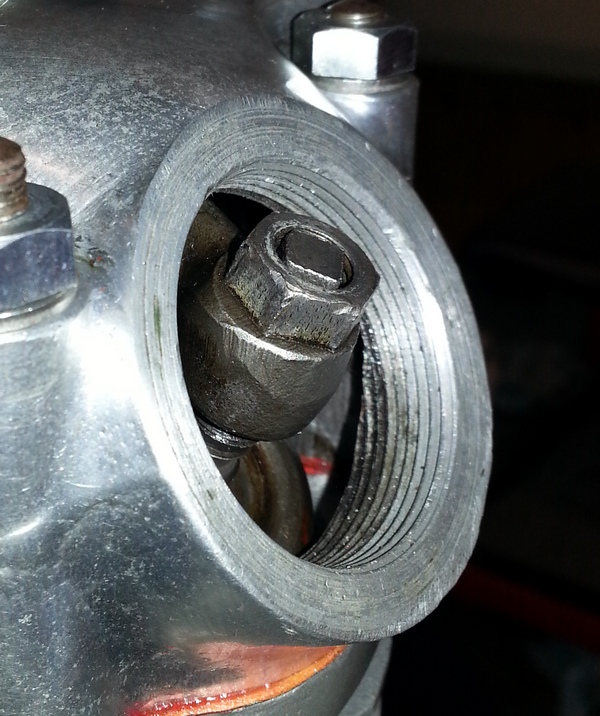
The head was fitted with the rocker box cover on it but it's been difficult adjusting the tappets as there is so little of the screw head showing - see photo below. I asked for advice on the C15 Facebook Group and it appears to be a common issue to the extent that Draganfly supply longer screws with Allen heads. These have been added to my shopping list! I have adjusted the tappets using Rupert Ratio's method - tighten until the tapping noise just disappears yet the pushrods still spin freely.
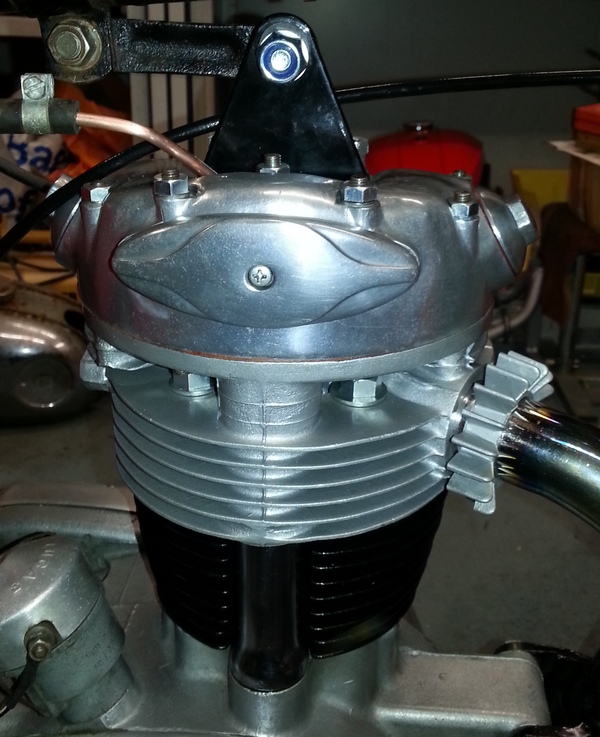
I cleaned up the rocker oil feed supply and the head steady and exhaust and fitted them. The engine is now looking quite respectable and I just need to fit the carb and she should be ready to test start!
First off I fitted new manifold studs and checked the O ring that provides the seal between the carb and cylinder head. I find fitting the throttle cable to be tricky as you really need a third hand as the long spring has a mind of its own! With the carb bolted on to the bike, the next struggle was to fit the hose between the carb and air filter. If there is a trick to it then I didn't find it. I ended up taking out the two bolts that hold the air filter panel to its frame and the air filter itself so I could manoeuvre the hose into position. I replaced the tank and had to jury-rig the petrol feed to the carb to incorporate a new filter to keep any rust particles out of the carb until such time as I get around to clean out the tank properly. Reading this back, I can see why my five-minute jobs never are!
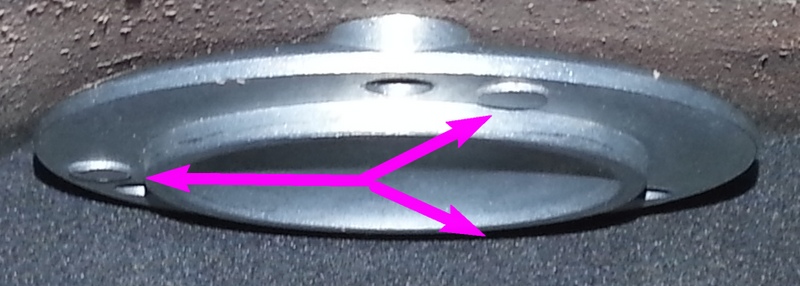
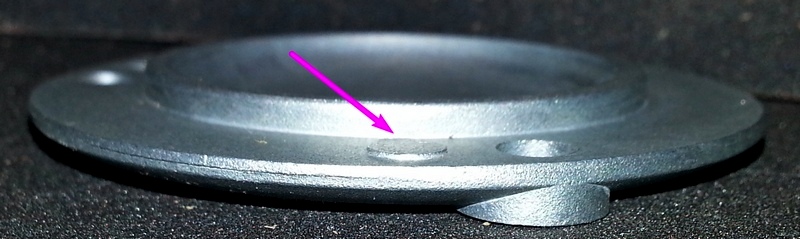
Unfortunately the carb leaked from the float bowl cover the same as the original one. No problem as I had bought a new genuine Amal cover in readiness but that also leaked! I had noticed that there are three raised "casting" marks on the new cover that are about a quarter inch away from each screw hole - see photos below. I don't have these on the two old covers that I have, both of which are perfectly smooth, so I think the cover may have missed a machining process and have contacted the seller about the issue. Meanwhile, i put back on the original cover with a smear of Hylomar and that has stopped the leak thank goodness! (UPDATE: I have received a replacement cover from the supplier and it looks fine.)
Before trying to start the C15, I removed the spark plug and kicked it over until I could see oil returning into the oil tank. I replaced the plug, switched on the petrol and opened the oil tap, started to kick it over but there was no life at all. I then remembered that it had an ignition switch, turned it on and it started first kick. I was surprised and delighted.
I wheeled it out of the workshop and took it for a test ride around the block. It starts and runs great - the clutch and gears work fine. I had a bit of a panic when the front brake “jammed”! It took me a little while to realise that I hadn’t finished tightening up the throttle control and it had moved in such a way that it was stopping me pulling back the brake lever in far enough to stop the bike. An easy fix – phew!
I left the bike parked on a clean bit of driveway for an hour or so to cool down and there was no sign of any oil on the ground which is good. It's back in the workshop again now so that I can go through the frame and bodywork.
Part 7 - everything but the engine!
I was a bit confused when the petrol from the C15 tap stopped flowing when I
knew there was petrol in the tank so I (wrongly) assumed the tap filter that
sits inside the tank was blocked. I removed the tank and was surprised at (a)
how much petrol was still in it and (b) that the tap filter was totally clean!
Whilst pondering this puzzle, I decided that, as the tank was off, I might as
well do a bit more de-rusting having only done a rough job earlier just so that
I could re-fit the tank to check that the bike started,
ran and drove.
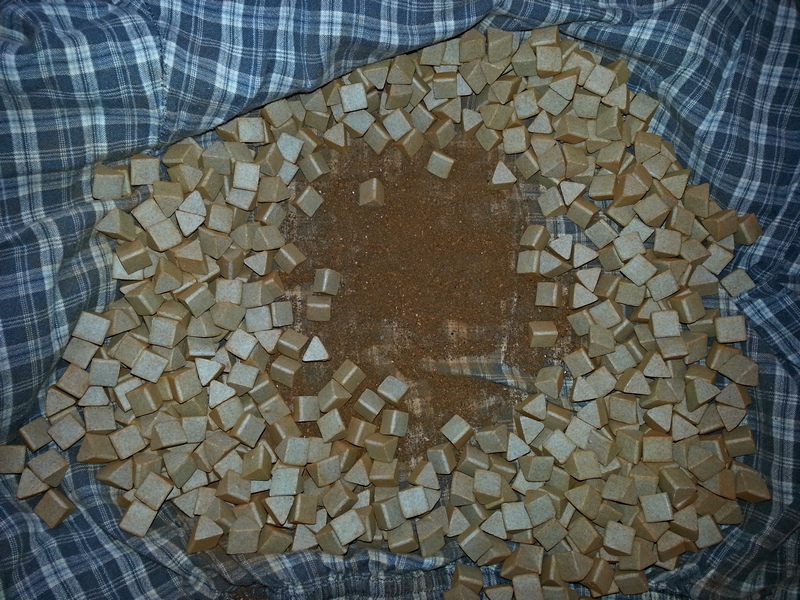
The media I used is quite chunky and used in vibrating tumblers and is called "deburring
ceramic media" and can be used over and over. I had hoped to wrap the tank in a
duvet and put it in the tumble drier but the drier didn't have a cold cycle
(other than a few minutes at the end of a programme) so, not wishing to cause a
conflagration, I chickened out - also Trish was at home! I need to find a mate
with one of those little electric cement mixers for my spare tanks.
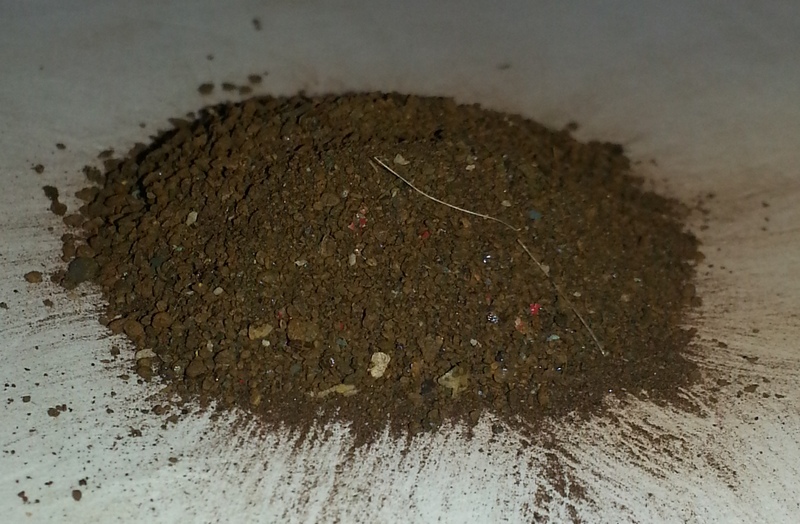
I
ended up shaking the tank (fairly) vigorously for as long as my unfit arms could stand and then emptied out the media and rust. I separated out the rust as best I could and had quite a pile although my photo doesn't show it too well. I then washed out the tank thoroughly with a petrol/diesel mix and that brought out a lot more of the fine rust. Interesting how the diesel mix held the rust in suspension so much longer than straight petrol. Over a day later it is still cloudy with rust particles.Having read horror stories of ethanol-laced fuel dissolving tank sealers, I am going to use the tank unlined as is and do something more drastic when it actually starts to leak. There is a filter on the tap but it is fairly coarse so I am going to run with an inline fuel filter and see how it goes.
Having got everything back together again, I put a few litres of petrol in and took it for a test run. It started and ran OK but is blubbering a bit at the bottom end so I am hoping that screwing out the pilot air adjusting screw and, if still rich, lower the needle a notch will sort it out. See the video by clicking on the photo to the right of the page below.
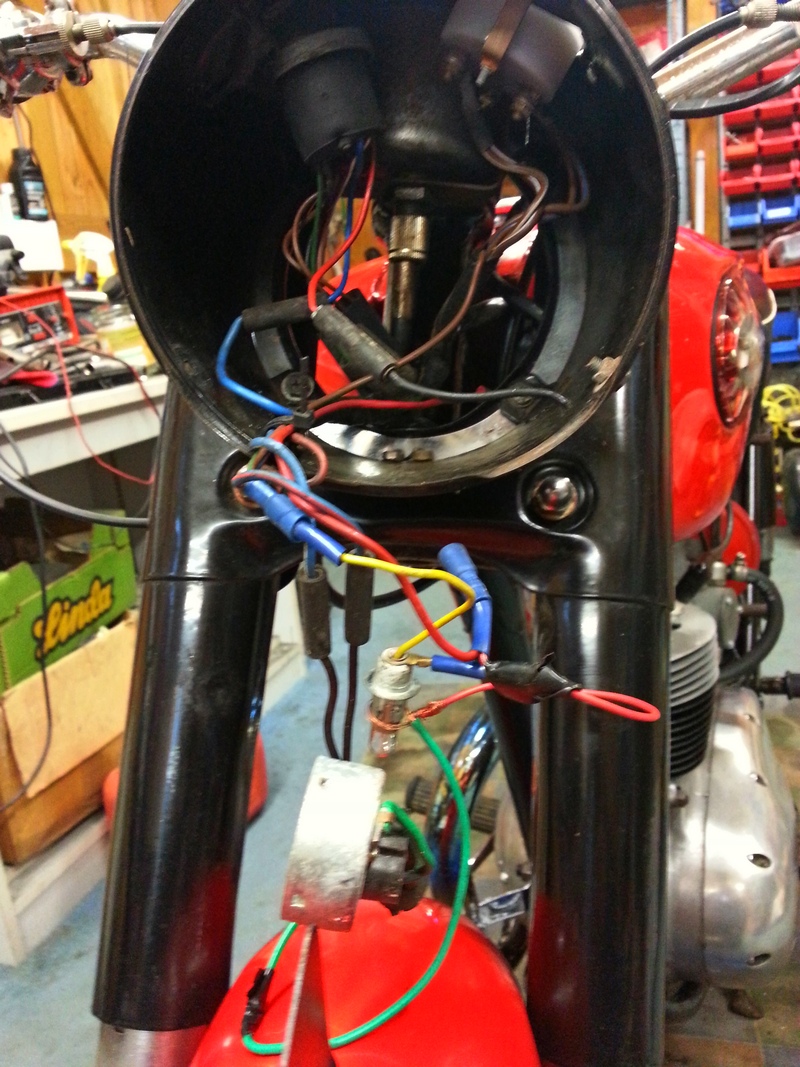
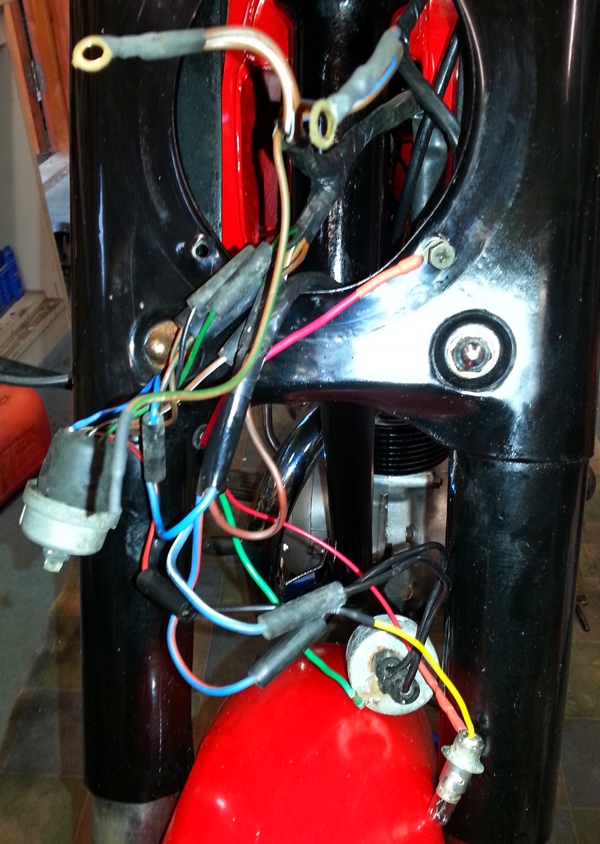
I have sorted out the rest of the wiring bodgery in behind the headlight and the inappropriate modern bright plastic crimp connectors have been removed and replaced with soldered bullets and black rubber connectors. Not all the wires such as those to the headlight bulb fixing are correct but it's a darn sight better than it was.
I am now painting the nacelle and headlight rim. What a palaver! Spent a good part of yesterday rubbing down, priming, rubbing down, filling, rubbing down --- you get the drift! Then I mucked up the final aerosol top coat so its back to rubbing down, etc., etc. ....... Spray painting is really a summer job.....
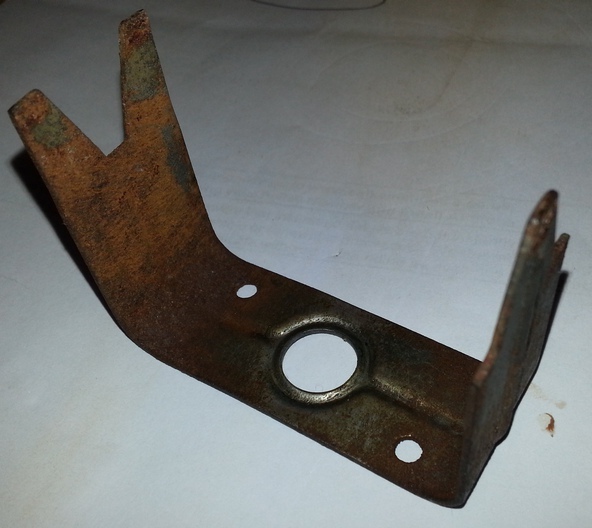
The speedo fixing bracket was missing a pilot light bulb holder bracket although the correct brown/green wire is there in the loom. I had previously worked on a mate's Bantam and recall replacing the old rusted speedo with a new one and was lucky that the old speedo bracket was still spare and that will be coming my way soon. The photos below show the difference. It'll just need bead blasting and plating. I need to find a bulb holder and wire it in now. I might try and find a 6v LED bulb just for fun.

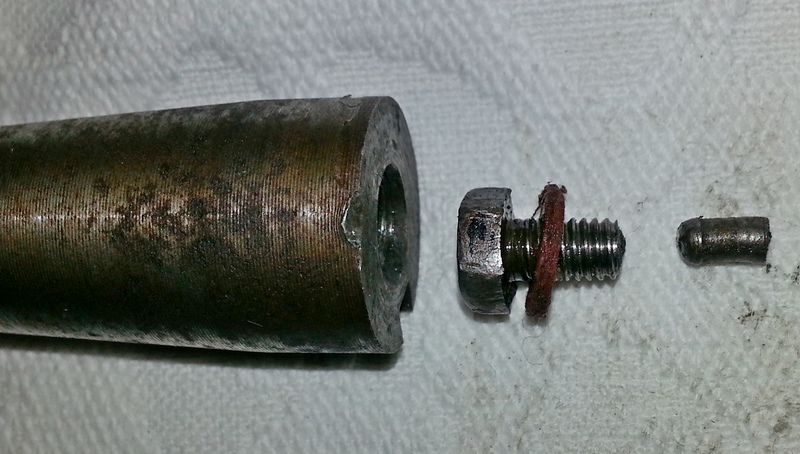
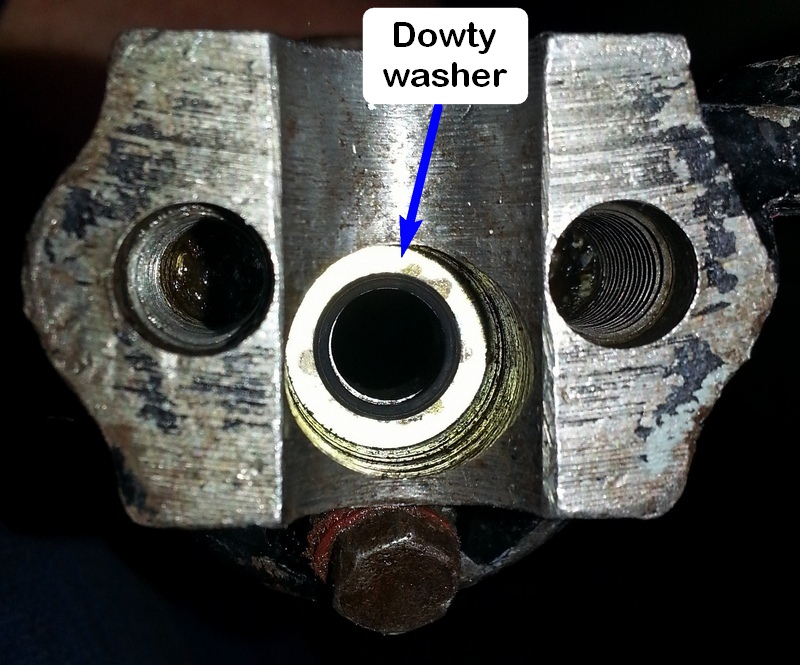
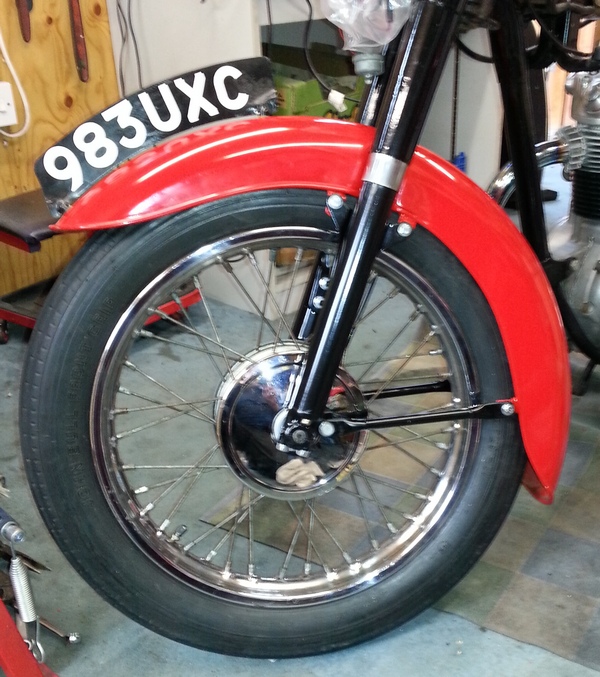
The C15 forks are very simple. There were no signs of any oil leaks but, as they hold so little oil, it makes sense to change it. A worthwhile exercise as I found one of the drain plugs had its locating pin broken by being screwed in when not in the locating slot in the damper rod so that was an excuse to drop the forks out, remove the springs and damper rods and give everything a good clean before re-assembly. Paul Firth is making up some new drain plugs out of stainless steel so I have ordered a pair. Also, something like PTFE tape had been used on the damper retaining bolts to seal them rather than the aluminium washers as shown in the parts book but I am happier using Dowty washers instead.

Whilst the forks are out the stanchions were cleaned and the bottom of the fork leg resprayed. The brake hub was cleaned and painted and put back in so that the bike is mobile again.

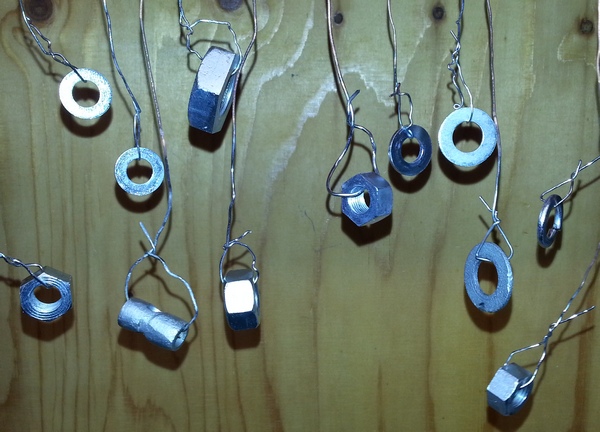
d) Cleaning and plating fasteners
I have learnt over the years never to assume the previous owner has used the correct fasteners! By checking back against the parts book for the C15, I can see that quite a few of the spring washers have been replaced by plain ones somewhere down the line. However, wherever they are correct, I am re-using the original nuts, bolts and washers by cleaning and zinc plating them. The plated parts are "passivated" before use and this gives them a very durable finish. I use a plating kit from Gateros which works well plus their support is really good if any issues arise.
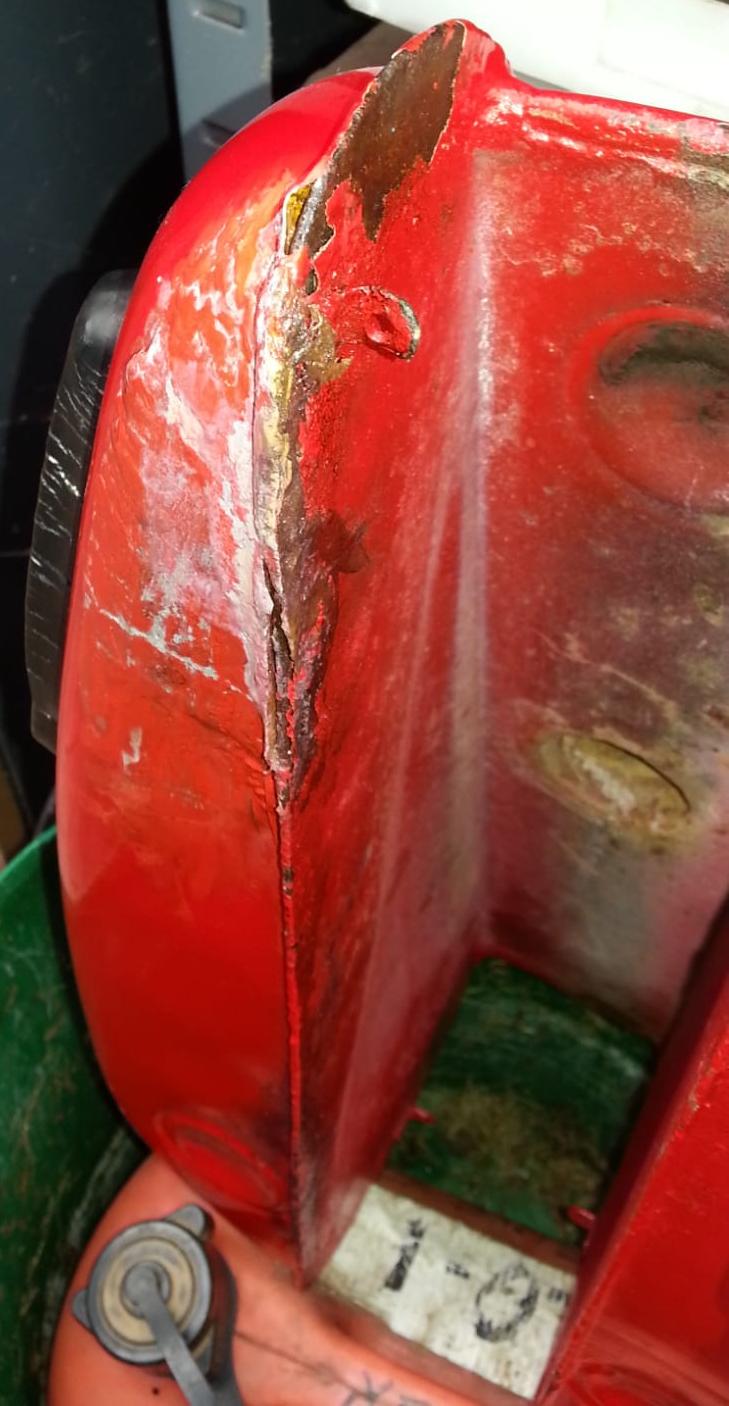
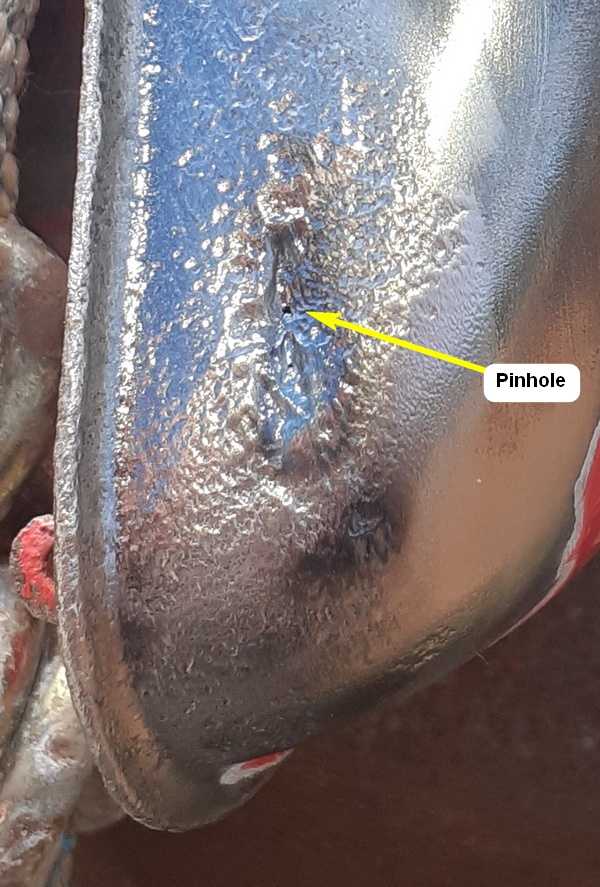
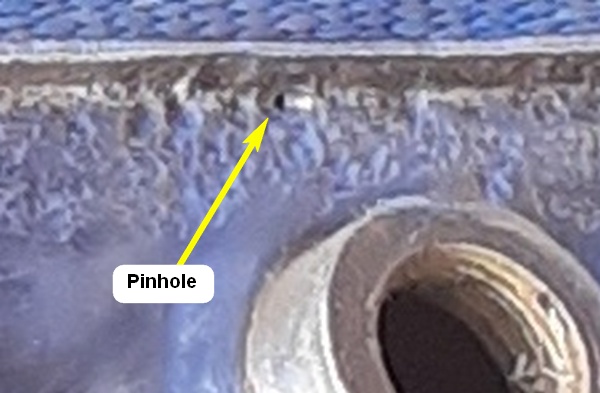
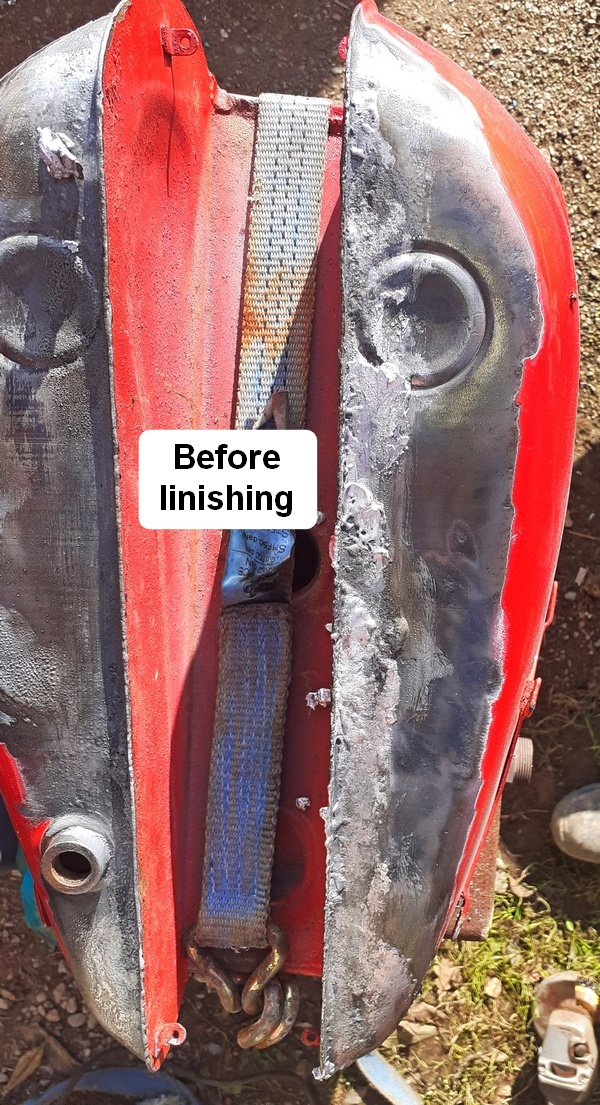
e) Petrol tank - again: I was over optimistic about the tank not leaking. I went into the workshop one morning and was overwhelmed by the smell of petrol. Whatever filler had been used to cover the pinholes had separated from the tank and petrol was dripping out quite quickly necessitating removal of the tank and properly draining it. I removed a biggish scab of filler and found a porous section of tank underneath with a pinhole at its centre. After some wire brushing, another pinhole appeared on the opposite side of the tank behind the tap boss.
 ..
..
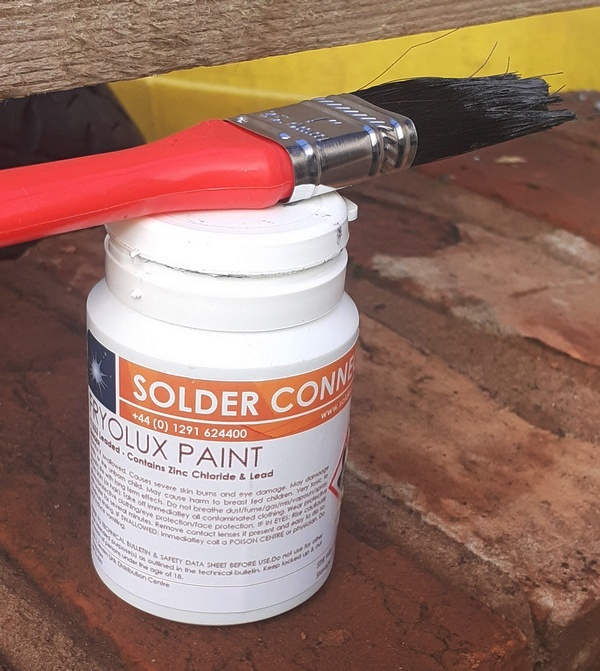
I wasn't sure what to do and initially bought a POR15 tank sealer kit from Frost Restorations - not cheap! However, after reading nightmare stories about sealants dissolving in our increasingly ethanol-laced petrol, I decided to look at alternatives the most attractive being old-fashioned "leading" where you melt sticks (made up of mostly lead and a small portion of tin) onto the surface of the tank to seal it.
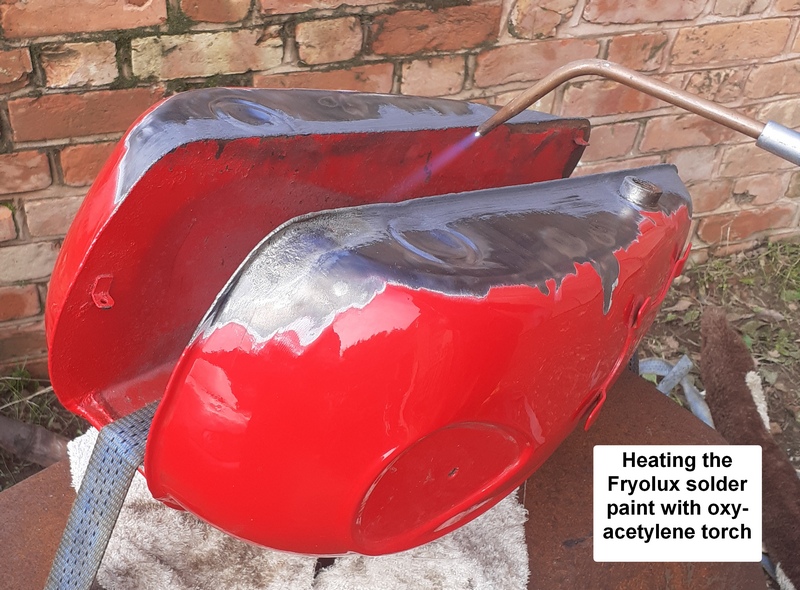
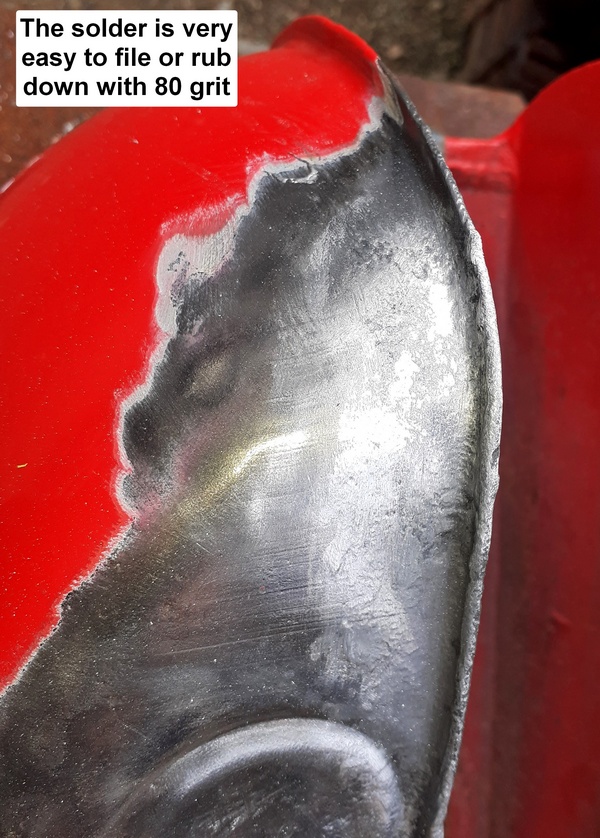
The surface to be leaded must be free of rust and scrupulously clean. Solder paint is then applied and heated until beads of lead can be seen at which stage it is hot enough to add further lead from a stick to cover the area needing repair.
Having got myself a leak-free tank, I sealed it with POR15 to keep any further rust at bay! Expensive but well worth the investment for peace of mind.
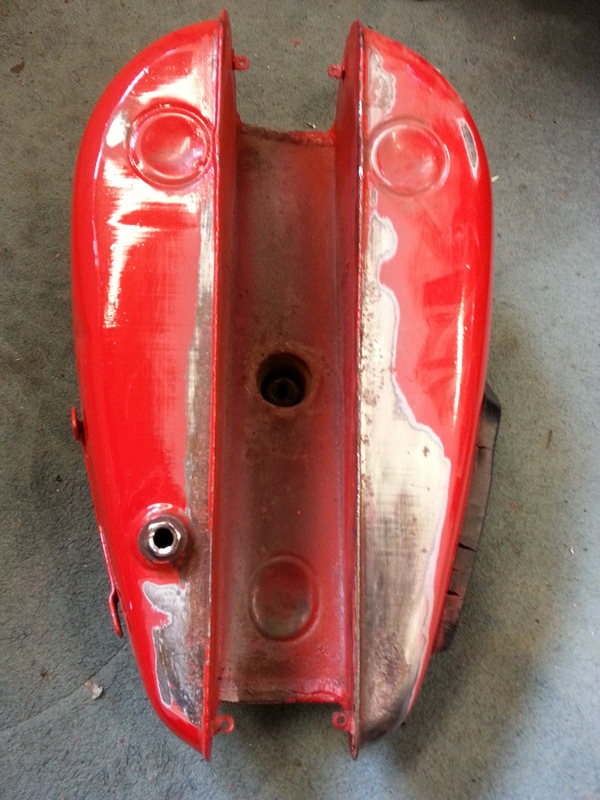
The next stage was to prime and paint the tank. I prepped the tanks up to the primer stage and my brother did the final colour coat - and a very good job he made of it I reckon! The first photo shows the tank in bare metal, the second in primer and then in its final colour.
The colour aerosols were made up for me by Allparts, Exeter, to match the original paint on the tank. So, for the home DIYer, aerosols are a pretty good solution I reckon. The tanks need a final clear coat of petrol-proof 2K again, amazingly, from an aerosol. Pro2KCLEAR - a brilliant product! This has a sort of widget of hardener in the can which, once released, requires the paint being used within 24 hours before it hardens.


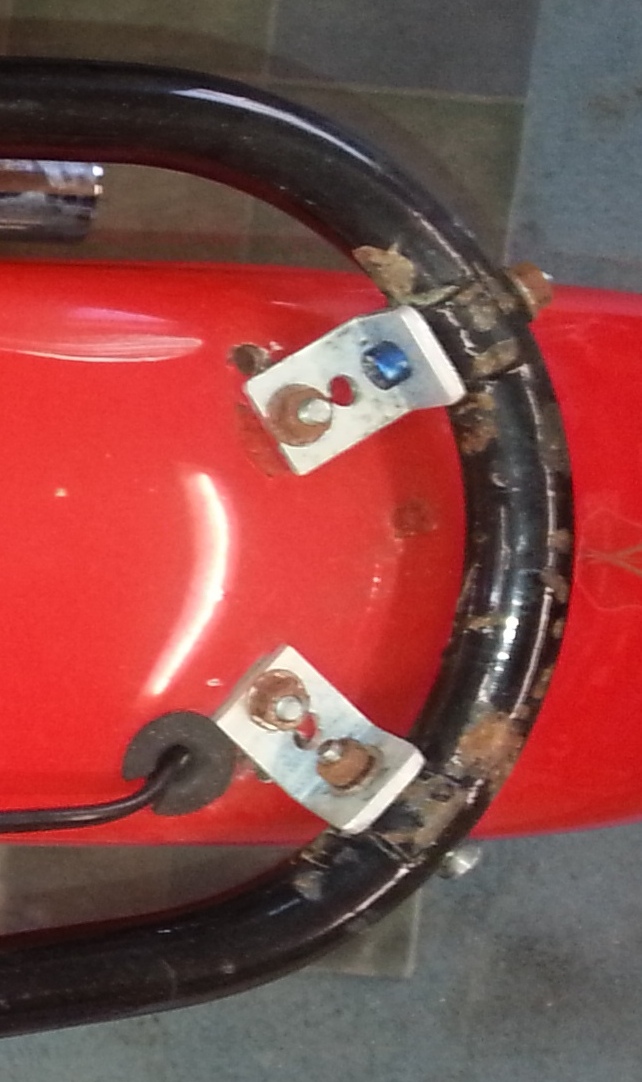
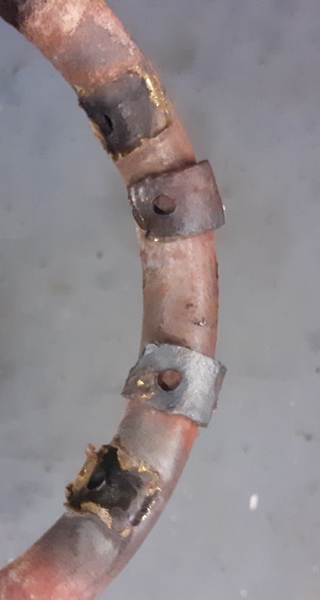
Having made new tabs and worked out and marking their positions on the mudguard, I loaded the C15 onto my trailer and took it to John, a professional blacksmith, who did a great job of the brazing them on. I later took him the mudguard so that he could weld up the "spare" holes ready for me to make new ones. I then tidied up and resprayed the mudguard and Hammerited the frame. A great improvement on what was there!

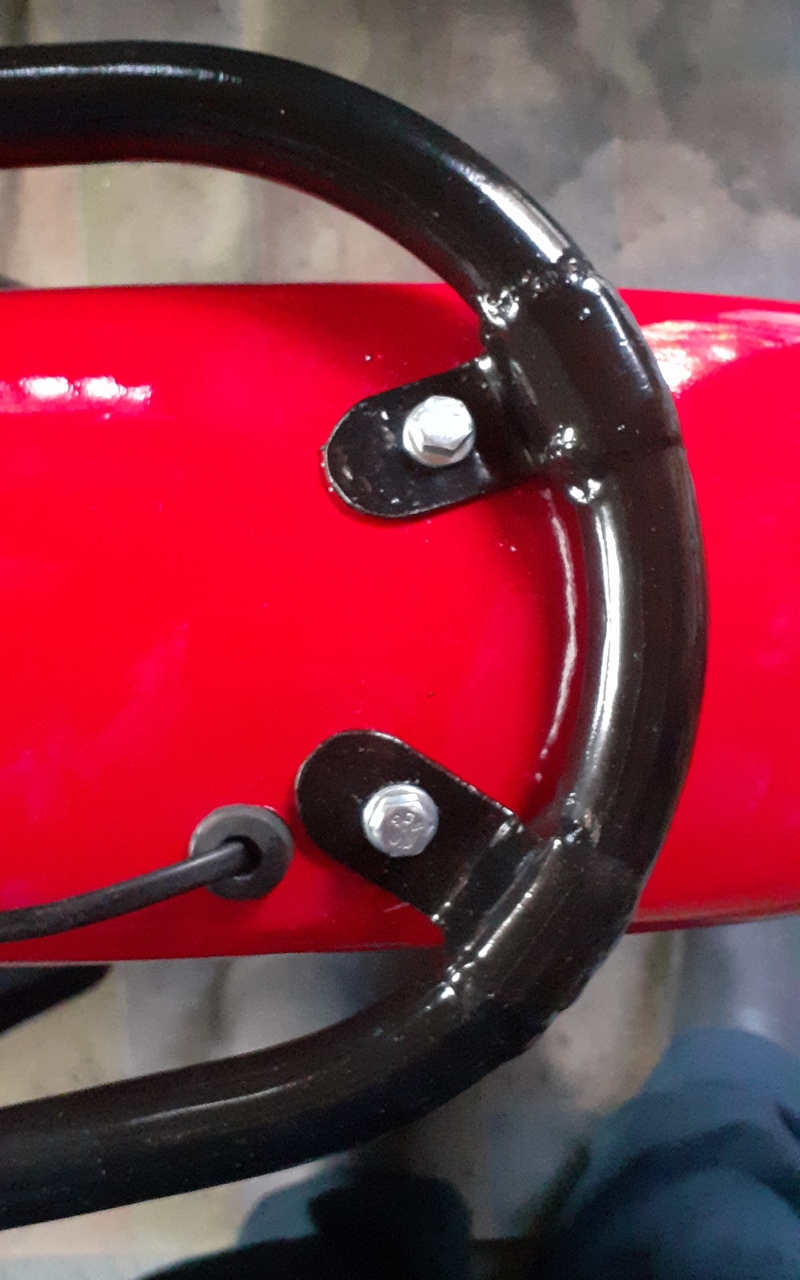
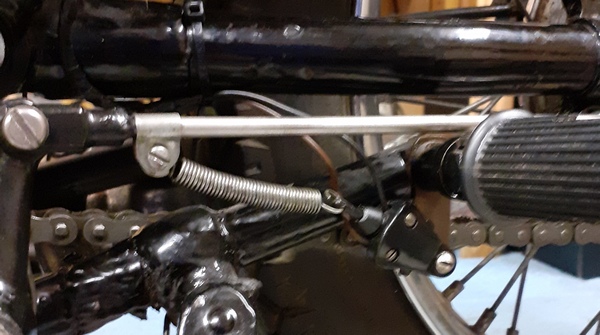
It seems that my brake switch is non-standard and attaches to the rear passenger footpeg so I have included a photo to show its positioning.


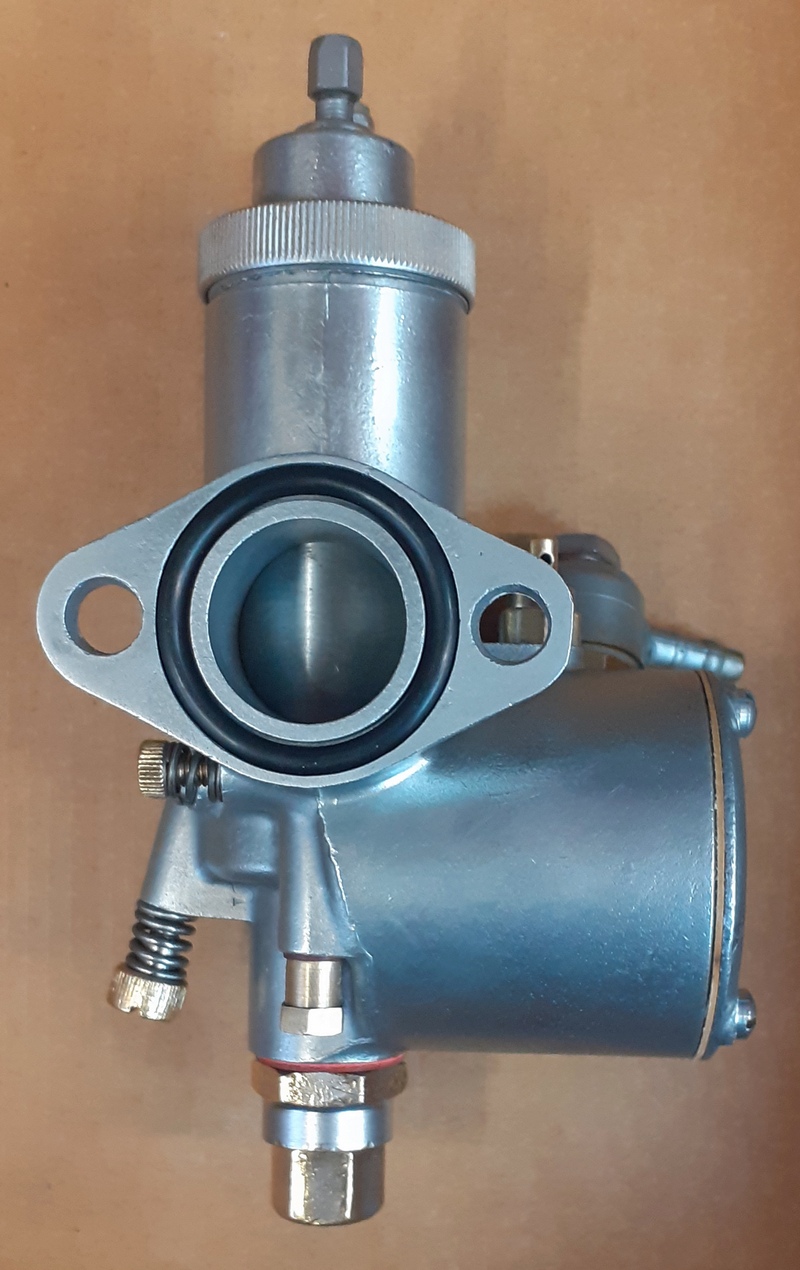
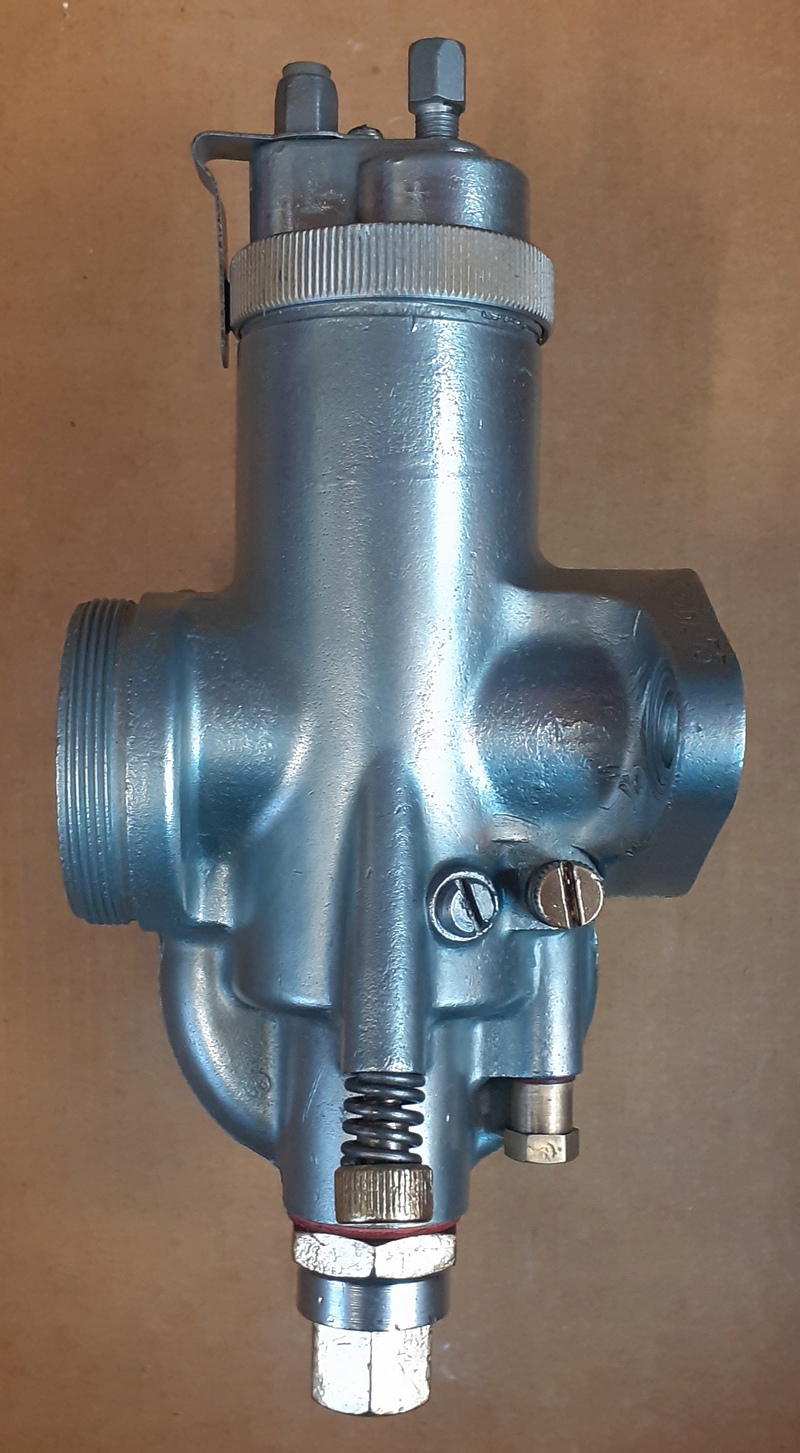
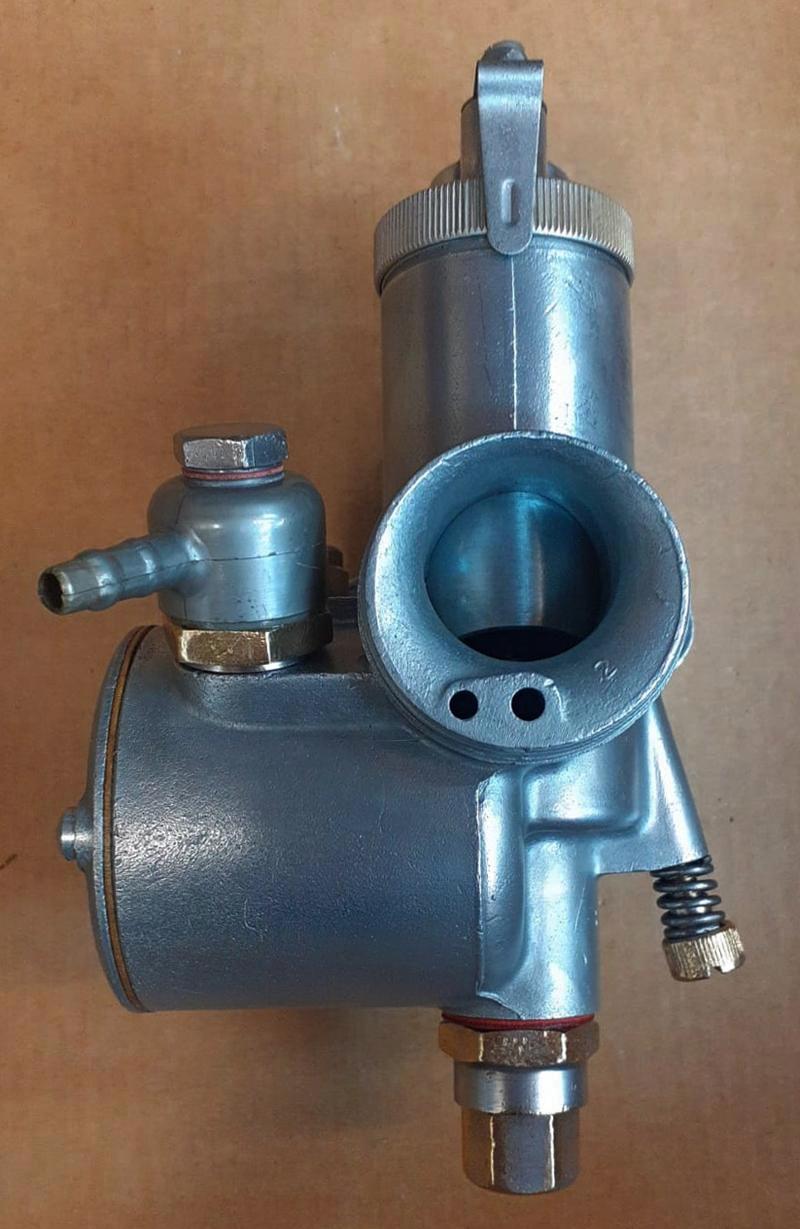
i) Carb Part 2: It seemed a shame not to take advantage of the SS80 head by fitting the correct carb so I managed to source an Amal Monobloc 376 which has the 1" bore that matches the inlet port on the SS80 head. It already had the correct 200 main jet (needle position 2) and 0.106 pilot jet but I had to buy a No. 4 cutaway to replace the one fitted. After a complete strip down, ultrasonic clean, bead blasting, rebuilding with all new gaskets and seals and a bit of a polish up, it was ready to fit and test.
I used the throttle stop and pilot screw settings as advised in the Rupert Ratio
manual and, once I realised it needed a bit of throttle when kickstarting, it
started right up and ran well enough to take her for a test ride. With small
adjustments to tickover speed and pilot screw she is now running really well and
pulls like a train!
Links to other websites, blogs, etc.:
"BSA C15 Restoration and Preservation" group Facebook page. This group is run by Paul Firth and has been really helpful in giving almost instant answers to my frequent questions as my rebuild progressed - thanks guys!
Michael Waller, Britannia Motorcycles - Michael has made some great videos including detailed engine and gearbox rebuilds. Go to his video page and have a look at his series of videos on building a 1959 BSA C15T replica. I found the engine dismantling and rebuild videos really helpful.
Rupert Ratio Books for BSA Unit Single motorcycles (C15, B40, B25, B44, B50 and Triumph T25). I have all three volumes which are excellent.
BSA Owners Club - The BSA Owners’ Club is the main custodian of all official BSA records dating back to 1907. The club also has an extensive library of everything BSA, including: Despatch Records, Factory Parts Books, Handbooks, Catalogues and Service Sheets, etc.
Restored BSA C15 - 1958 Motorcycle - there are some really high quality photos of the beautifully restored C15 from all angles which have provided very useful reference points for my own rebuild. Just click on the photo and it moves on to the next.
The BSA Otter - all about classic trials bikes with quite a few C15-related articles.
Resurrection: 1965 BSA C15 (SS80) - a good refurbishment blog with some excellent info and photosBSA C15s - father and son maintenance and repair blog - amusing but also very useful!
BSA C15 Restoration from start to finish - YouTube video"On Yer Bike" Youtube videos of Craig's C15 bobber build. Go to that web page and scroll right down to find the bobber videos. The engine strip was covered in this video https://www.youtube.com/watch?v=Fzs72rf6pS4
BSA C15 Wikipedia and BSA C15 "Wikiwand" - includes the model history and some nice photos.
BSA C15 - full background details of the development and run through of the C15 models plus details of the author's own C15 restoration - some nice photos.
Brian Sussex