DISCLAIMER: The modifications described in the following text are for educational purposes only. In no way do I recommend that you apply these modifications to your own motorcycle. If you do choose to go ahead and modify your motorcycle based on the information in this document you will accept all responsibility for your own actions. The author(s) of this document, and host(s) providing it for you, accept no responsibility whatsoever. If you are unqualified to make any of the changes described herein but are bent on doing the modification, seek out a knowledgeable friend or professional mechanic for assistance.
TTR250 Starter Motor Information
NOTE: This is just a guide; it does not replace a service manual, general mechanical knowledge, specific motorcycle repair experience and good old common sense. With the proper tools, some general experience and this guide most users will be able to successfully service, replace or repair their starter motor . If you have any problems then stop and ask questions on the forum, take pictures of your point of confusion and get your answers before you start.
General information:
As far as I can make out, the TTR250 uses a Mitsuba SMU0354 starter motor. The starter doesn't seem to have been used on any other model
If the starter pinion gear is damaged or stripped then the cause is almost certainly a worn or faulty sprag clutch.
The battery is negative earthed to the chassis - so the connection to the top of the starter motor from the solenoid is positive and the starter body is negative and earthed via the engine to which it is bolted.
The motor spins in a clockwise direction.
A "dead" starter can be caused by (a) a flat battery, (b) faulty solenoid (starter relay), (c) poor contacts in the starter button, (d) worn or faulty brushes or (e) a poor connection or broken wire.
Faulty sidestand and clutch isolator safety switches will also prevent the starter operating. One is on the clutch lever perch. If the TTR is in gear and the clutch is pulled in then the switch is operated and allows the engine to start. The second is on the sidestand. If, having started the TTR in gear, you let out the clutch with the sidestand down then it will cut the engine. These can be checked by bridging (shorting out) their connectors in the wiring loom.
If the solenoid clicks but the starter does not work, check the solenoid by first making sure the TTR is out of gear and then bridge the two large terminals on the solenoid with a screwdriver. If the battery and starter are good then the engine should turn over. If they do then replace the solenoid. If they don't then you have a connection problem or need to check/replace the starter brushes.
After-market starters are notoriously unreliable and best avoided if possible. Better to source a good used genuine OEM TTR250 starter motor. Members of the TTR250 forum have said that the Yamaha YBR250, Honda CBF250 and CBX250 Twister starter motors are exact replacements and may be available on eBay. Yamaha Majesty YP250 starter motors can be made to fit by swapping the rear mounting case from the old TTR starter over to the Majesty starter. Yamaha FZR600 and FZ600R (1990-96) starter motors can be made to fit by fitting the TTR rear casing and drilling mounting holes about 12mm closer to the starter body to allow for the FZ starter being longer.
The starter removal procedure described below is the most used method but it is also possible to take the starter motor out from the left-hand side of the engine by removing the generator cover - see here for procedure - although you only have to follow it as far as removing the cover!
The starter motor body includes two rubber gasket/seals. These are not O rings and are square in section. If your starter has been apart and these have been damaged then best to replace them to prevent water/moisture getting inside the starter.
Replacement parts:
New brush sets available from Totally TTRs here
Starter motor gaskets/seals - see here
Starter body with magnets - used - genuine Yamaha - see here
Starter switch - genuine Yamaha - used - see here
Solenoid or starter relay - new - genuine Yamaha - see here
Other starter parts available here
Case history:
A friend was having trouble with her TTR starter. It started as an intermittent fault and then it stopped working altogether. The switch was OK and there was a healthy click from the solenoid. A tap on the starter would get it turning over indicating a problem with the brushes or commutator. I took a few pics of the strip down in case it might help someone else.
It isn't possible to easily take the starter out from the LH side
without removing the generator cover as the carb is in the way. So it comes out the RH side.
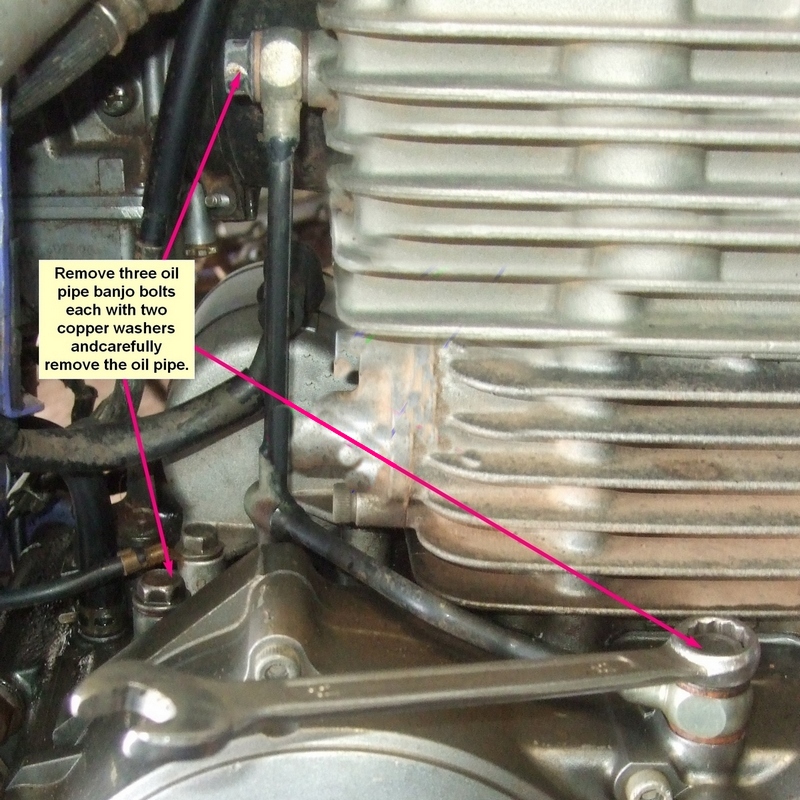
Firstly take the Jubilee clips off the shock reservoir and park it out of the way. Then undo the three union bolts on the oil line being careful not to lose the washers or drop anything nasty into the oil holes. Once removed just pop the lower two bolts back in the holes to stop anything falling in.

Next, remove the 10mm bolt that holds the clutch cable retainer in place and move it out the way.
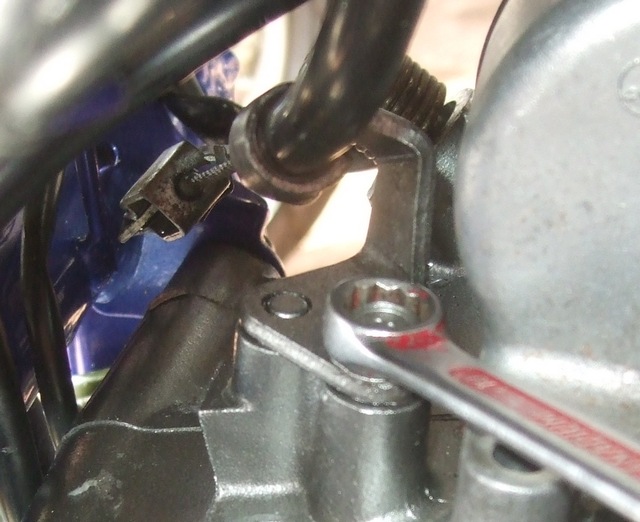
Once removed there is plenty of room to get the starter out.
Positive terminal - feed from solenoid. Lift rubber cap and take off the 10mm nut that holds the terminal on. I have thinned down a 10mm open-ended spanner on a grinding wheel to hold the nut under the cable end to stop it turning.
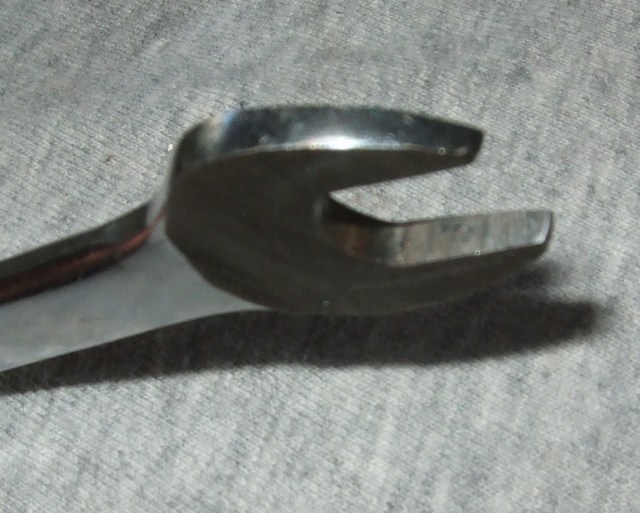
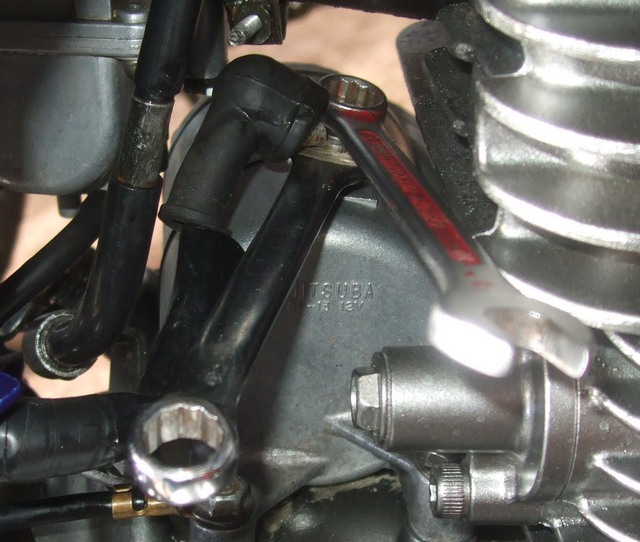
The starter can sometimes be reluctant to pull out so a bit of gentle persuasion at the generator cover end helps.
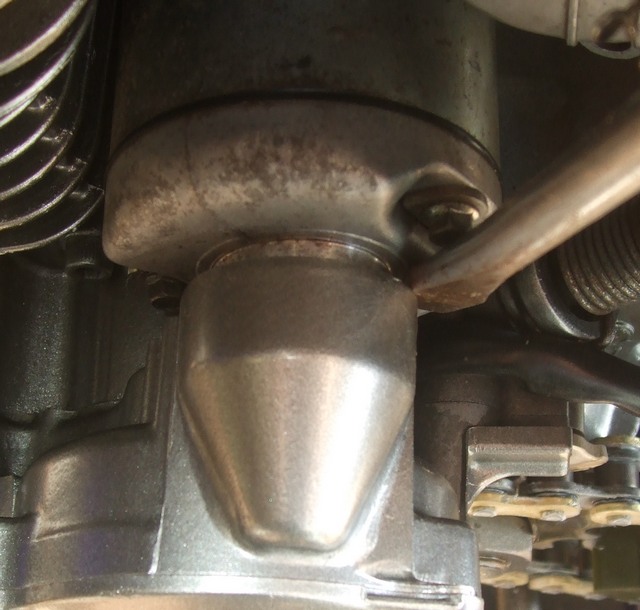
It is difficult to write down exactly how to extract the starter but it's basically a case of rotating it whilst wiggling it out - no force needed!
To get it past the timing chain tensioner I recall it needing to be upside down!
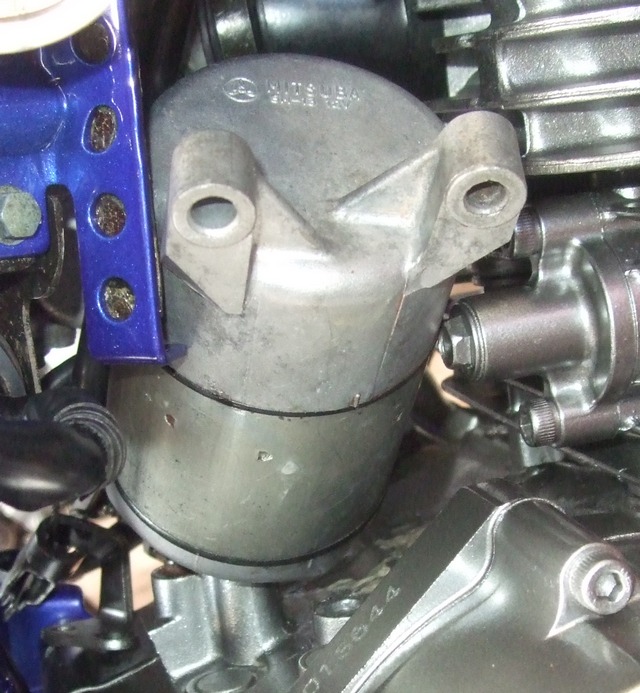
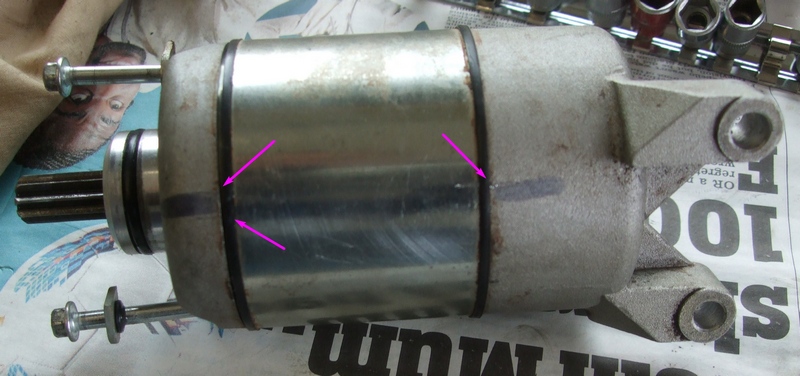
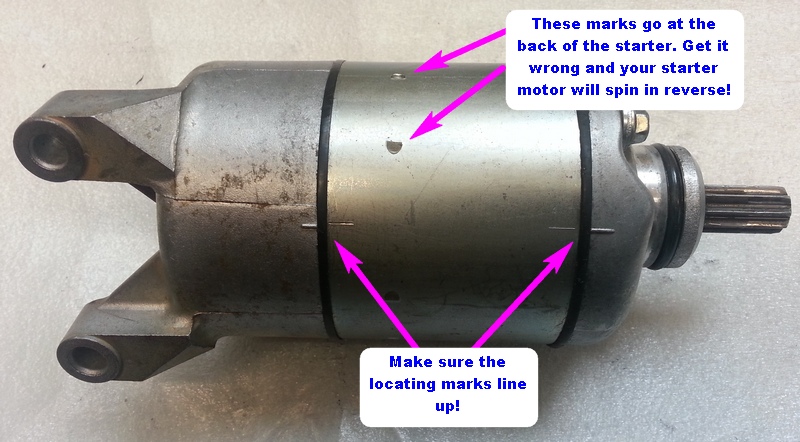
Before stripping down the starter make sure there are some marks on the body so that it all goes back together the right way. Having put a body back the wrong way around once before (it makes the starter run backwards!) I now put two scribe marks on one side and a single on the other.
Sure enough one of the brushes was stuck.
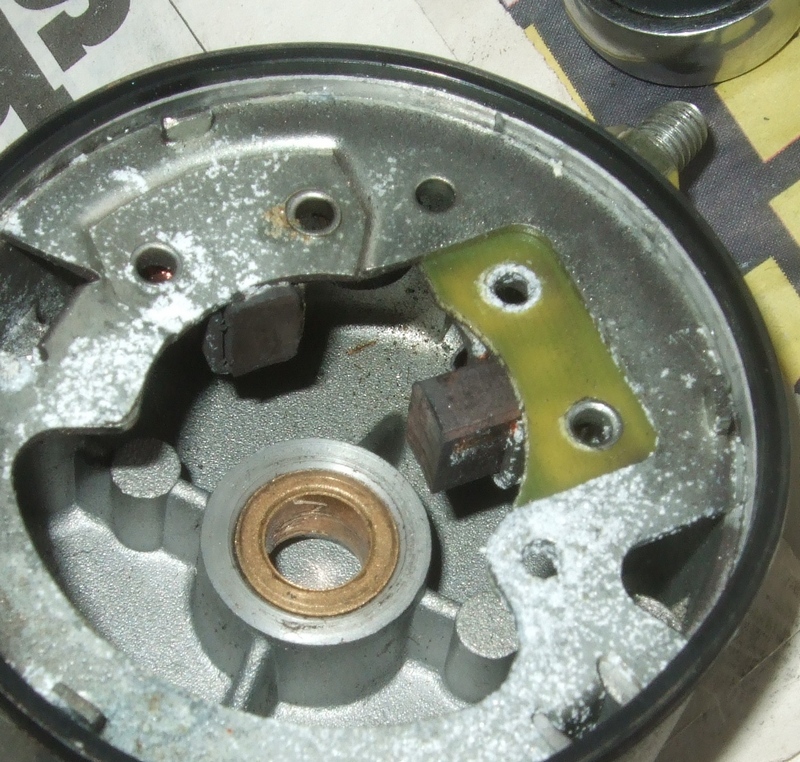
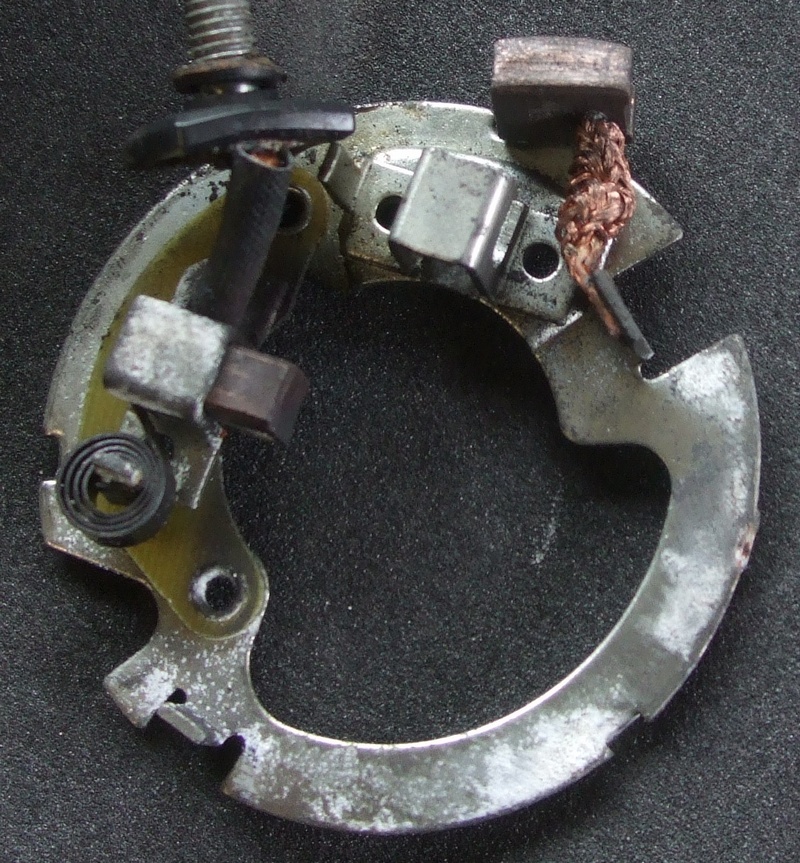
The other side of the brush set!
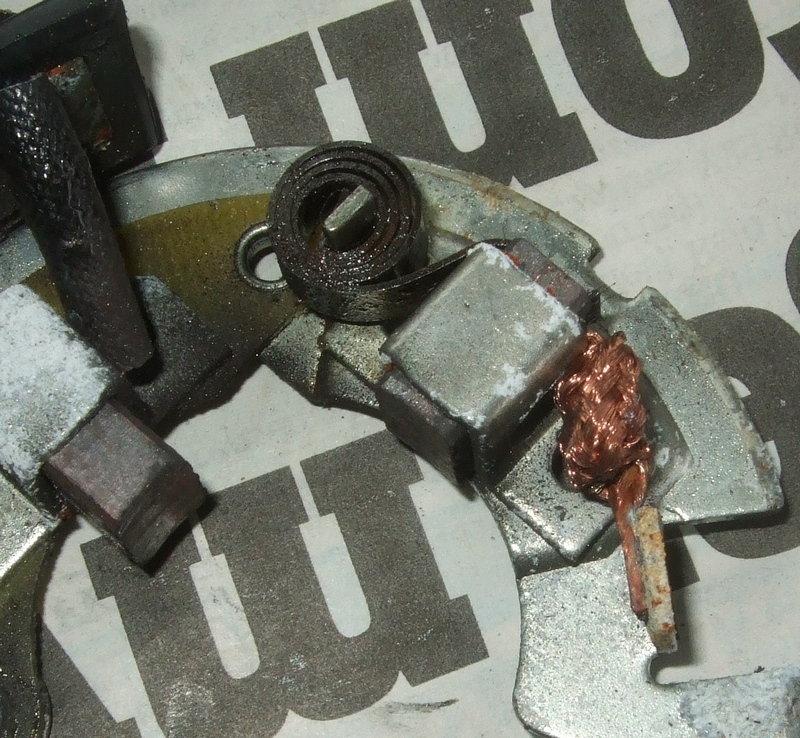
I cleaned the offending brush up with a bit of emery and it now moves freely.
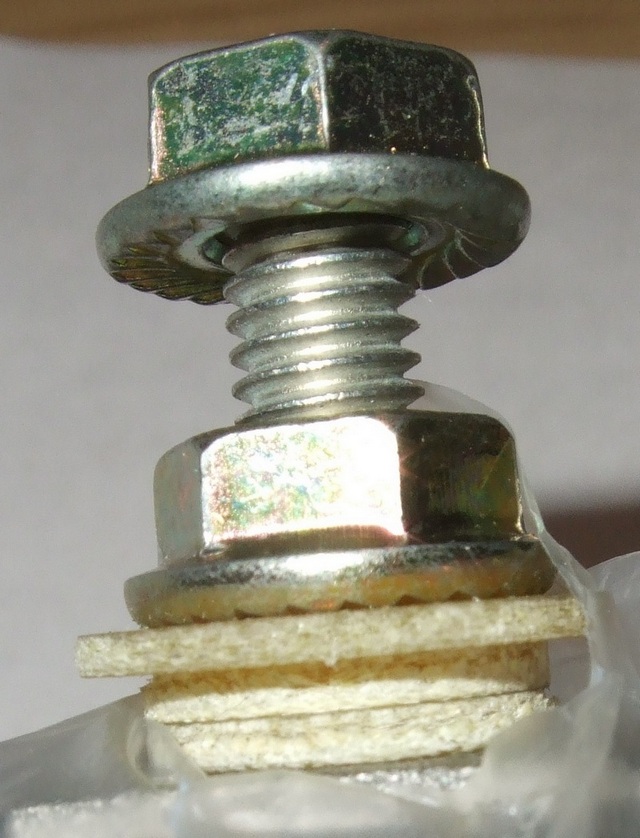
If the washers on the live feed terminal of the starter have been disturbed then this is how they should go back on:
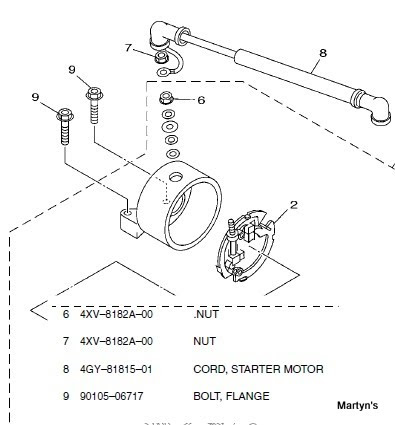
In real life they should look like this with the big fibre washer directly under the nut with the two smaller ones below it. The large fibre washer provides a lip that the rubber boot cover snaps onto to cover the terminal and top nut.
The starter motor all back together and ready to fit! It should spin clockwise.
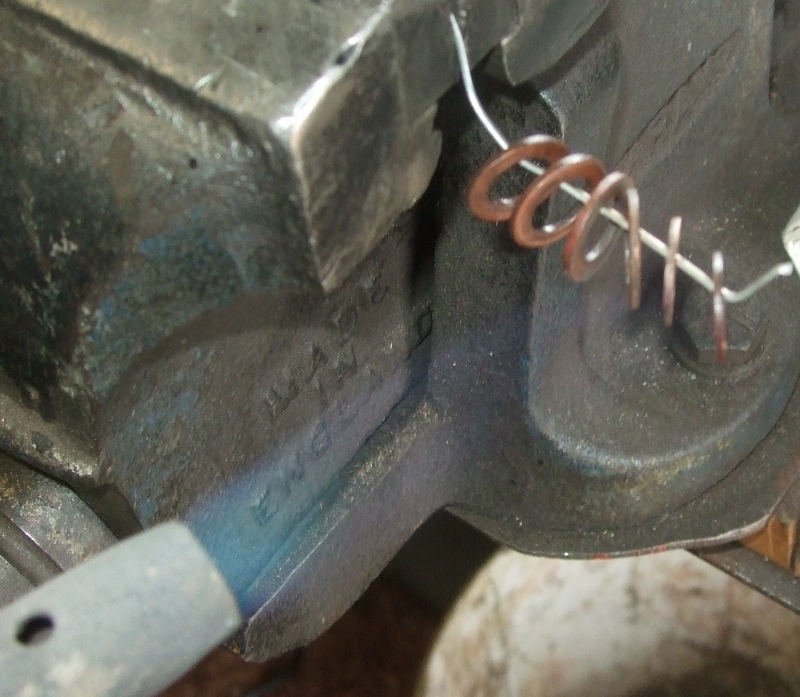
To prevent oil leaks from the oil feed pipe, I annealed the copper washers (heat to cherry red for a few minutes and then quench them in cold water) before putting everything back together again.
The starter was new not long ago but I am guessing limited use and storing the bike outside under a cover may have contributed to a bit of corrosion building up. Anyways up, all working fine now!
Brian Sussex
Compiled by Brian Sussex, Devon, UK
http://www.ttr250.com/
- all you ever wanted to know
about TTR250s
http://ttr250.activeboard.com/
- the forum for TTR250 owners
http://www.totallyttrs.com/
- everything you need (possibly!) for
your TTR250
http://www.totallywrs.com/
-
for all your WR250R and WR250X after-market parts and accessories
Reference within this site to any specific commercial or non-commercial product, process, or service by trade name, trademark, manufacturer, private individual or otherwise does not constitute or imply an endorsement, recommendation, or favour by Brian Sussex