DISCLAIMER: The modifications described in the following text are for educational purposes only. In no way do I recommend that you apply these modifications to your own motorcycle. If you do choose to go ahead and modify your motorcycle based on the information in this document you will accept all responsibility for your own actions. The author(s) of this document, and host(s) providing it for you, accept no responsibility whatsoever. If you are unqualified to make any of the changes described herein but are bent on doing the modification, seek out a knowledgeable friend or professional mechanic for assistance.
Rebuilding a cylinder head on a Yamaha TTR250
This pictorial guide assumes you have removed the cylinder head and is to help you with valve cleaning etc before replacing the head. This guide is best read in conjunction with this thread - http://www.ttr250.com/Removing_Cylinder_Head/TTR_head_removal.htm
Tools needed:- Valve lapping tool (about £3 inc p&p from eBay), valve grinding paste (fine grade), drill and emery paper.
Parts/supplies: Head and base gasket set and valve stem oil seals
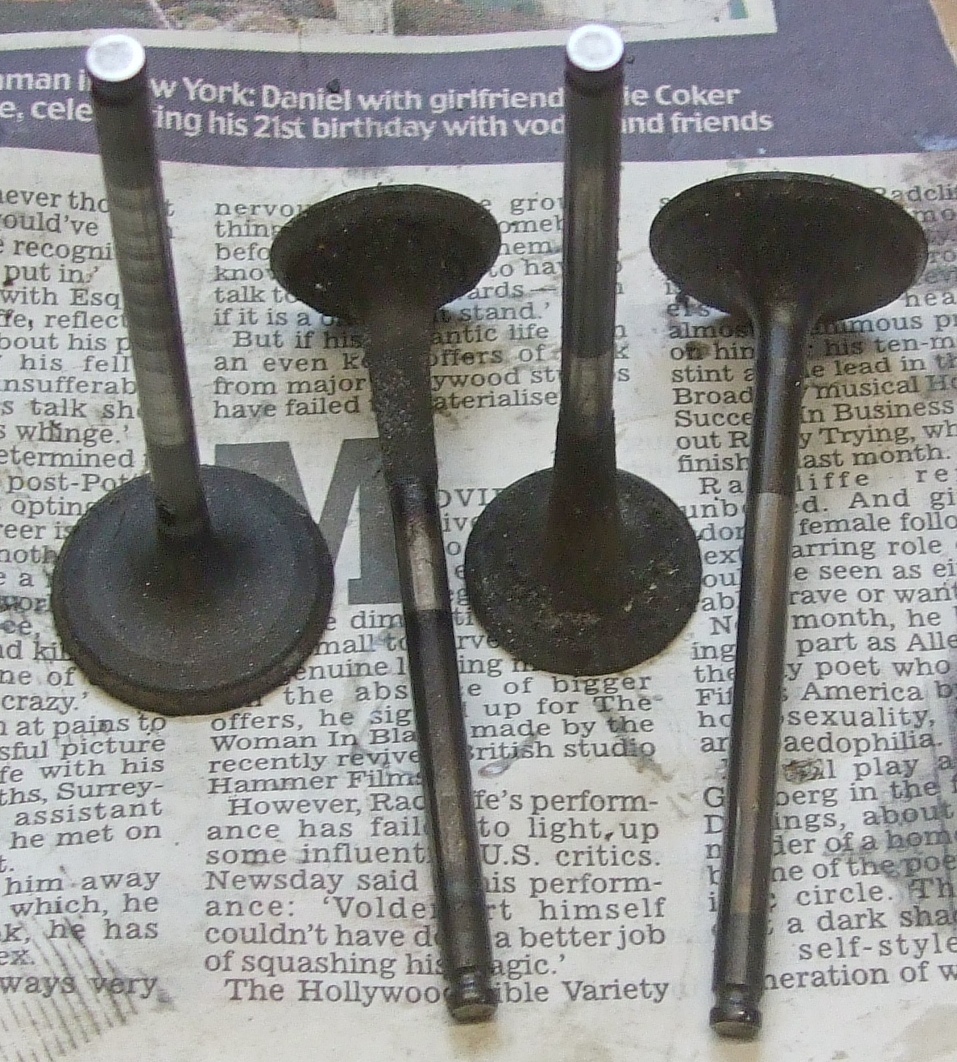
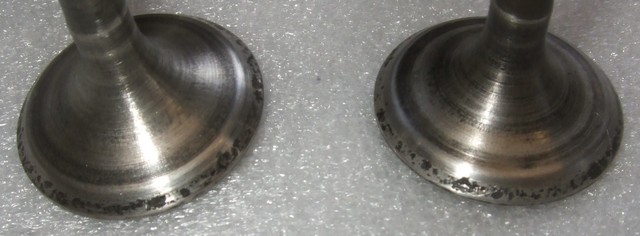
The engine from one of my project bikes was pretty tired and the valves were very carboned up showing that at some stage the bike had run hot and lean and then started burning a lot of oil.
A "before" photo of the valves below.
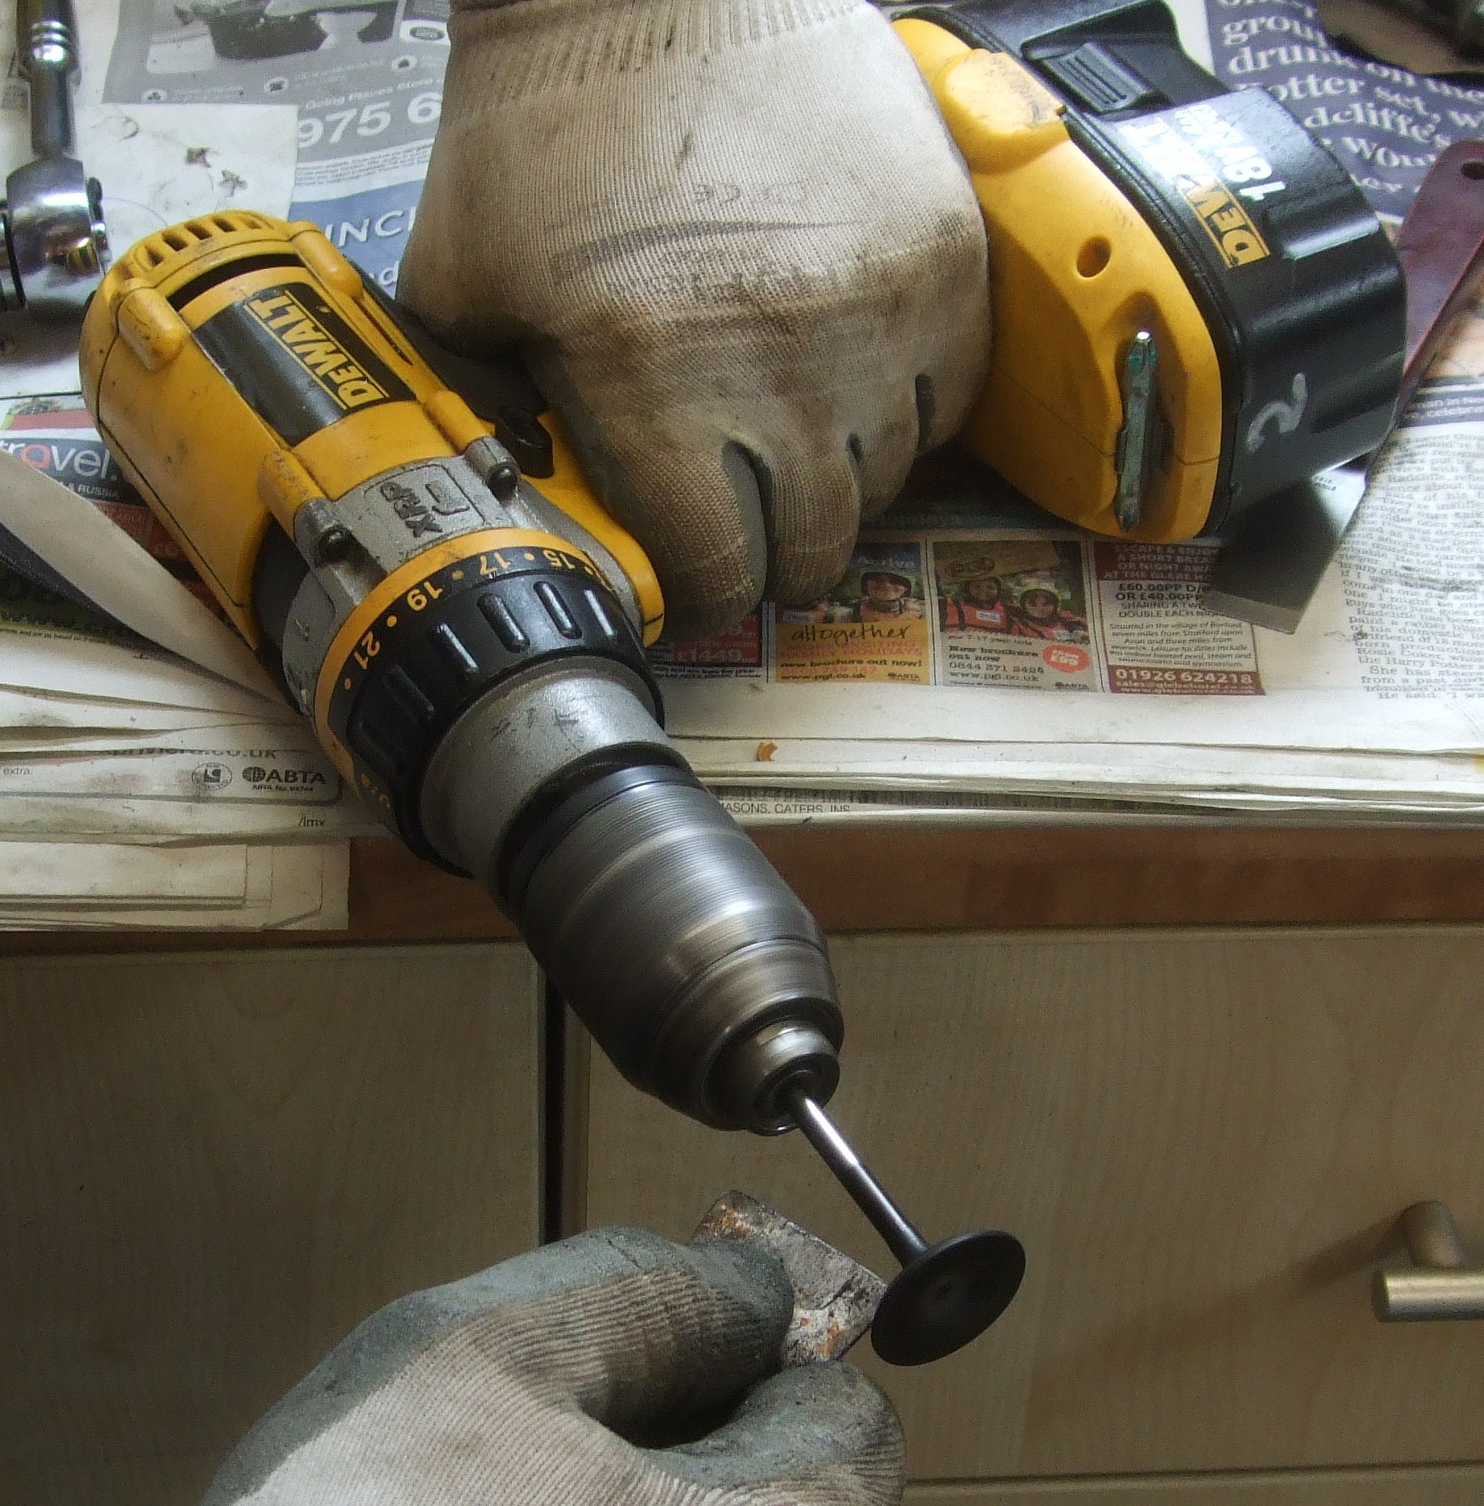
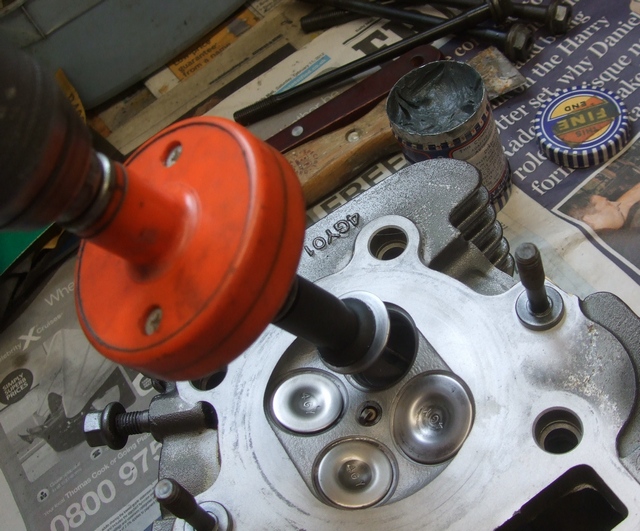
I clean the valves in an electric drill. I get most of the carbon off with a metal scraper blade and then follow up with 2 or 3 different grades of emery paper. A bench grinder fitted with wire brush is also very effective.
I was surprised at how thick the carbon was on the exhaust valves so weighed them before and after. There was about 2 grammes difference after cleaning!
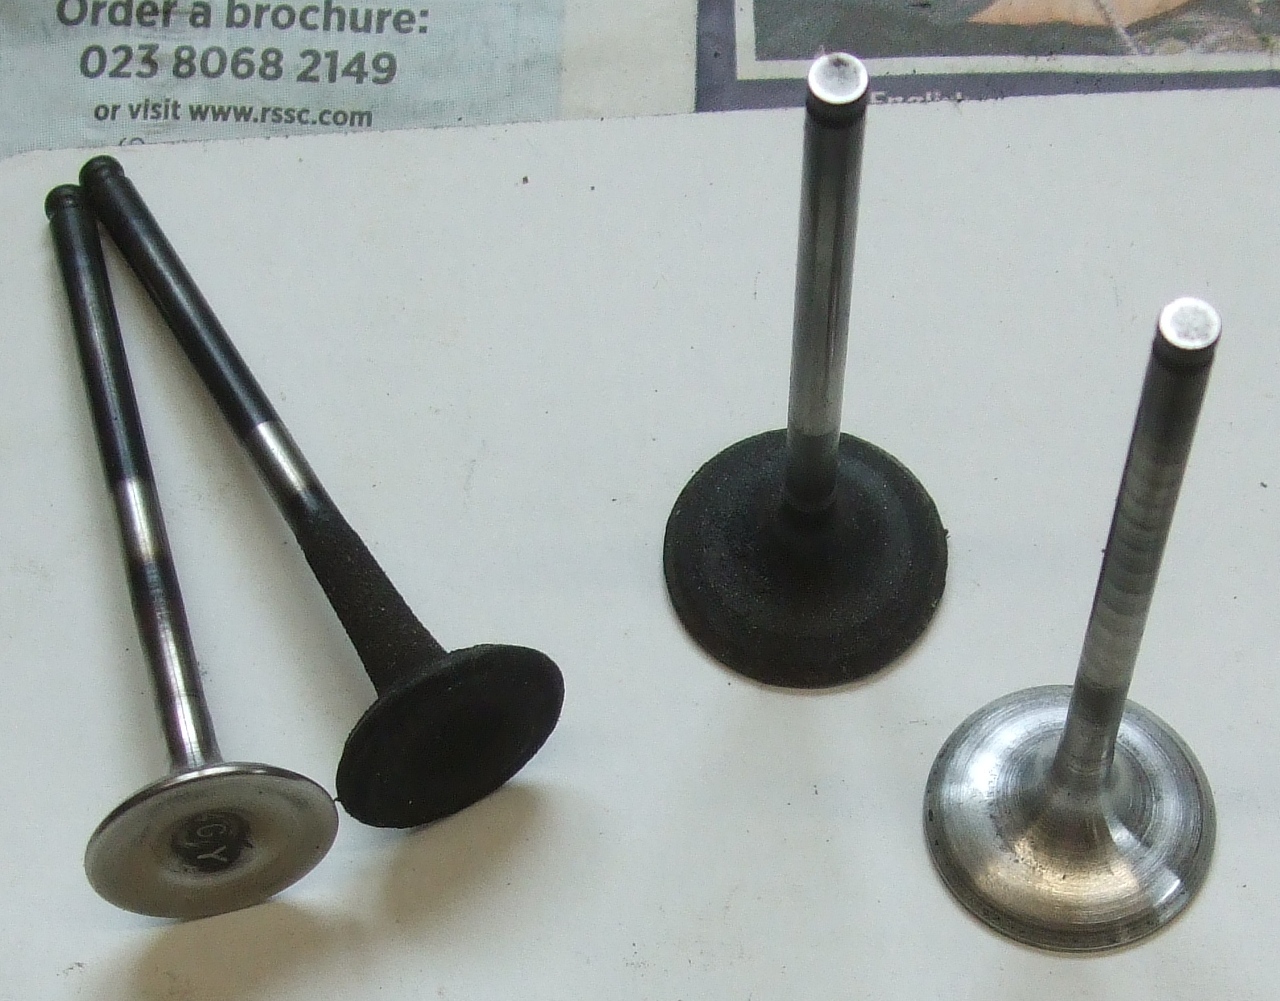
Don't re-use the exhaust valves if the valve stem where it joins the valve head has been burned dark blue (tempered) as it has been weakened. This is VERY unusual! Also if the valve seats are pitted you won't get a proper seal so either fit good replacements or get an engineering firm to re-cut them.
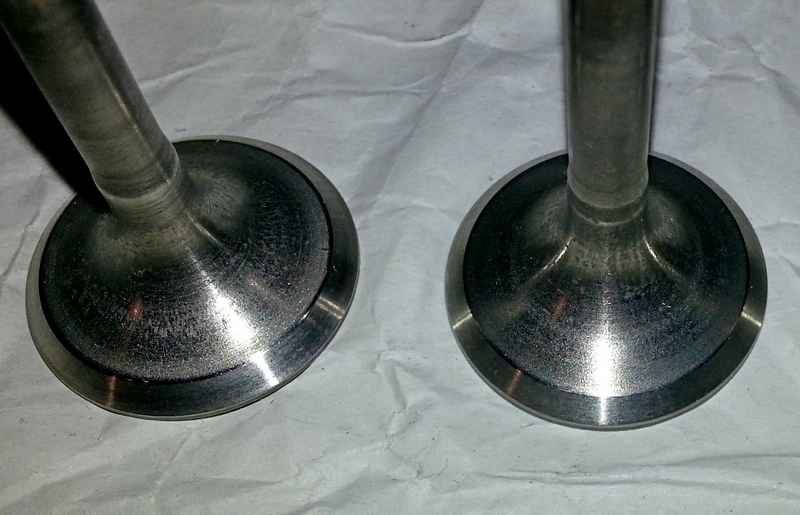
The valves on my engine looked fine and were re-usable. I have only ever had to replace a few exhaust valves because of pitting but maybe I have just been lucky. See photo of pitted valves below:
This is what re-cut valves look like - a vast improvement!
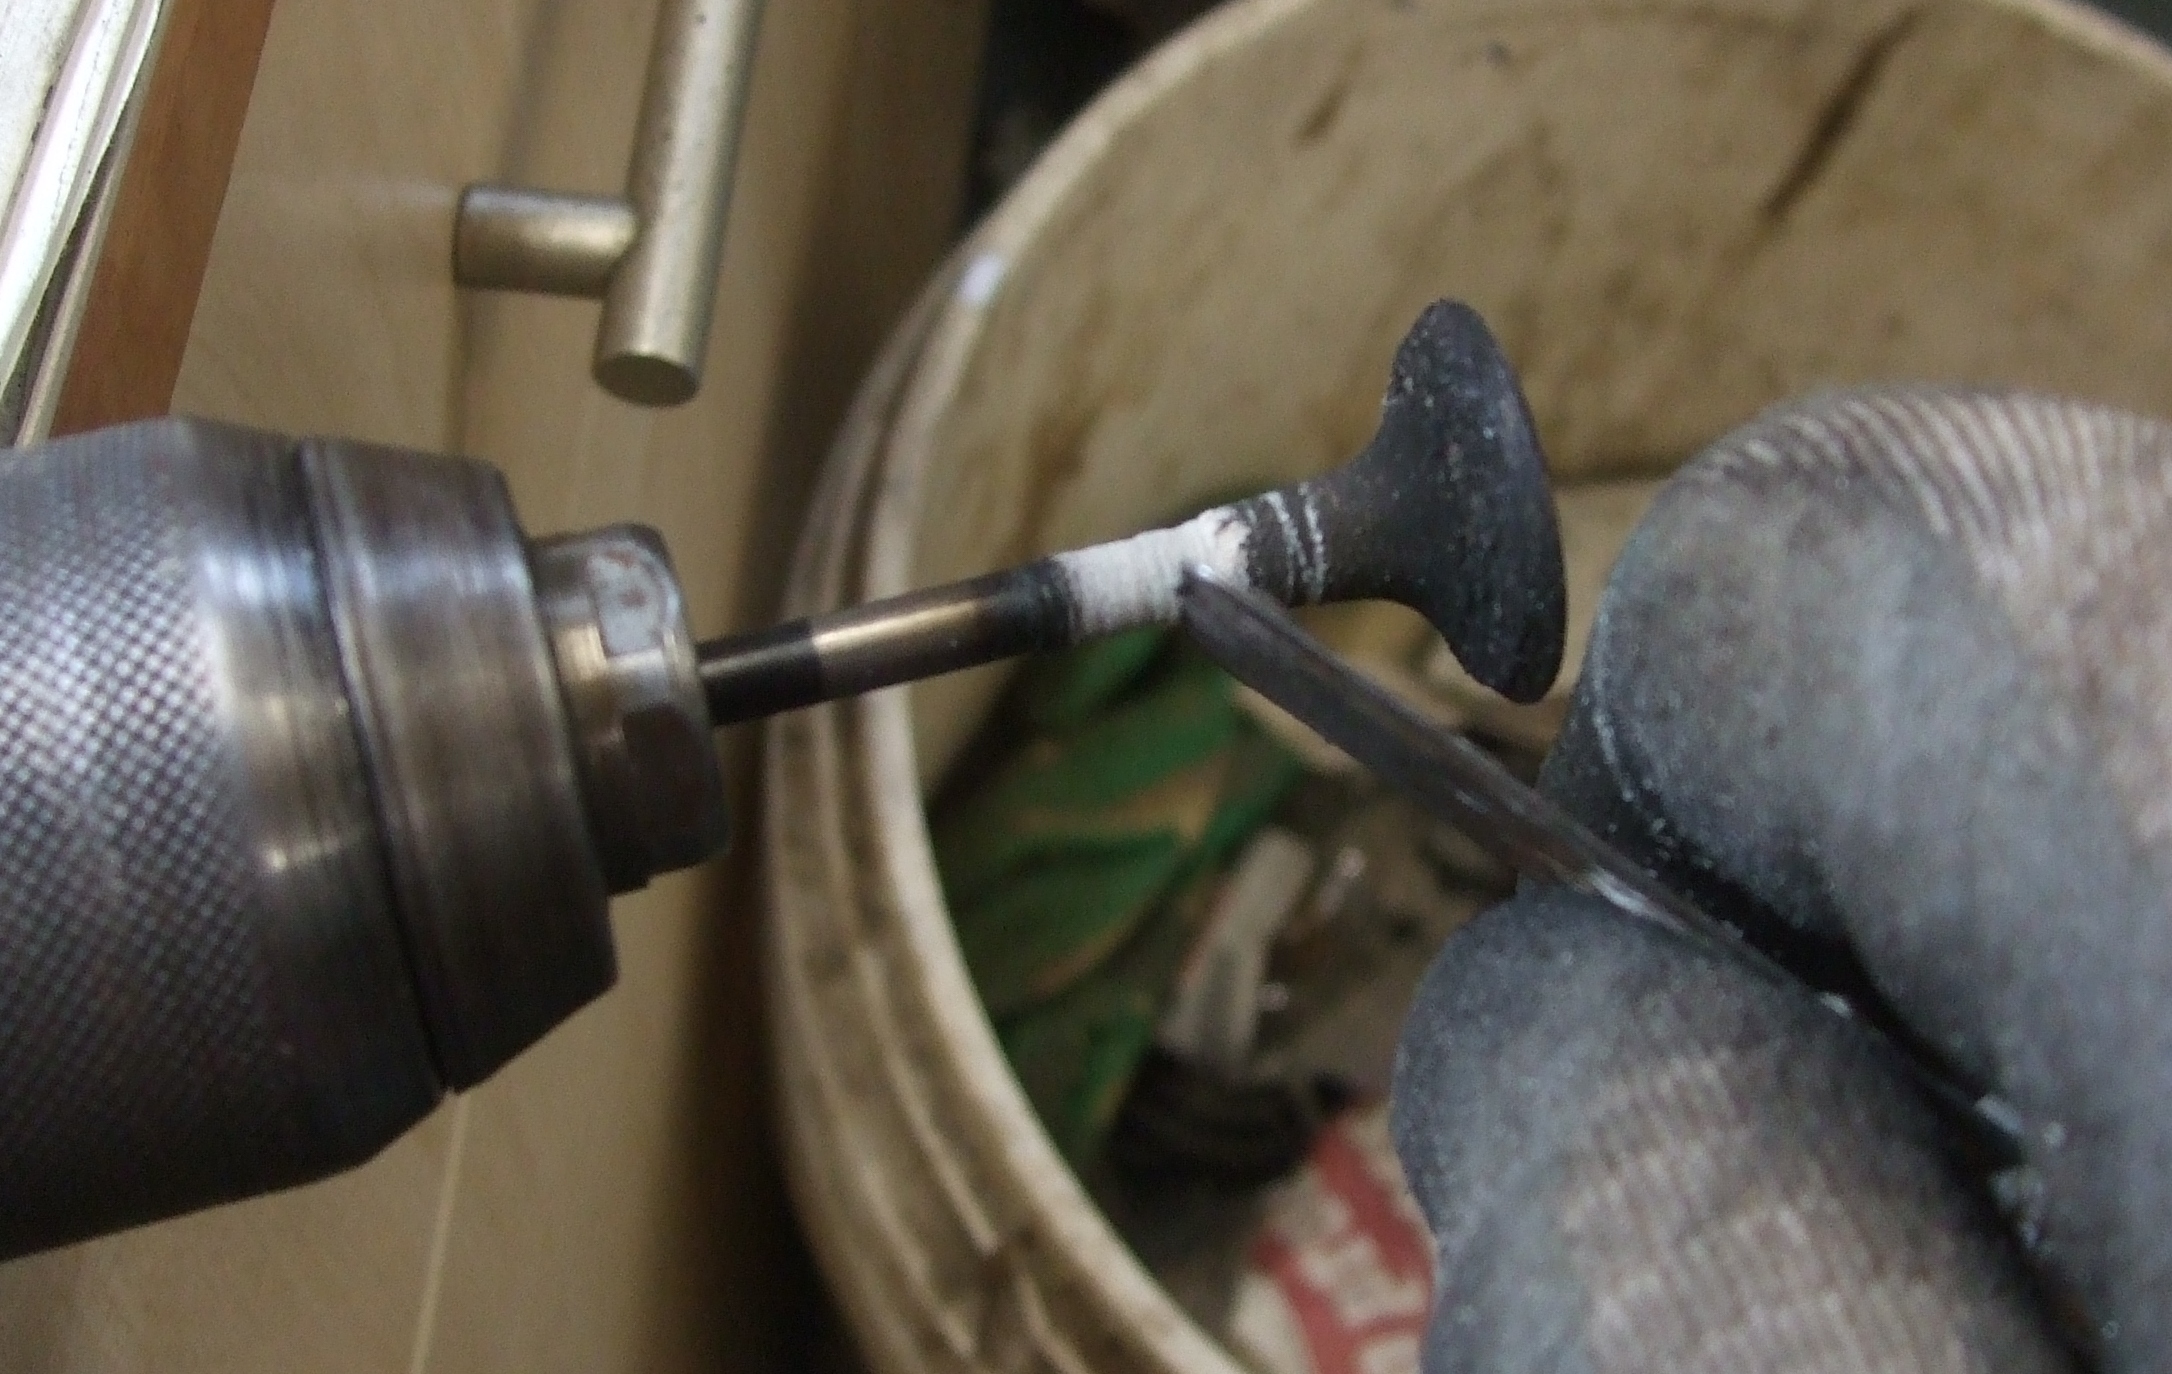
The grinding in process takes a while if doing entirely manually but several decades ago I bought a little device that goes in the end of an electric drill and oscillates the valve which makes grinding in the valves a relatively quick process. Mine is a Draper which seems unavailable now but alternative makes of the tool are available from eBay.
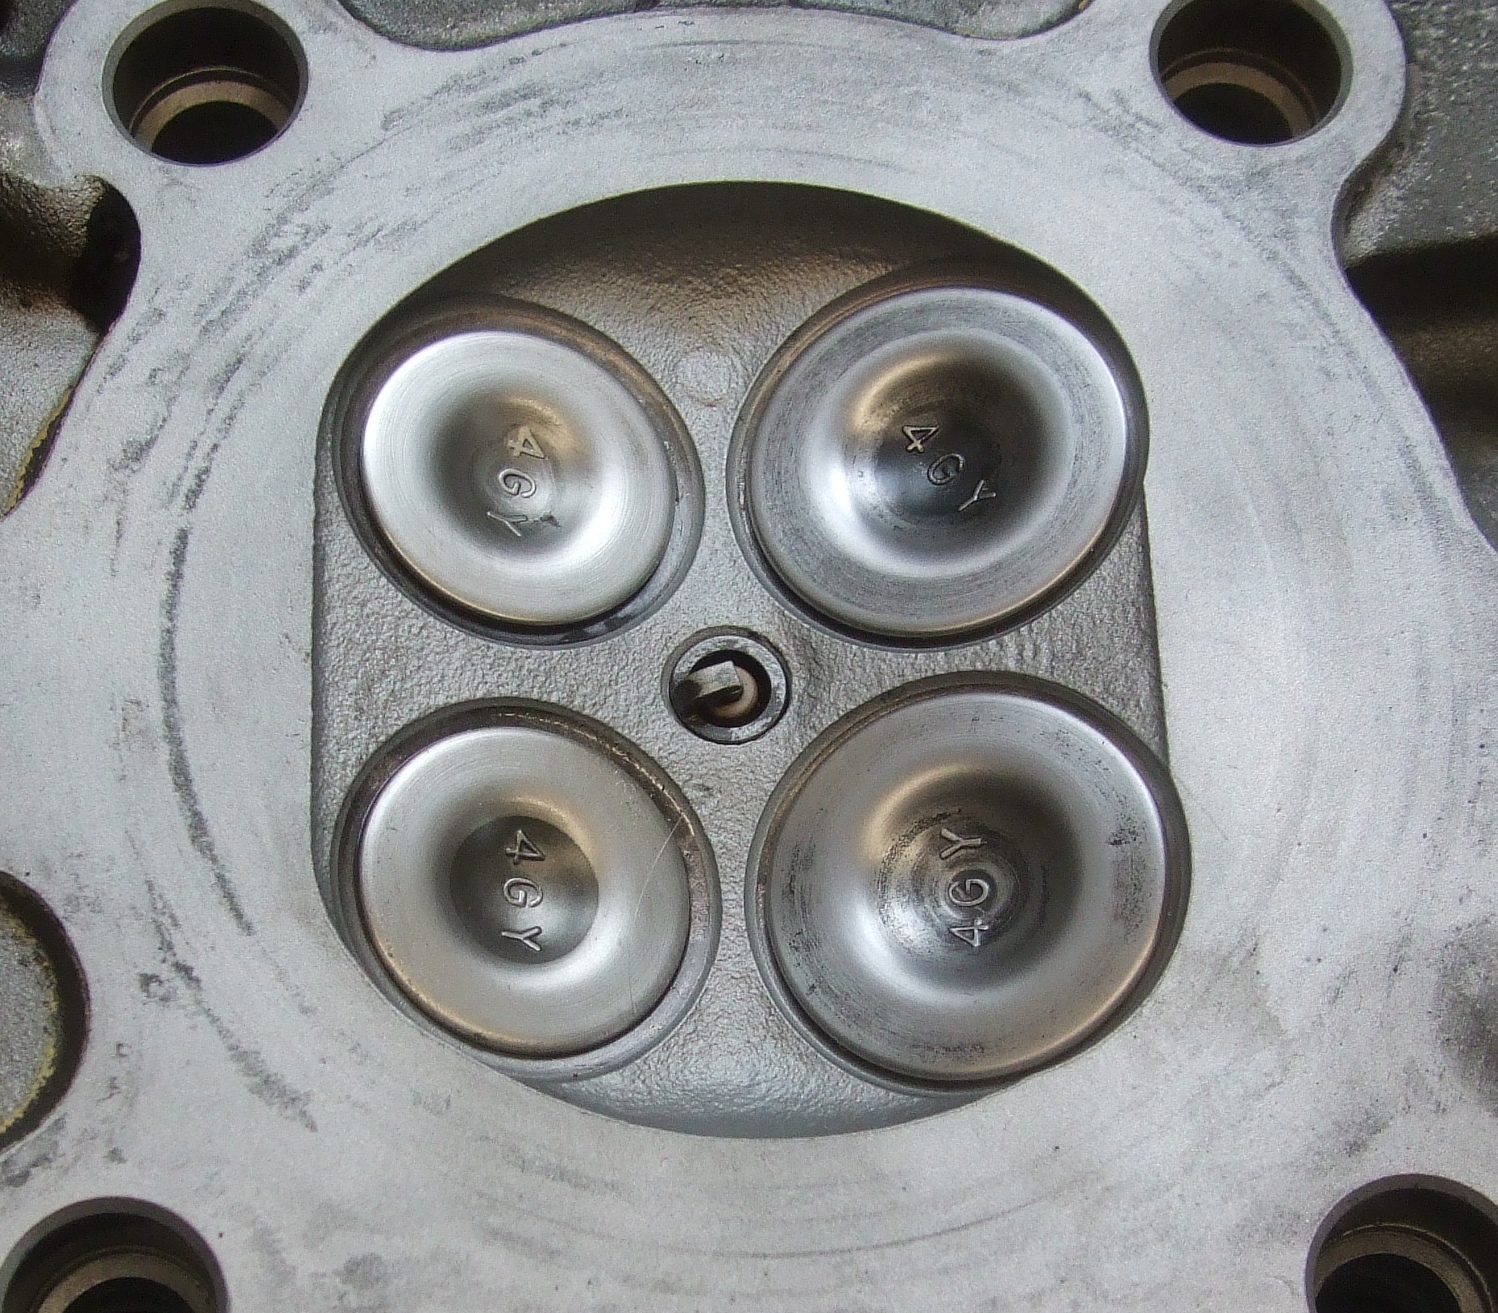
It should only be necessary to use fine grade grinding paste to get a good seal.
Before the next stage, make sure that you have cleaned off all the valve grinding paste and particularly that there are isn't any on the valve stems!
Now turn the head over to do the more difficult job.
If you don't know when the valve stem oil seals were last replaced then now is the time to do it. New seals are a nice olive green colour. Old seals that have hardened and lost their effectiveness tend to look black. Cost for the four genuine Yamaha seals is just over £30.
The diagram below shows how the valve springs etc are assembled:
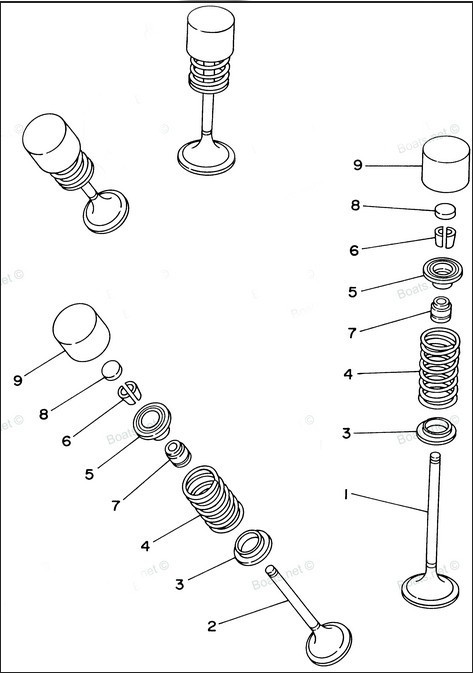
If you are re-using the original valve springs then there is a pinkish white
section which should be at the top.
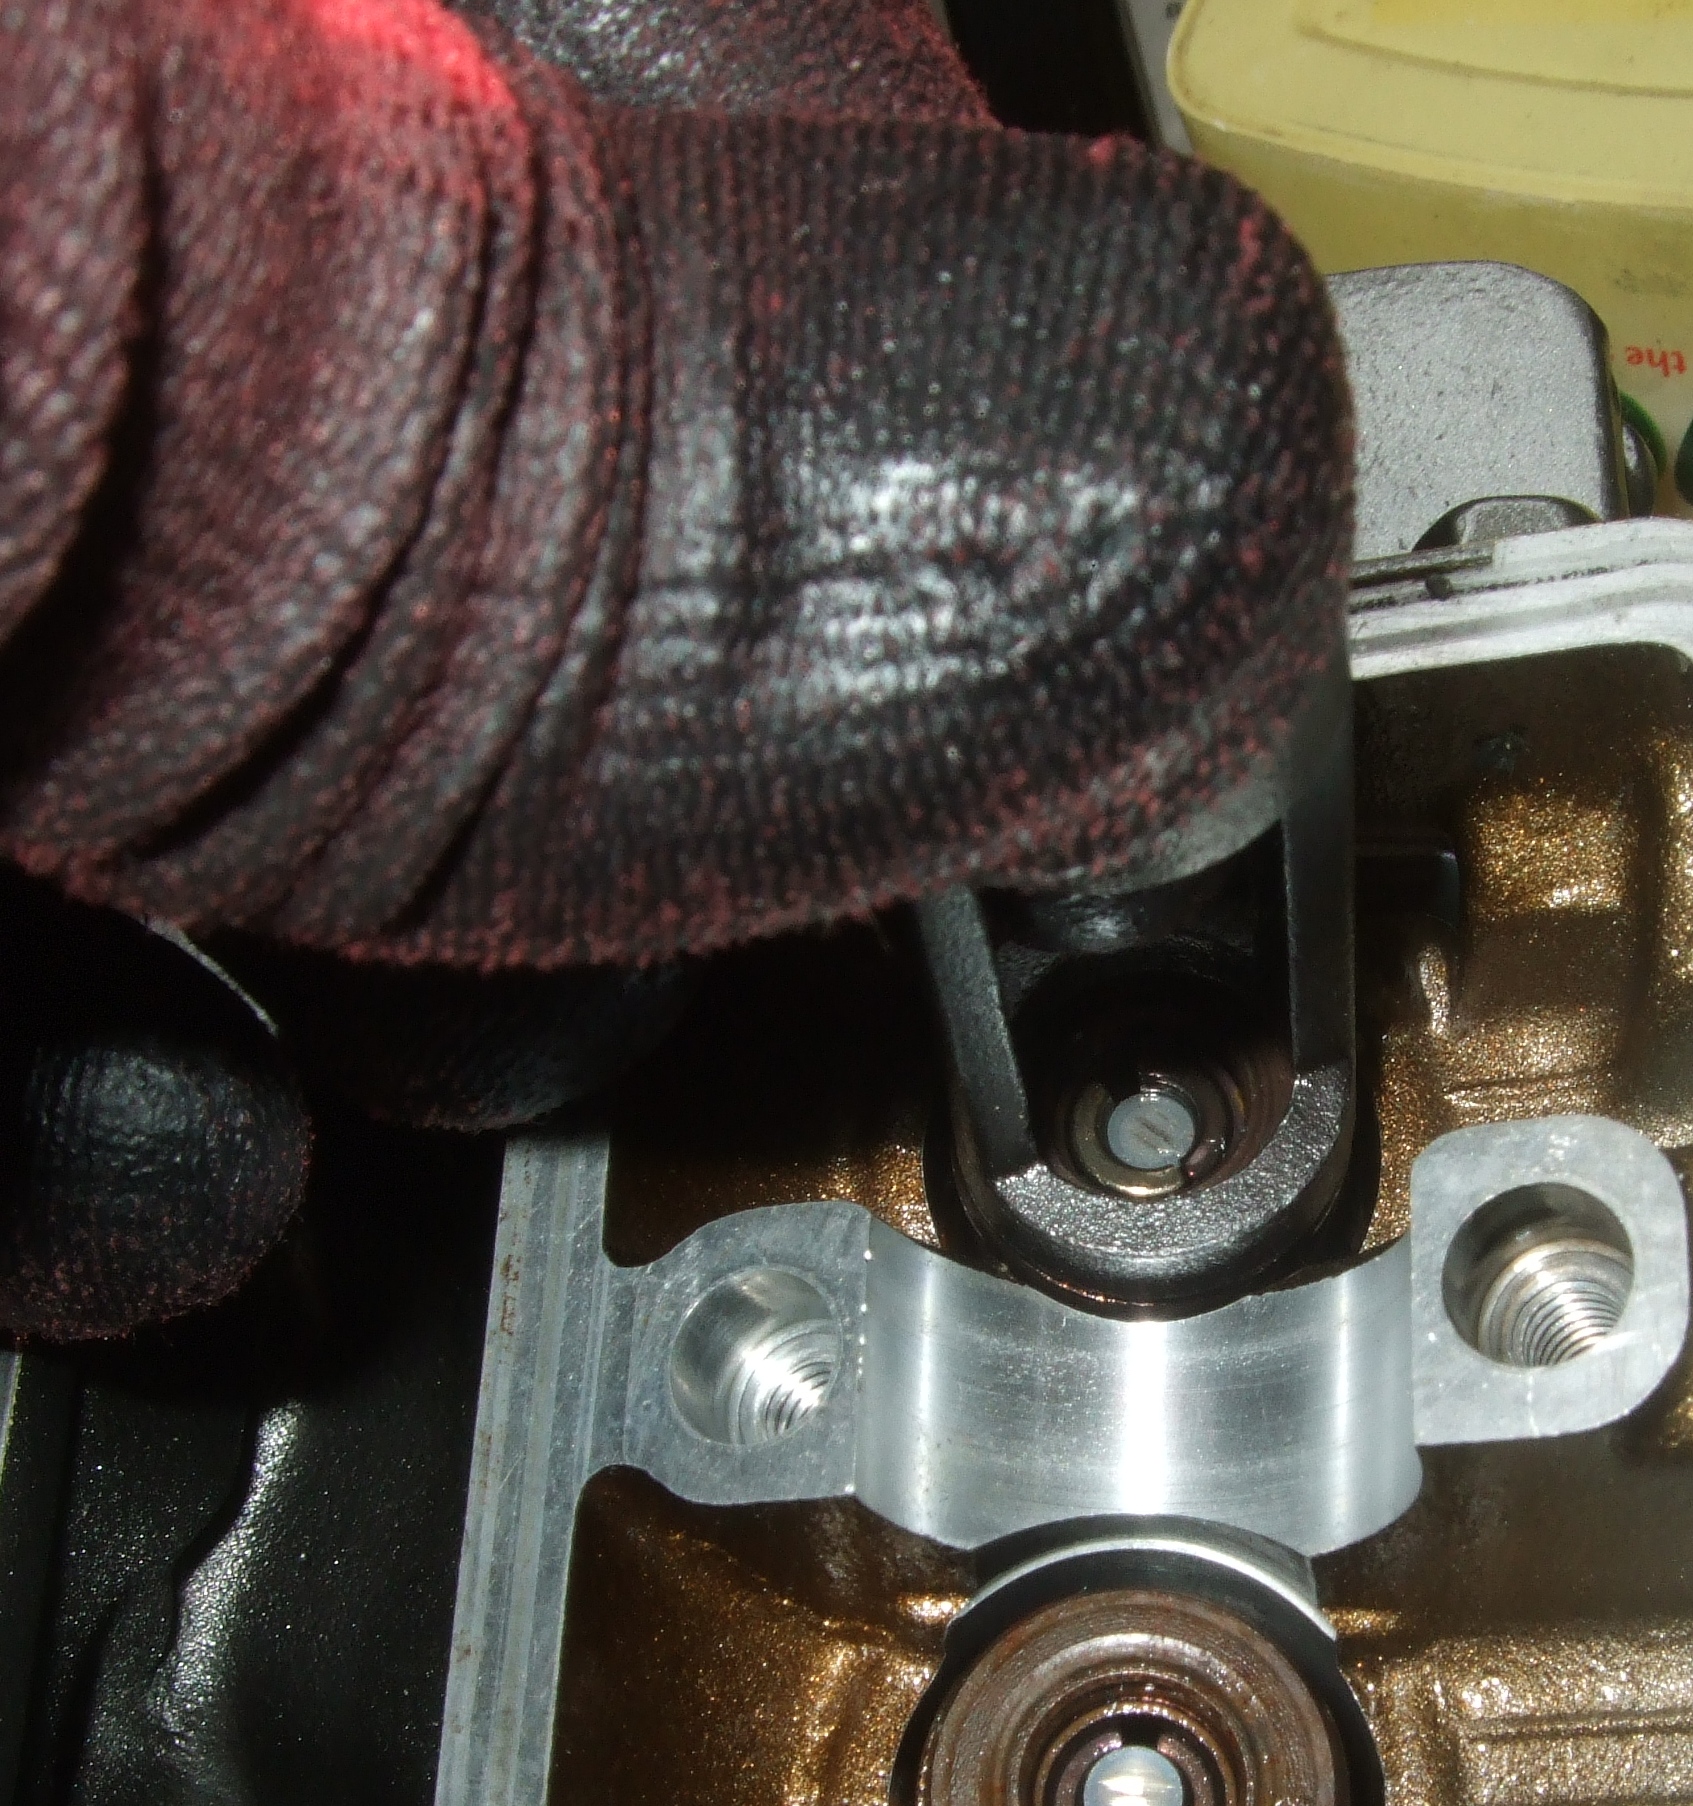
Using a valve compressor is a bit cumbersome but I have strong thumbs and am
able to compress the springs enough to fit the collets (also known as keepers)
which saves a lot of time. Ideally, you would have use of a collett fitting tool
as shown
here which makes a fiddly job dead simple!
There is a guide to adjusting the valve clearances here,
Job done!
Brian Sussex
Compiled by Brian Sussex, Devon, UK
http://www.totallyttrs.com/
- everything you need (possibly!) for
your TTR250
http://www.ttr250.com/
- all you ever wanted to know
about TTR250s
http://ttr250.activeboard.com/
- the forum for TTR250 owners
http://www.totallywrs.com/
-
for all your WR250R and WR250X after-market parts and accessories
Reference within this site to any specific commercial or non-commercial product, process, or service by trade name, trademark, manufacturer, private individual or otherwise does not constitute or imply an endorsement, recommendation, or favour by Totally TTRs