First step after getting the bike on the stand is to . Then loosen the Jubilee clip on the shock reservoir and move that back out the way.
DISCLAIMER: The modifications described in the following text are for educational purposes only. In no way do I recommend that you apply these modifications to your own motorcycle. If you do choose to go ahead and modify your motorcycle based on the information in this document you will accept all responsibility for your own actions. The author(s) of this document, and host(s) providing it for you, accept no responsibility whatsoever. If you are unqualified to make any of the changes described herein but are bent on doing the modification, seek out a knowledgeable friend or professional mechanic for assistance.
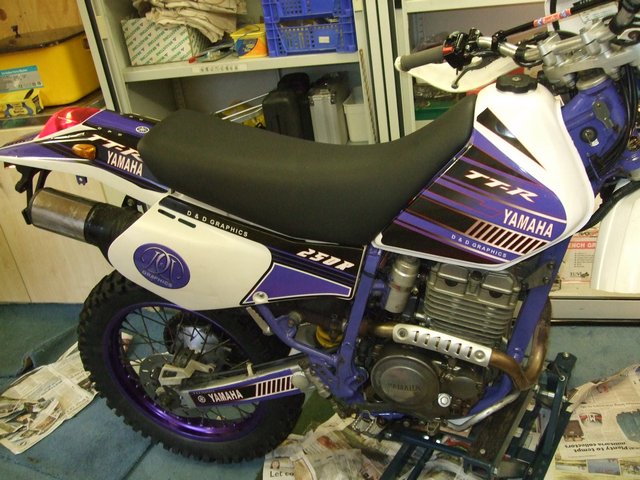
Removing and replacing a cylinder head on a Yamaha TTR250
There is quite a lot of work involved and it is essential that you have the workshop manual to hand for full details of the procedures, torque settings, etc.
However, the manual expects you to be removing and replacing the cylinder head as part of a full strip down and that is not always going to be the case.
This pictorial guide assumes you ONLY want to deal with the cylinder head and is just to help you along the way.
Tools needed:- I used just about every tool I had in the toolbox - and others beside!
Parts/supplies: Head and base gasket set and cylinder base O ring.
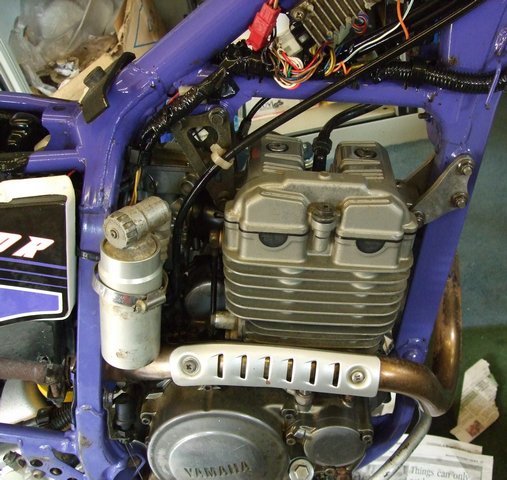
Before you start, remove the seat and petrol tank and power wash the area above the cylinder head so that no dirt can drop into the engine when it is being dismantled.
Then make sure that the bike is safely on a stand and at a comfortable working height - if at all possible. Make sure the floor and working area is clean. I tend to rob the recycling bin of old newspapers and lay them around to give a clean absorbent surface on which to put down any parts removed.
Ideally you will remove the airbox and carb but this is not essential.
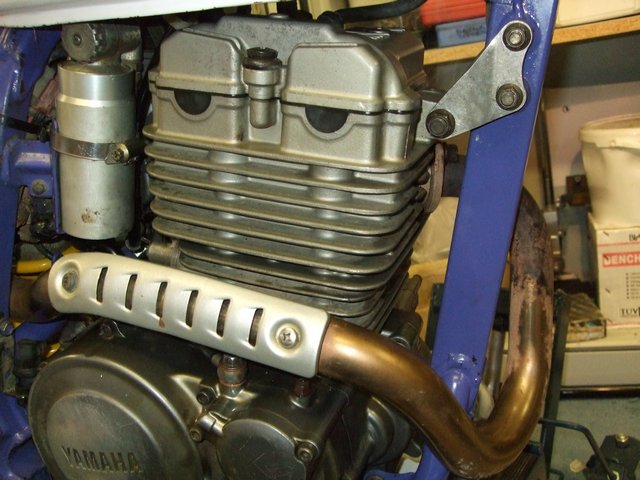
First step after getting the bike on the stand is to . Then loosen the Jubilee clip on the shock reservoir and move that back out
the way.
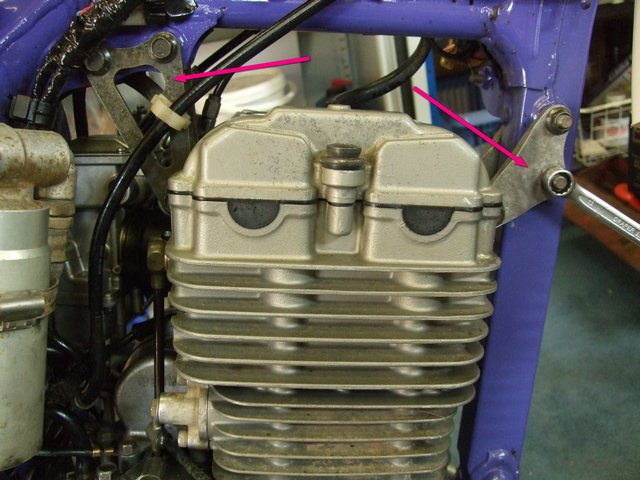
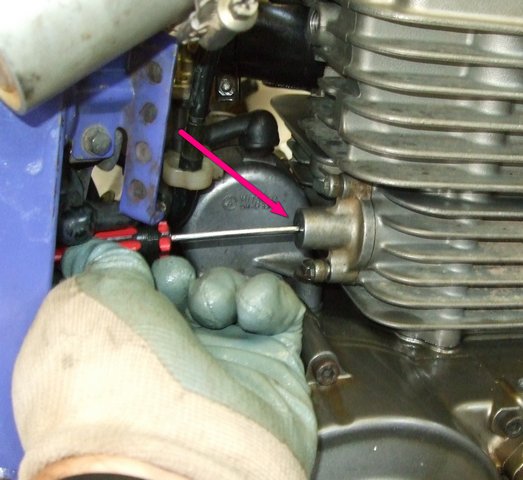
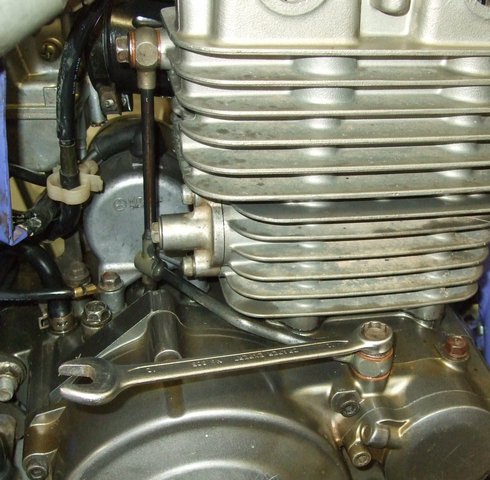
You now have access to remove the exhaust down pipe and the head steadies
(arrowed).
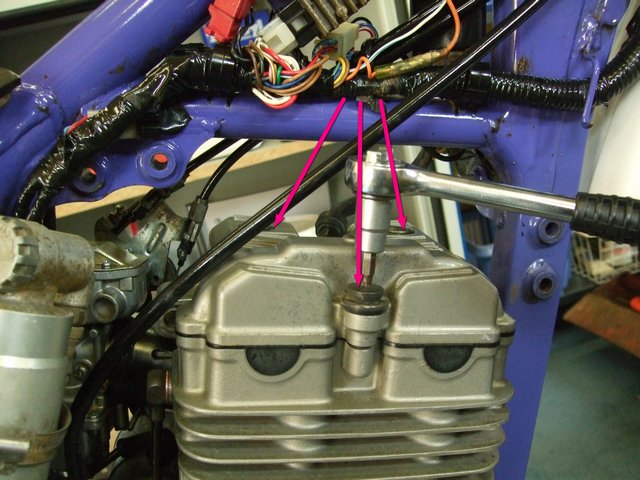
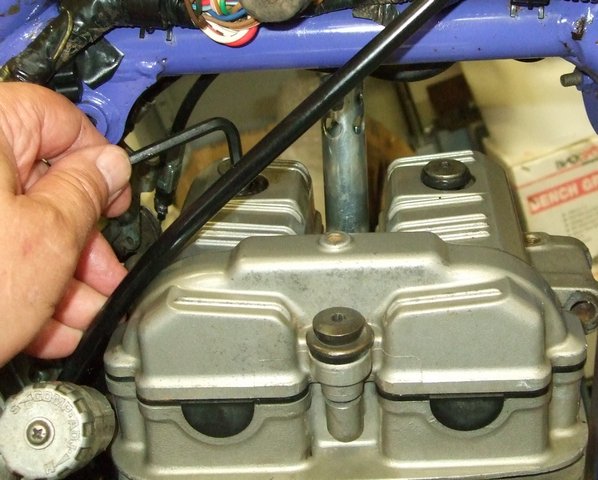
Next remove the three Allen bolts and take off the cam cover being careful not
to damage the
rubber gasket.
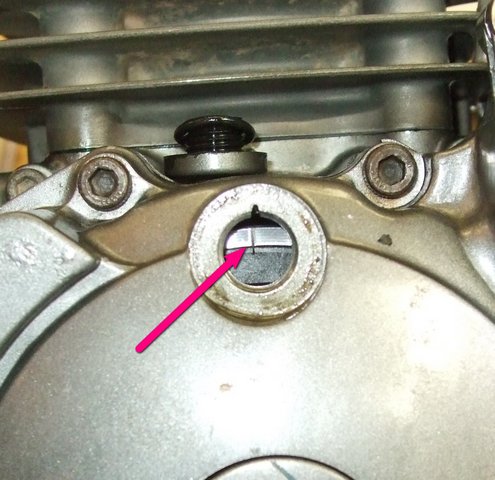
No kick start on this TTR so I put the engine in 6th gear and turned it to the TDC
mark using the rear wheel. TDC is the SINGLE mark and not the H shaped
mark about half an inch away.

Remove the Allen bolts and take out the cam chain tensioner.
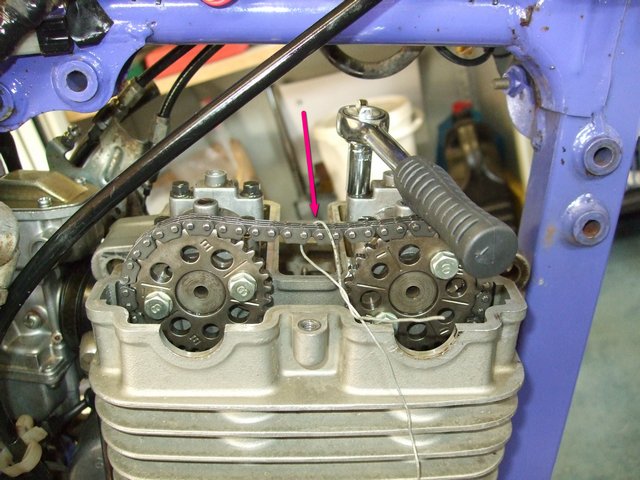
In this rebuild I used a bit of wire around the cam chain to stop it falling down into the
crankcase but I had a bit of a disaster on a later build when a bit of wire
broke off into the engine so I now use plastic covered wire. Pack something like a lint-free cloth down
or newspaper below the cam whilst
removing each bolt, as you really don't want to have to retrieve it from the
crankshaft having let it drop in. That would ruin your day! Remove cloth once
bolts are safely out of the way. The bearing caps and cams can then be removed.
The wire is holding the cam chain out of the way securely.
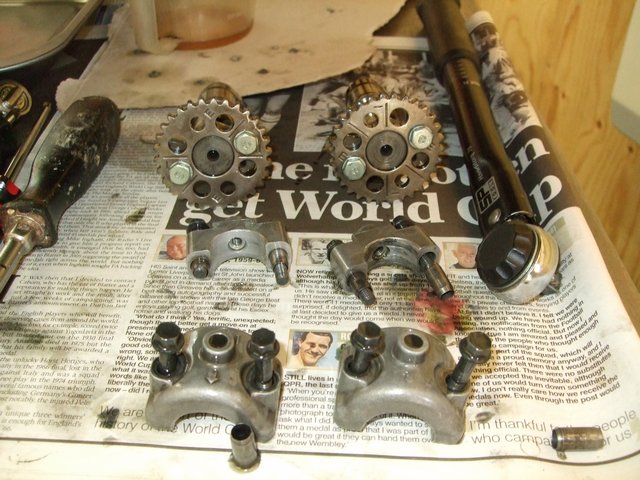
Place the removed cams and caps in the correct order on some newspaper.
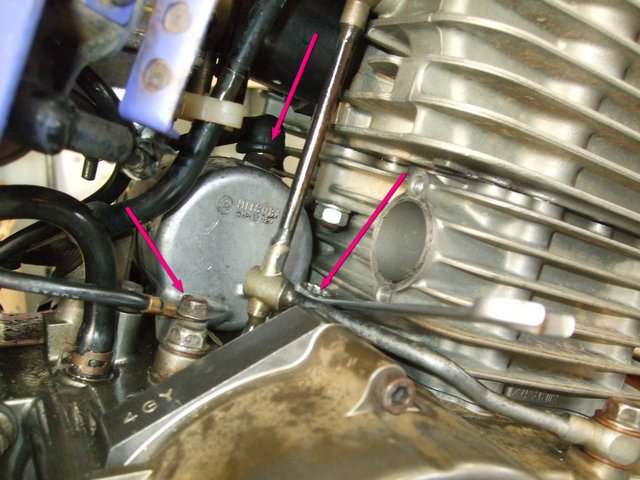
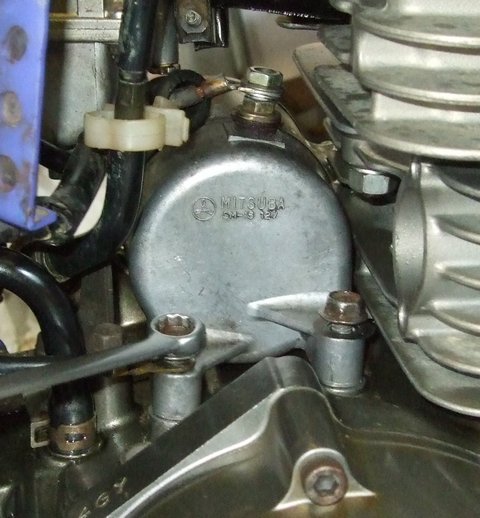
In order to access the head retaining bolt at the back of the engine I recommend
removing the starter motor which is a fairly simple job after the oil pipe has
been taken off. It is held on by two bolts plus a nut
holding the terminal as arrowed.
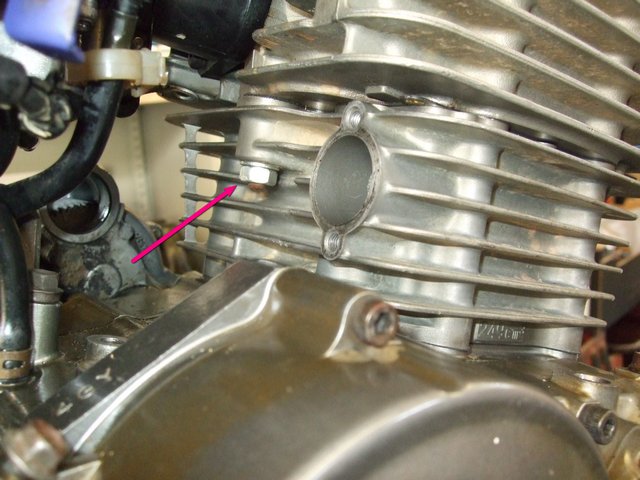
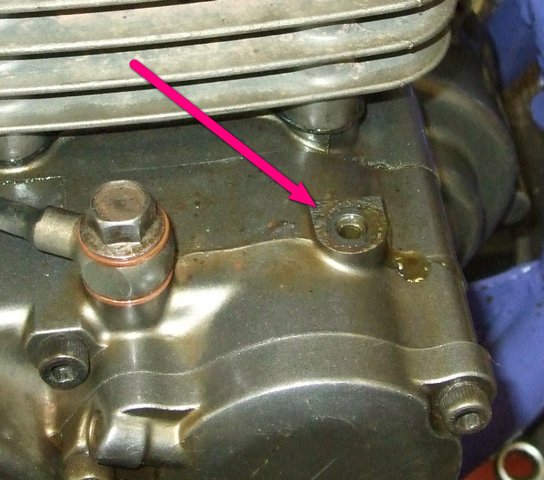
The oil pipe is also removed giving clear access to the head retaining bolt
arrowed in the picture.
Remove the 4 large cylinder head bolts, the two external "upside down" nuts (as
shown in the photo above) and the two Allen-headed bolts in the cam-chain case.
The head can then be removed.

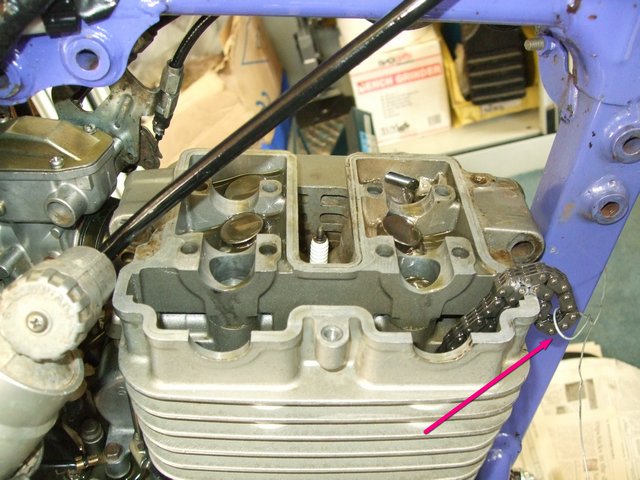
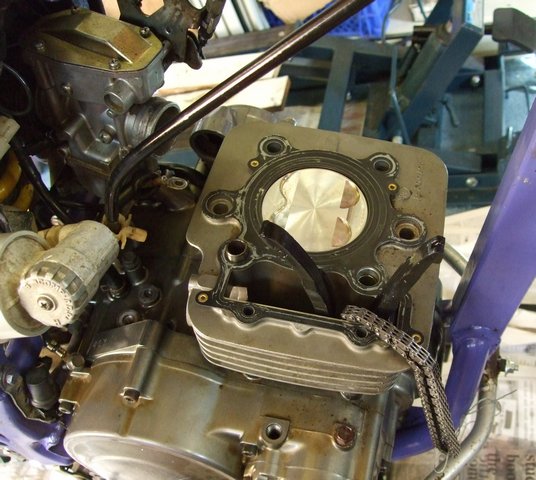
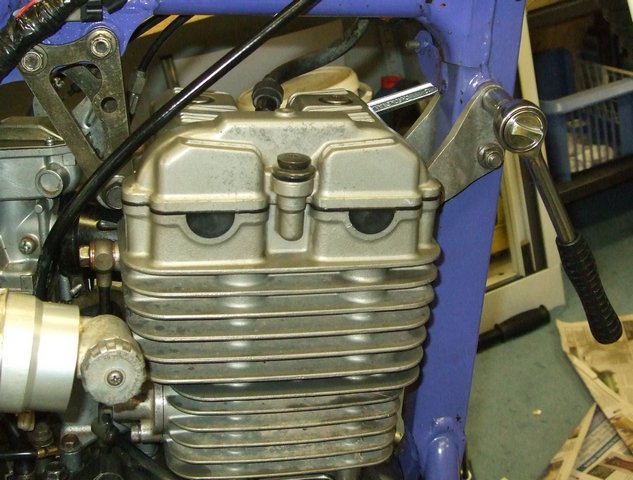
Another view of the cylinder barrel with the head removed. This is as far as you
need to go if you are replacing a head gasket or have other work to do on the
cylinder head. In my case this was to Helicoil a stripped thread which isn't
accessible with the head in place.
A guide on cleaning up the valves can be found here.
However, it is too good an opportunity to miss if you haven't been inside your engine before. Lift off the barrel and examine your piston, rings and bore for wear or damage and action as necessary. At the very least consider fitting a new set of piston rings before putting everything back together again. It is also a good opportunity to replace the cylinder base gasket and O ring to help prevent any possible oil leaks after the rebuild.
NB You will find that as soon as the head bolts are removed the cylinder base will move on the crankcases and I have found that, more often than not, this breaks the cylinder base gasket meaning the barrel has to come off to replace it.
Ideally, whilst you have the head on the bench, fit the camshafts and check the valve clearances and, if any adjustments are necessary, fit the correct shims to bring the clearances within specification. There is a guide to adjusting the valve clearances here,
So, assuming you have done everything you need to do with the head off, it is time to start putting everything back together again.
At this stage it is worth checking the rear cam chain guide where the tensioner pushes against it. Check the "punch" mark as the guide can sometimes get damaged at this point.
Also check the carb intake as sometimes the rubber section can come away from the aluminium stub that bolts it to the head,

The head is now being replaced using a new head gasket. It is sometimes a bit of
a struggle to get the carb lined up with the rubber inlet manifold but this is
easily remedied with a bit of friendly persuasion with a large flat blade
screwdriver or similar.

Ready to replace the head bolts.
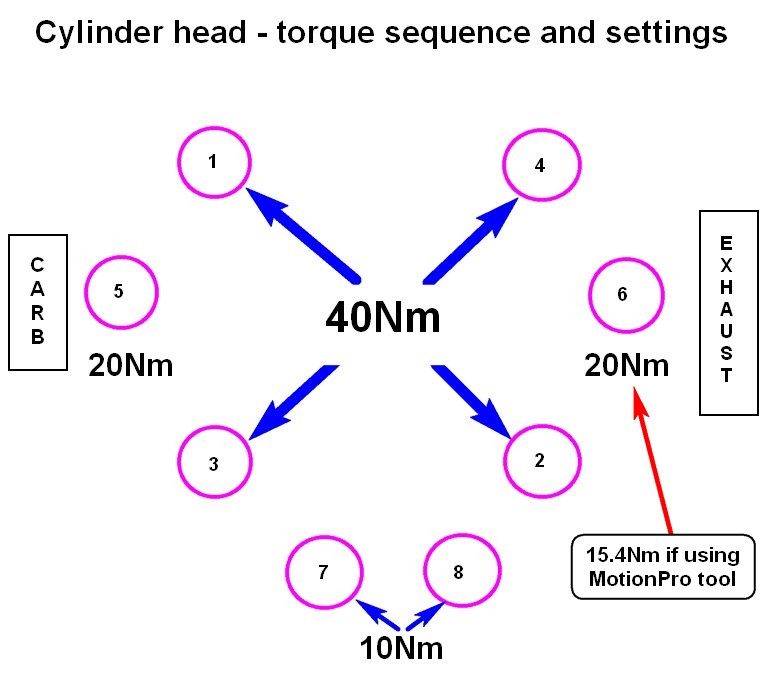
To save messing up the manual, I have printed and laminated the head tightening sequence and
torque settings but otherwise jot then down on a scrap of paper.
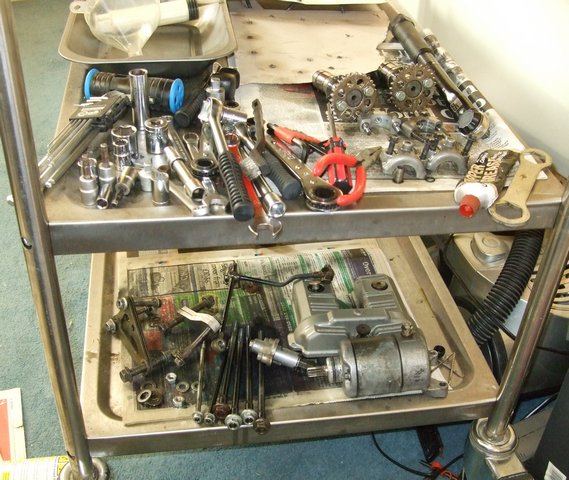
All the bits on the trolley (along with the tools needed) ready to refit!

Be sure to follow the correct tightening sequence and torque to the correct
settings as in the manual.
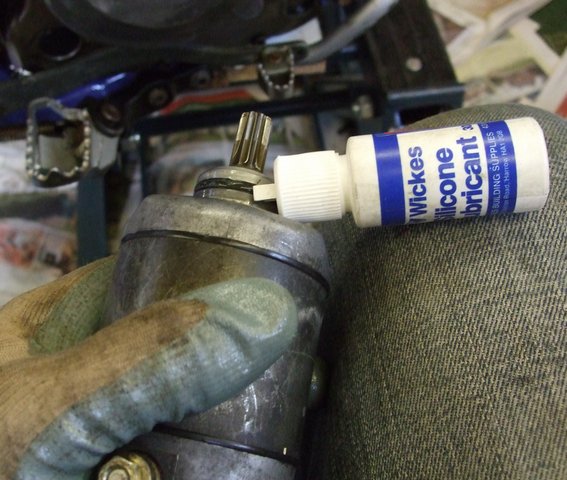
Before replacing the start motor, I just put a bit of silicone lubricant on the
rubber seal. Whilst the starter is out, it's a good opportunity to check the
condition of the pinion teeth. Mine were perfect - phew!
Replace the terminal nut and two retaining bolts on the starter motor.
Double check the engine hasn't moved and that it is still at TDC i.e. the SINGLE
mark and not the H.

Rest the cams back in the head with the markings as shown in the manual. Again.
I tend to draw a diagram (arrowed) to save mucking up the manual. When placing
the chain back on the sprockets make sure you are tensioning it over the front
sprocket.
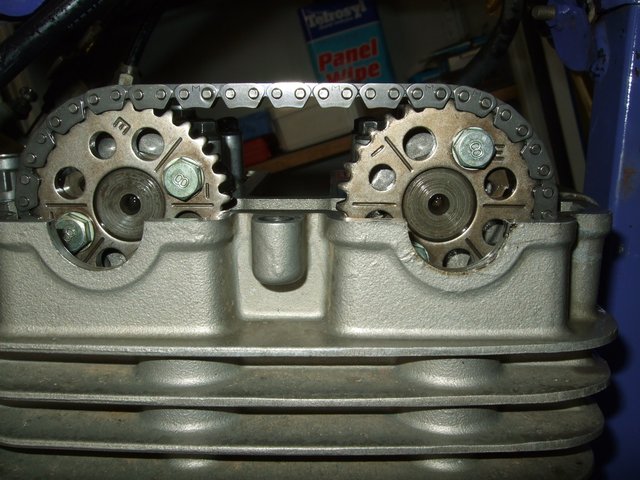
Ensure both cam lobes are pointing away from each other (see pic below), and alignment markers
are as shown in photo above.
Cover everything well with clean oil!
Replace the caps and carefully torque them up.
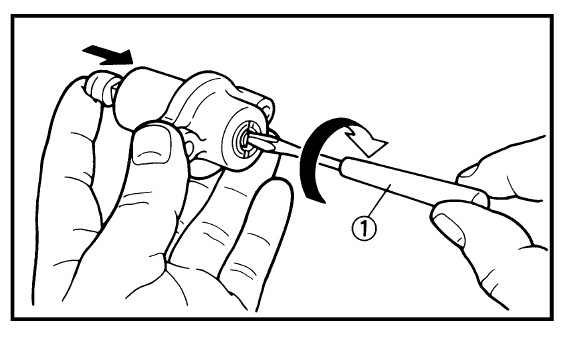
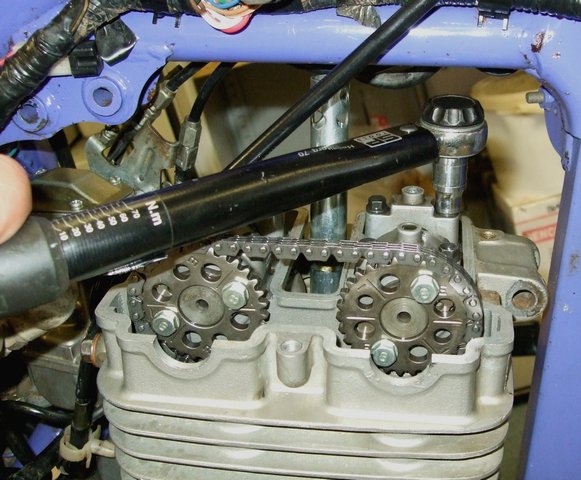
The workshop manual shows how to wind in the tensioner before
fitting. The tensioner rod is spring loaded so, whilst pressing the tensioner
rod inward, lightly wind the the tensioner rod up fully with clockwise turns of
a thin screwdriver.
This can be tricky! I never seem to have a screwdriver short enough to make replacing the tensioner an easy job and, since taking the photo above, a mate (ttrsteve) made me one up out of a spare IKEA flatpack hex key and kindly donated it to me after we had finished using it on his engine.
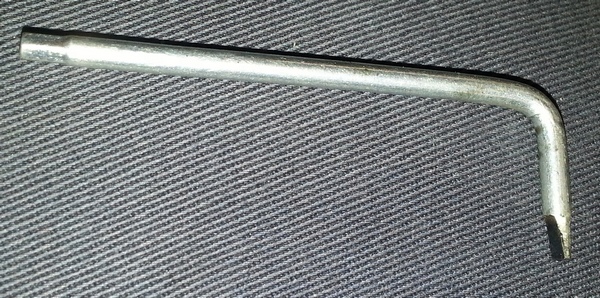
What is nice about it is that it sticks in the slot leaving two hands free.
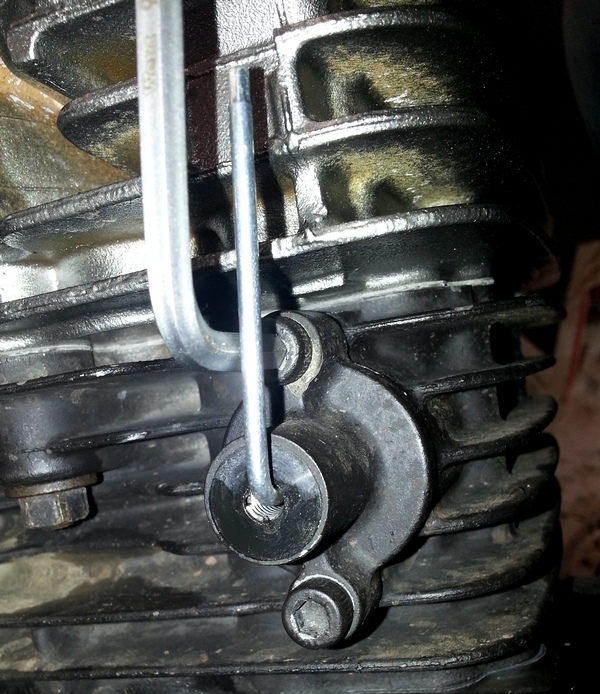
So, to repeat, use the best tool you have to turn the tensioner head inside the bolt hole which will pull the spring-loaded tensioner rod into the body of the tensioner. Hold the screwdriver in place whilst replacing the tensioner and the 2 bolts to hold it in place, and then gently release the screwdriver allowing the plunger to extend. There should no longer be any slack in the cam chain.
Roll the engine forward at least 2 more full revolutions, then check the cam timing again. Better to find out now that it's moved, rather than when it's all back together!
The engine should turn over smoothly with no binding or clunks. It is important to do this test before using the starter motor as that has enough force to bend valves etc if there is a problem.
Replace the oil feed pipe on its three banjo bolts using
new copper washers if
you have them. Otherwise you can anneal the old ones.
Replace the cam cover and the retaining Allen bolts.
Before going any further, check that you have an oil feed by
taking out the check bolt and turning the engine over on the starter with the
sparkplug out (but grounded!).
Assuming all OK, the exhaust and head steadies can be replaced.
Tighten everything up including the carburettor retaining circlip and you are
ready for a test start.
Recheck everything is tight before starting engine and that you have refitted
the oil breather pipe on the cam cover of later engines.
Make sure the doors and windows in your workshop are open and start up and run
for a short while to check for any oil leaks etc.
Listen for any strange noises, and SWITCH OFF immediately if you hear any as you've not finished yet if this is the case. Hopefully you will have no problems.
Job done!
Brian Sussex
Compiled by Brian Sussex, Devon, UK
http://www.totallyttrs.com/
- everything you need (possibly!) for
your TTR250
http://www.ttr250.com/
- all you ever wanted to know
about TTR250s
http://ttr250.activeboard.com/
- the forum for TTR250 owners
http://www.totallywrs.com/
-
for all your WR250R and WR250X after-market parts and accessories
Reference within this site to any specific commercial or non-commercial product, process, or service by trade name, trademark, manufacturer, private individual or otherwise does not constitute or imply an endorsement, recommendation, or favour by Totally TTRs