 Custom Search
Custom Search
Custom Search
If you own a TTR250 please join the
TTR250 Group here
http://ttr250.activeboard.com/
![]()
DISCLAIMER: The modifications described in the following text are for educational purposes only. In no way do I recommend that you apply these modifications to your own motorcycle. If you do choose to go ahead and modify your motorcycle based on the information in this document you will accept all responsibility for your own actions. The author(s) of this FAQ and host(s) providing it for you accept no responsibility whatsoever. If you are unqualified to make any of the changes described herein but are bent on doing the modification, seek out a knowledgeable friend or professional mechanic for assistance.
General
Pre-Y2K (white) models including differences
between Open Enduro and Raid models
Y2K (blue) models
What's a TTR worth?
What should I look out
for when buying a TTR?
Uncorking the TTR250
Engine information including cylinder head removal and refurbishment
Fuel tank options
Dating a TTR from its frame number
Chain & sprocket information
Handlebars and levers
Can I convert the
digital speedo from kph to mph?
More speedo information
What tyres and tubes are best for on and off road use?
Can I get a big-bore kit for
the TTR?
Can
I fit an oil cooler?
Improving the
headlight, cheap replacement bulb option and installing an on/off switch.
Can I get second-hand parts for my TTR?
Can I modify the exhaust to improve power?
Carburettor
information
What brake pads fit?
Fitting rear brake pads, replacing
master cylinder seals, brake discs/rotor
information and caliper part numbers
Oil changing
Can I get a bash plate and frame guards for my TTR?
Need a grab handle for your
TTR?
Batteries
Kick-start kits
Starter motors
and solenoids
Replacing
the one-way starter bearing or sprag clutch
Clutch information
Fork information including replacing seals
and fork oil
Steering
head bearing
inspection/replacement
Spark Plugs
How can I lower the TTR250?
Where can I get a manual?
Wheel bearings and seal details
Clutch inhibitor switch replacement
and other safety switches
Suspension
Installing a Scott's Steering Damper on a '99
Clogging of front sprocket
on white TTRs
Smarten up your TTR!
TTR250 - Street Legal in
California?
Got a brand new TTR?
Specification comparisons
Further TTR links
A little extra pressie at Xmas?
General:
The TTR250 has an air-cooled, 4 stroke, 4 valve, DOHC single with
electric start, six (fairly close ratio) speed gearbox and disc brakes front and rear.
Owners tend to be very enthusiastic about the model and justifiably so. I am one
such enthusiast and when I first got my TTR I struggled to find any information
on it - hence this FAQ developed. I am now on my third TTR (a new 2004 model) and still
think they are the best all-round trail bike around! I live in Devon, a County
in the beautiful South West of the UK, which has an abundance of unsurfaced
roads also known by trail riders in the UK as "green lanes".
Overall the TTRs are very well made with some nice touches like decent chain guards, chunky spokes, solid-looking alloy swing-arm on the Open Enduro models, engine oil sight-glass, big diameter stainless steel header pipe, hand-adjustable rear damping and, on the blue models, a plastic tank and back-up kickstart. Starts well and has a quiet smooth engine with a light clutch and lots of low-down torque. The gears are nice and close and give relatively brisk acceleration in the lower gears and, by the time you get to 6th, you have a proper high road gear. Very comfortable to ride with quite firm and well-damped suspension. The engine is quite sophisticated for an air-cooled lump and incorporates a pumper carb. Yamaha have thoughtfully routed the carb breather pipes up over the airbox and have one-way valves on the drain pipes which prevents cutting out in deep water.
The road legal version was available in the UK between 2003 and 2005 and Yamaha UK officially imported approximately 781 units. In other parts of the world, the TTR250 was available for longer e.g. up to 2011 in Australia by which time they were produced with a black frame.
TTR250s are particularly suitable for those starting out on trail riding. They are not too tall (and lowering links are readily available for those with a short inside leg) and have the all-important electric start. Having taken out a lot of "newbies" trail riding, an electric start can make the difference between exhaustion and an enjoyable experience as, invariably, there will be lots of stalling and perhaps a few gentle offs. Four strokes in particular don't like going horizontal - restarting without an electric start can be difficult.
The TTR handles beautifully off-road and can be chucked into bends and flicked around in an impressive manner. It also tracks very nicely through, and across, ruts. The suspension is very good and absorbs bumps and roots really well but doesn't wallow or bottom out on the bigger whoops.
In areas where there is quite a bit of
roadwork to be covered between the lanes, the six-speed box comes into its own.
Yamaha WRs, Honda CRFs etc all suffer from being buzzy on the road because they
have only five gears. The TTR's all-day comfy seat is an added bonus when
compared to the razor-like planks that pass for seats on some off-road bikes.
Model numbers:
| Yamaha TT250R (4GY1) | 1993 / 4 |
| Yamaha TT250R Raid (4GY3) | 1994 / 3 |
| Yamaha TT250R (4RR1) | 1995 / 3 |
| Yamaha TT250R Raid (4GY5) | 1995 / 4 |
| Yamaha TT250R Raid (4WA1) | 1996 / 3 |
| Yamaha TT250R (4RR2) | 1997 / 1 |
| Yamaha TT250RL | 1997-99 |
| Yamaha TT250RM/RN/RP/RR/RS/RT/RV/RW/RX/RY/RZ/RA | 2000-11 |
![]() Back to top of page
Back to top of page
Pre-Y2K (white) models. There are basically two models: the Open Enduro and
the Raid. The TTR is a very
civilised traillie that the UK Trail Bike and Enduro Magazine (TBM) described as being "as civilised as it is
competent". Only a handful of TTRs was imported into the UK back in 1995 by
Mitsui Yamaha and were never classed as "official" imports. They seem not to have sold well - not because they weren't good bikes -
but because of what was described as an "exorbitant" price tag at the
time of £4,000 plus.
There seemed to be a lot of unofficial imports between 1993 and 1995 (white
plastics and metal tanks) after which there seems to be a gap until the new
"blue" TTR (plastic tanks) became available and sold officially by Yamaha in the
UK.
The Open Enduro model
has a well specified suspension set-up with adjustable
units front and rear. The very capable quick-steering front end has a
leading axle and air-damped forks with over 10" of travel. The rear has Yamaha's
own rising rate monoshock with a remote reservoir that allows adjustment for
both compression and rebound damping and about 10" of travel as for the
front forks. It has a steel frame with a heavy duty aluminium swing arm
and distinctive purple anodised wheel rims which you either love or hate! The
engine thrives on revs (rev limited by the CDi to 10,200rpm) but has enough bottom end to plonk along at low revs and
still pull cleanly from nothing. Quoted at 28bhp @ 8,500rpm
The
differences between the Raid and Open Enduro models:
·
the tank is larger on the Raid hence if you fill
it right up its going to add weight over and above that of the OE
·
the headlight assembly on the Raid is more
suitable for road or use on night trials but it is a fairly hefty (4lbs weight
compared to 1lb 4oz of the OE plastic unit) item with a mild steel protection bar
·
the Raid doesn't have adjustable rear compression
damping i.e. "Hard-Soft" clicker adjustment on the rear shock "reservoir whereas
most OEs have them
·
the Raid’s side panels are more like “pods” -
there is a useful plastic box under the left hand one containing the tool kit
·
chain size and gearing is different with a 520 on
the Open Enduro and a 428 on the Raid
·
the rear sub frame is also different as are the
seat layouts – the Raid seat is lower (about 35” off the ground compared to the
OE’s 36.25”) and flatter. It’s designed for more sat down, long distance work
but is a lot better than the OE if you want to carry a passenger
·
rear footpegs on the Raid are mounted separately
onto the sub frame and on the Open Enduro are small alloy ones mounted direct to
the subframe.
·
the Raid swing arm
and linkage arm are steel - it is alloy on other TTR models
·
the front fork
internals are different to the Open Enduros
·
specification for
the OE
is on this FAQ
![]() Back to top of page
Back to top of page
Y2K (blue) models.
Since about 2000 all new TTRs have had blue "YZ" plastics and plastic tanks.
They are based on the Open Enduro version rather than the Raid. The front
forks have air valves for adjusting the spring rate and a damping adjusting
screw for adjusting the damping force. The rear shock has the usual spring
reload adjustment, rebound damping force adjusting dial and a compression
damping force adjusting knob.
The TTR250 is well known in Australia for having won its class in the national enduro
championships, piloted by Geoff Ballard!
The models sold in Europe have electric and kick start as standard
making them "dual start" as well as having revised (quicker) steering geometry
and suspension. The TTRs that were supplied to the USA are ONLY electric start.
The TTR250 was still available new in Australia (and the frame changed to black)
until 2012.
It was also dual start!
Apparently the 1999 TTRs sold in Australia, despite being the blue plastic tank
models, have the 6-plate clutch and the older engine from the "white" TTR model
fitted.
![]() Back to top of page
Back to top of page
How much should I pay for a TTR250?
In the UK, older "white" TTRs resell for between £1,800 and £2,400 with blue
models in good condition costing £2,000 upwards. It is worth paying more for a
good example not needing engine or cosmetic work. New TTRs are no longer
available anywhere in the world. The TTR250 was still an "official" import into Australia/NZ
until 2012. In recent years, particularly in the UK, the TTR250 has achieved
"classic" trail bike status and prices for good examples have risen such that a
fully restored 2004 model went recently for over £3,000!
![]() Back to top of page
Back to top of page
Uncorking
the TTR250
Two freebie mods to start with:
1. Look under the tank at your throttle linkage and you will notice that Mr
Yamaha installs a stop screw that limits you to less than full throttle. Adjust
the screw to allow full travel of the throttle linkage but to stop it just
before the throttle slide hits the top of the carb. Some riders take the screw
completely out but I wouldn't recommend that.
2. If you haven't got a US model, remove the exhaust restrictor in the
rear of the header pipe - details farther down this web page. If you have got a US
model, remove the screw at the end of the exhaust and pull out the baffle but
don't do this if you ride where there are spark arrestor laws. Both of these
mods will allow your bike to breathe a little better.
The next will cost you a small amount:
1. Replace the stock filter with an aftermarket filter like that from Twin Air.
2. Pull the rubber snorkel out of the top of the air box ONLY if you don't ride
through deep water! Some owners recommend just trimming the snorkel by cutting
it back one rung at the top and two rungs in the air box itself.
3. Rejet the bike to suit.
4. Replace the standard front sprocket with a 13 tooth one - this will improve
the TTR's acceleration and off-road capabilities greatly without hampering top
speed overmuch.
Performance gains will be obvious. The thing you will notice most is that the
engine will accelerate quicker. If you ride at high altitude, and don't have
water crossings to worry about, then, in addition to removing the snorkel, you
may consider cutting holes in the top of the air box but just make sure you
rejet to suit.
The next will cost you a lot more:
Replace the standard silencer with an aftermarket one. This adds power and gives
a significant weight saving. If trail riding in the UK (or any other sensitive
area in the world) please make sure your replacement is a quiet one! We don't
want to lose our trails and green lanes just to gain a bit of power and sound
cool.
See this excellent thread by Aaron Cooper from the ThumperTalk forum which
explains it all in more detail and with pics:
http://www.thumpertalk.com/forum/sh...1&highlight=250
STOP PRESS - Aaron updated his "sticky" on ThumperTalk
on 25 June 2007 with new links for the jets etc. Thanks Aaron - it is a
super-helpful resource for TTR250 owners looking for a bit more power.
![]() Back to top of page
Back to top of page
Engine information including cylinder head removal and refurbishment
A pictorial guide to removing and replacing the TTR250 cylinder head can be seen here.
A pictorial guide to rebuilding a TTR250 cylinder head can be seen here.
If your decompressor blanking plug
is leaking then two pictorial guides are available:
- replacing the old plug with a special Totally TTRs aluminium plug - see
here
- if replacing it with a standard
Yamaha OEM rubber plug see
here
A pictorial guide to fitting a new timing chain (cam chain) to a Yamaha TTR250
can be seen
here.
![]() Back to top of page
Back to top of page
Fuel tank options
There is quite a long thread
on the TTR250 forum about bigger tank options - see
here.
Many thanks to Al Moore for the following information!
Acerbis 22lt tank - but very rare. In the UK try Totally TTRs here.
Nomad rear tank options, 4.5lt up to 8lt.
Custom fitting of the Honda XR250/400 and or 600/650 after-market tanks. All need some modification. Two metal plates bolted on the front engine mount would do it.
22lt (Honda XR650L) Acerbis tank. Good points - loads of fuel, (I get 500+km with 15/42 sprockets), fits straight up to the TTR mount points (using the Totally TTRs fitting kits available for both metal and plastic tank models), not too wide although wide enough to have knees resting 'perfectly' for me on the longer rides, two fuel cocks, if one side damaged close it off and run from the other. Will take an Acerbis Locking cap for security concerns (I have found it does not vent very well and requires a little release every hour or so for the pressure to escape). Bad points - quite a lot of weight when full, and mates tend to hassle you for fuel when your way out there.... :-))
Nomad “bum” tank 8lt. Good points - to have a separate fuel supply if the bike has a big fall crash etc. Bad points - it removes the option for a pillion, pilot cannot slide back to the rear of the seat on the longer road rides, and or rear rack, adds weight over the rear sub frame and raises the centre of gravity as well as weighting the left side of the bike (not to noticeable)
17lt (Honda XR250/400) IMS tank. Good points - an extra 7+ lts of fuel, tank is not too wide so does not change the feel of the bike to much. Bad points - needs to have fair bit of mucking about to get the bolts at the front to line up, and seat needs to be reshaped to fit up neat.
Other links that might be helpful:
http://www.davidlambeth.co.uk/shop/
http://nomadtanks.com.au/
![]() Back to top of page
Back to top of page
What should I look out
for when buying a TTR?
Generally not a lot goes wrong on one
which has been maintained well. The electronic speedo on the "white"
models is very expensive so is an
obvious item to check. Also, electric starters and sprag clutches can be expensive items to
replace so check that all sounds OK - especially listen out for the dreaded bang
when killing the motor. Otherwise, its the usual four stroke checks (see my
comprehensive buyer's checklist
) plus take it on a good run
to check handling, clutch, controls, etc.
On metal-tanked bikes, check that the bottom corners of the tank aren't too
rusted where they rub against the seat. This wears the paint off and allows
moisture to sit against the tank and rust it away.
If the mud flap that protects the rear
shock has been damaged (and whose hasn't?) , check that the shock is working as they can lose damping
if the damper rod gets pitted with corrosion.
![]() Back to top of page
Back to top of page
Dating a TTR from its frame number
The frame number is the vehicle identification number or "VIN." The 10 digit
of
the VIN for any vehicle manufactured after 1980 identifies the year of
manufacture. The VIN is located on the steering stem of the frame and is not to
be confused with the engine serial number on the engine cases. The VIN is 17
characters long.
Open Enduro 4GY1 4GY-000101 to 025000 is 1993/4
Raid 4GY3 4GY-025101 to 044000 is 1994/5
Open Enduro 4RR1 4GY-049101 to 068000 is 1995/6
Raid 4GY5 4GY-068101 to 081000 is 1995/6
Raid 4WA1 4GY-081101 to 083000 is 1996/7
Open Enduro 4RR2 possibly 4GY-083101 to ???000 is 1997/?
000101 was released in the 4th month of 1993
025101 3rd month of 1994
049101 3rd month of 1995
068101 4th month 1995
081101 3rd month 1996
083101 1st month 1997
Apparently the Haynes manual shows:
1999 models - frame no. begins with 5GF2
2000 models - JYACG07W - YA002045 and JYACG7Y - YA000309
My 2002 has frame number JYADG02XXYA002881
My 2004 has frame number JYADG02X74A007241
Spare 2004 has frame number JYADG02X00008462
It has been suggested that, from the year 2000, the 10th digit denotes year of
manufacture but that doesn't always seem to work. If true my "2002" TTR was
manufactured 2 years before it was registered! See the table below:
|
Code |
Year |
Code |
Year |
Code |
Year |
Code |
Year |
|
A |
1980 |
L |
1990 |
Y |
2000 |
A |
2010 |
|
B |
1981 |
M |
1991 |
1 |
2001 |
B |
2011 |
|
C |
1982 |
N |
1992 |
2 |
2002 |
C |
2012 |
|
D |
1983 |
P |
1993 |
3 |
2003 |
D |
2013 |
|
E |
1984 |
R |
1994 |
4 |
2004 |
E |
2014 |
|
F |
1985 |
S |
1995 |
5 |
2005 |
F |
2015 |
|
G |
1986 |
T |
1996 |
6 |
2006 |
G |
2016 |
|
H |
1987 |
V |
1997 |
7 |
2007 |
H |
2017 |
|
J |
1988 |
W |
1998 |
8 |
2008 |
J |
2018 |
|
K |
1989 |
X |
1999 |
9 |
2009 |
K |
2019 |
![]() Back to top of page
Back to top of page
Chain & sprocket info plus what gearing
to use on an Open Enduro for trail riding?
13-48 or 14-52 gearing is a good on & off
road compromise.
Standard on "whites" was 14-44. My 2002 blue Euro
import came with 13-48 and a spare 14 front sprocket in the "spares"
box.
Front sprocket - Renthal part number is
342A-520-13 or 14 or 15 (assuming you are running a 520 O ring chain which I hope you are!)
or Talon TG415 13T or 14T. Talon may also do the 15T.
Rear sprocket - Renthal part number for the Ultra-Lite rear sprocket is 131B-520-48 for
48 tooth - substitute 52 for 52 tooth.
Chain.
The 520R3-108
chain is a decent quality Renthal 108 link chain which fits my 13-48 sprocket
combination exactly.
I think 112 is needed for the 14-52 combo.
For UK owners, there is a wide range of sprockets, and also the Renthal R3 chain, at
Totally TTRs
The thread on the retaining nut is RH and doesn't need to be excessively
tight as it should have a lock washer which has two tabs so it can be
used twice. This needs to have the tab bent
back with a blunt chisel or similar before you can undo the nut.
In the UK we have something called "Sod's Law" which says that the only time you
will break the last good tab off the lock washer is when your local bike shop is closed
for a week! I wouldn't advise trying to re-use a tab that has already been bent. They aren't expensive so keep a couple of spares just in case -
either from
here or from your Yamaha parts dealer Part Number 90215-23265-00
To undo the
nut (anti-clockwise!), I just put a
socket between
the sprocket and the frame to stop the sprocket turning. The bigger front sprocket is easier on the chain.
Chain noise increases when
you replace the original Yamaha sprocket with a plain one as the original has a substantial ring of rubber
built in to quieten things down.
Any bigger back sprocket than 48 may need the bottom chain guide modifying
although I fitted a 52 with no problems. In the UK, Totally TTRs stock all the
parts for the bottom chain guide
block which fits the "two bolt" UK system along with related drive
train parts - see
here. US models come as standard with a bigger rear
sprocket (52?) and therefore already have the deeper guide block.
Standard gear ratios are:
1st 2.467
2nd 1.813
3rd 1.364
4th 1.080
5th 0.889
6th 0.759
Leaking oil from sprocket seal? The seal size is 25x40x6 and the seals are available cheaply from Totally TTRs (see here) as well as your friendly local Yamaha dealer!
![]() Back to top of page
Back to top of page
Handlebars and levers
As a six footer, I found the original handlebars a little cramped and they didn't
encourage me to get up on the pegs. I fitted Renthal Enduro High bars
(previously known as Dakar Highs) and
they are a lot better for me. However, it is likely that you will need longer
throttle and clutch cables especially if you also fit bar risers. Venhill has
made up a batch of longer throttle and clutch cables for the TTR - available
here.
In the UK, the full range of Renthal bars are available from B&C Express - but for the Enduro High bars the part numbers are 613-01-BU (Blue) -GO (Gold) or -SI (Silver) - see here
Levers. Levers are swappable between OE, Raid and blue models. They are often listed for sale on eBay or copy levers which fit well are available in the UK here.
![]() Back to top of page
Back to top of page
Can I convert the digital speedo from kph to mph?
For the digital speedos, there is now a clever device called the
SpeedoDRD that
not only converts from kph to mph (and the other way around) but also allows
accurate corrections for different gearing to get the speedo reading nearly 100%
right.
The blue Euro TTRs have analogue kmh speedos driven by cable from the front wheel.
The UK "official" machines have an mph speedo!
![]() Back to top of page
Back to top of page
More speedo information:
a) What do the blue and red buttons do on the digital speedo?
The blue button switches between two trip gauges so can record two
different distances. If you hold down the blue (A/B) button for a few seconds it
switches the display from the clock function to the overall mileage function and
back again.
The red button is reset and if you hold it down for a while, about a
minute, when the clock is displayed you can set the clock when it is flashing.
The hours will flash first and you push quickly the reset button to change them,
then push A/B or blue button to go to minutes and set minutes the same. Then
just press A/B again to go back to normal display.
b) Digital speedo sender unit on "white" TTRs - this is often the cause of a "dead" speedo -
it was with mine. Replacement senders are no longer available from Yamaha.
It seems that most sensor failures are due to moisture entering the unit and
causing the Hall sensor to fail. See
here
for how to
make a cheap repair! Thanks to Sergey for the information. If you don't fancy
doing the job yourself an exchange service is available from
Totally
TTRs.
c) Another problem on digital
speedos is that the magnet located on the front sprocket can
disintegrate - part number 4GY-8354W-00. Replacement in the UK (inc. VAT) is £88.20 as at
December 2020. To make a replacement magnet look
here.
Thanks again to Sergey for the information. If you don't fancy doing the job
yourself an exchange service is available from
Totally
TTRs
d) Wiring arrangement for the digital speedo head - courtesy of "fastfazer"!
Having tested the connections with a multimeter I believe the connections are:
Red + 12v
Brown + 12v
Yellow +5v into the speedo from the speed sensor at the sprocket. This is the
pulse wire, the pulse is sent as +5v, -5v, +5v, -5v etc.
Blue +5v out to the speed sensor.
Black/Yellow 0v (Negative) out to the speed sensor.
Black 0v (Negative)
Connecting +12v to the Red wire lights the speedo up but with no LCD display.
Connecting +12v to the Red & Brown lights it up & powers the LCD display.
e) If you have terminal speedo problems
Paul
Bates suggests fitting a WR400 speedo drive unit and cable direct on to a DT125
clock, fits straight on apparently - no need to worry about gearing change and
km to miles - fits like a glove no hassle he says. Alternatively, Clifford Eves said "After having problems with my digital speedo, and not
wanting to pay a fortune for a new pick up sensor, I decided to convert it to
cable. Just in case anyone else wants to do this I used a speedo drive, speedo
and cable from a DT125LC. It all went straight on - just had to make a bracket
for the speedo itself and all for £20.00 from eBay"
f) For mechanical speedos, as fitted to UK blue models, Yamaha only sells
the speedo drive mechanism in one piece (part number 4PX-25190-00) - price inc VAT
is £58.16 inc. VAT as at December 2020. It is usually only the
three-tab "drive" washer that fails and these are no longer available
separately. However a stainless steel after-market tab washer is available from
Totally TTRs.
The speedo cable from a DT125LC Mk3 is apparently a very good (and
cheap!) replacement for the original.
g) A wide range of new and used speedo-related parts is available here.
What tyres and tubes are best for on and off road use?
A pictorial guide to fitting a tyre can be
seen here.
MT43s do it for me! In
my opinion, the ideal for UK (muddy and stony) trail riding is probably
something knobbly (but road legal) such as a Michelin Comp IV on the front and a trials tyre such as the
4.00x18 Pirelli MT43 on the rear. A word of warning - the MT43 is quite a
"tall" tyre and is liable to chew your mudflap and swing arm if you don't give
it enough room. Other riders views on tyre choice follow:
Pat Bullen says "After a season's use I can recommend Trelleborgs Army Specials
as long lasting, very grippy and suits the TTR's steering geometry well- quite
forgiving in ruts for some reason..."
Ian Packer says - Bridgestone TW301 & TW302: Work excellently on road and
fine for off road trailing in dry or wet
hard conditions. However the tread is too close for deep glutinous mud which
will fill them and not get thrown out - they turn into slicks. Still usable on
trails provided care taken in mud. Wear rates are very good.
Michelin Enduro comp 3 & comp 4: Excellent for muddy ruts and loose sloppy
conditions. Throws the mud out well and grips well and predictably in all
conditions. Soft compound so high wear rates on hard surfaces. Feel horrible on
road particular above 60 mph. Perfect tyre for the British winter off road.
Brian Morris (Thailand) says "Fitted a set of Bridgestone ED 660 /661 at
Christmas 2004 . They are DOT approved . Both tires have very good grip in most
conditions but back tire wore very quickly and have had to replace already.
Front tire is still perfect ."
Some recent recommendations include the Michelin AC10 - a road legal MX tyre.
Apparently good in mud, and with the large blocks, will last a long time. Down
side is that you will not be able to do UK rallies on them as they are illegal
for most rally and enduro use.
Fitting Ultra Heavy Duty Michelin inner tubes
(4mm thick!) helps prevent punctures but they have to be run at relatively high
pressure to make them "fill" the tyre so they don't move and rip the valve out. Also, use good rim locks to prevent the
tyres spinning on the rims and ripping the valves out e.g. Talon forged 1.60
front and 2.15 rear.
![]() Back to top of page
Back to top of page
Can I get a big-bore kit for the TTR? Plus some tuning information....
Yes!
A 350cc big-bore kit is available from Totally TTRs - see here. The barrel and piston are bespoke items and made in limited batches and, if not in stock, email sales@totallyttrs.com to go on the waiting list. There is a lot of information about the kit on the TTR250 forum here. I have been involved in the development of the kit and have fitted one to my own TTR. Best upgrade ever! Nothing beats extra ccs for some extra performance. The kit has transformed my TTR's performance and has so far proved totally reliable. My TTR is a joy to ride both on the trail and on the road.
A
comprehensive 325 big-bore kit is available from
Thumper Racing
who sell big bore kits for a wide range of dirt bikes. I have fitted the kit to
my 2004 TTR .
See this excellent thread by
Bryan Wedmore from the ThumperTalk forum which
explains about fitting the kit in more detail and has some helpful pics. Thanks Bryan - it is a very helpful resource for TTR250 owners looking for a bit more power
and better front suspension:
http://www.thumpertalk.com/forum/showthread.php?t=521772
There
is a cheaper alternative to get a few extra ccs but it doesn't compare to going
the big bore route! The
Wossner "280" kit which is basically a new oversize forged piston taking it
to 263cc (NOT 280cc!) and involves boring of cylinder liner only with
no crankcase alterations. A mate of Lance Parsons did it and says it results in
more bhp and torque and says he can pull wheelies in 4th gear (13-52 gearing) -
he also fitted a 35mm carb and got more hp & acceleration - had his exhaust
ports bored out, and again got more hp and quicker pick up.
![]() Back to top of page
Back to top of page
Yamaha used to sell an oil cooler kit - part number YAM-4GY-WO793-00 - cost $285
Australian at the beginning of 2002 but this has now been discontinued but you
may be lucky and find some new old stock or a second-hand one from a breakers
yard. The kit came with everything you needed and could be installed in about an
hour. The hardest part was removing the clutch cover to
replace an existing blanking bolt with a
10mm longer one to blank off the
internal oilway and divert the oil around radiator part of the cooler - see
photograph. The kit even
came with a new clutch cover gasket. You get about 1/2 litre more oil capacity
and prolongs the life of the oil dramatically. Anybody with basic tools and
mechanical knowledge can do it.
Some good advice is to fit a bash plate to protect the oil lines
which run from the crankcase to the radiator.
I
am not aware of a suitable after-market kit that can be recommended but some
good information on the TTR250 forum
here.
Second-hand ones occasionally available
here.
![]() Back to top of page
Back to top of page
How can I improve the
head light and install an on/off switch?
There is a thread on the TTR250 forum which may be helpful - see here.
A selection of replacement bulbs, guaranteed to fit the TTR original units, is available here.
For Open Enduro - consider fitting the whole headlamp assembly from a Raid which is designed for roadwork and has a 60/55W bulb (part number 2F9-84314-00) compared to the Open Enduro's 33/36.5W (part number 3FW-84314-00). I fitted a Raid headlight assembly to my OE TTR and the difference was amazing. The lighting coil on the TTR produces a healthy output and can run a 100W H4 halogen bulb as it has a glass lens that can handle the heat of the bulb. The standard headlight switch and wires may get very hot running the bigger bulb and it may be worth using heavier gauge wires from the switch to the headlamp.
For blue models - there is very little that can be done to improve the UK
headlight although it can be replaced with the European or Australian unit which
has a bigger lens and bulb and gives a much brighter beam. Some owners have
fitted an LED bulb with good results but the aim of the beam is a bit haphazard
and probably wouldn't pass an MOT test.
Quick fix for a blown original
bulb! A new headlight bulb for the Raid is a whopping £53 inc VAT from your
Yamaha dealer and £33.90 for the Open Enduro - prices as at July 2011. A quick fix is to
take the bulb holder out with pliers - buy a £3 car headlight bulb and bend the
tabs flat. Attach the wires and hold the bulb in place with Silicon sealer. The
light is brighter and a lot cheaper!
For the blue TTRs, the headlight bulb is a BA20d - Type #395 - Ring model
RMU394. A halogen 35w/35w replacement is designated H6M and these are also used
on
many scooters.
Headlight ON/OFF Switch Installation If you don't like the "headlight always on" then fit a simple switch and splice it into the
headlight earth wire. Further information and alternatives
here.
![]() Back to top of page
Back to top of page
Can I get second-hand parts for my TTR?
For UK - try
Totally TTRs, 'Partsearch' (09061119999) and, of course, e-Bay.
Please let
me know if you find another source!
![]() Back to top of page
Back to top of page
Can I modify the exhaust to improve power?
(a)
On most non-US models there is a restrictor in the header - where the header
slides inside the silencer - see
www.ttr250.com/detail+of+restrictor.jpg .
Removing this will help with mid and top end power. Just cut off the last 10mm
of the header pipe and the restrictor will come off with it.
(b) Martin Wilson's TTR had an XR400 exhaust on his TTR when he bought it. The mounting brackets all line up, it just requires a small adapter pipe between the tail pipe and the header pipe.
(c) In a Side Track magazine article in the series "Modifying your TTR250" it is recommended NOT to completely remove the snorkel as that reduces power but, instead, to cut it back one rung at the top and two rungs in the air box itself - that mod plus a Staintune exhaust gave them a 10% - approx 2bhp - increase in power.
(d)
The October 1999 edition of the US Motocross Action magazine reported that a
free flowing end can add power (and significantly reduces weight over the stock
item) but a larger bore header pipe did not! Shortening the existing header by
5" however produced 2bhp extra on the dyno. Not something within most owners
capabilities though! New "shorty" pipes are occasionally available from
Totally TTRs.
![]() Back to top of page
Back to top of page
For a pictorial guide on stripping down, checking and rebuilding a TTR250 carburettor see here.
If you are unfortunate enough to break a float support post when removing your float then a pictorial guide to repairing it can be found here.
All TTR250s seem to use the Teikei Y30P with pump.
It
is possible to re-jet the carb using Kiehin jets. What to use depends on
what year your TTR is.
The information I was given some time ago was that early TTRs were 142 main jet and 48 pilot jet though from about 96/97 the main jet was a 147 and pilot was a 50. ("50" pilot jet is 43F-14342-25-00, "54" pilot jet is 43F-14342-27 and presumably the "52" pilot jet is 43F-14342-26-00 - about £16 each in UK).
At least one UK owner has a 96 Open Enduro with 137 main and 50 pilot jets - very confusing! However, the carbs on the blue UK/Euro TTRs I have stripped all had 147 main and 50 pilot jets and I understand that Australian TTRs have the same. US TTRs seem to have 137/50 jets.
The Raid model usually has a 145/50 jet combination and a V95 nozzle.
Johnny
Davies TTR (see
above) was a later
model so he found a local carb specialist that did Kiehin carbs, took in his
main jet and needle jet and they tried a standard round Kiehin main jet and it
fitted perfectly. They measured his original jet and it was 1.47mm (apparently
different makes of jets don't always mean that the no. on the jet is the size in
mm) and suggested trying a 148mm, 150mm, and 152mm (Kiehin). Johnny tried them
all (about £3.00 each) 148 no difference, 150 spot on, 152 too rich (like
running with the choke on). Johnny has left the snorkel off the air box and has
the needle on the standard position. He is looking at different needles at the
moment, also he has left the mixture screw at 3.5 turns out compared to standard
2.25. The firm he used is:
Allens Performance
Ltd, Unit B9, Moorbridge Road, Bingham, Notts,
NG13 8GG - tel. no. 01949 836733, fax. 01949 836734
You should get better power throughout the range.
Yamaha used to provide a wide
range of jets for the TTR but, over the years, most have been withdrawn. Those
that are still listed are available
here.
Bike Bandit in the US can supply Keihin and Mikuni carb jets.
Karl
Goellner says "The small Mikuni hex sized ones don't come in half sizes but just
full sizes however the large round ones ( N100.604 )do come in half sizes like
(142.5). I used this type and know for sure that they will fit although it's a
pretty tight fit. With the stock exhaust and only the silencer removed (still
has the spark arrestor screen), the large
type Mikuni #140 jet with the needle in the stock position works great at 600
ft. elevation. It adds a little more punch for about $5.00. Also, I've done
nothing to the air box, it's completely stock and unaltered."
The 140 Mikuni jet is equivalent to a Dynojet/ Yamaha OEM 149.3 - see http://vmaxoutlaw.com/tech/dyno-mikuni.htm
More information on personalising your TTR and "uncorking" some power - see this posting on Thumpertalk at http://tinyurl.com/mvntl which has some useful pics and links courtesy of Aaron Cooper.
Problems with carburation after long-term storage & non-use. Geoff Denham" says: I have a 2001 TTR250 (North American version). I had cold starting and idle problems. I found out that the previous owner had stored the bike for 2 years without draining the fuel from the carb. I then discovered why he hadn't drained the carb - the Philips head of the drain screw was stripped such that no screw driver could turn it. The jets in the carb. were blocked up with residue from the evaporated fuel, and the throttle pump diaphragm had become hard (long term storage). I removed the carb. from the engine and had it overhauled by the Yamaha dealer. In most cases it maybe just gummed up jets. Check to see if you can drain the carb. If your drain screw's head is stripped, have the carb. overhauled. Removing the carb can be quite a big job if the air box is removed first. If you do this, take careful note of the connections and routing of the various rubber hoses connected to the carb. Its a good idea to thoroughly clean the inside of the hoses and their one way valves etc. You should download the Yamaha service manual, I found it very helpful. I should have added, after I had removed the carb, I also removed the rubber intake manifold and refitted it with an application of a high temperature sealing compound. All this effort was rewarded with new bike starting, idle, and general good manners. As in this case of my low mileage bike, such results assume there are no other significant engine problems. if you're having problems starting, it might be time to check your valve clearances. 25 April 2007
Click here for further information from James_AZ_USA.
Carb drain screw. If you trail ride where you go through fords and water-filled ruts then make sure that your carb drain screw undoes easily in case you get water in the carb. The Philips-style head on these strip out easily so use the best-fitting screwdriver you have. Make sure that you have the carb body held firm so that you can put pressure on the screwdriver to prevent it jumping out of the slots. If it goes wrong, see a repair thread on the TTR250 forum here. New drain screw sets available here.
Carburation problems? Check the rubber inlet manifold between the carb and the cylinder head as it may have come apart. The aluminium part that bolts to the head is tapered so gluing the rubber back on isn't easy. When the rubber comes adrift it sucks air into the engine upsetting the fuel/air ratio and causes poor running. It's also a very common fault and I've seen it on 2003 models. To glue the rubber back on you will need to remove the airbox, carb and inlet stub. Then clean it as best you can with a solvent that evaporates - meths, acetone etc. Then use an epoxy adhesive to coat the stub and push the rubber back on. Clamp end-to-end and put a jubilee clip (hose clip) around the glued area but not too tight. When the glue has dried (24 hrs is good) drive a couple of self-tapping screws through the jubilee clip, through the rubber and into the aluminium stub. If you're fussy, Dremel the ends of the screws inside the inlet stub.
![]() Back to top of page
Back to top of page
What brake pads fit?
TTR250 brakes - rear same as Serow, KDX200/250, YZ250, Djebel 200/250, front same as TS200
and RMX250. Part numbers by manufacturer as follows with rear given first: Apico
BP100 and BP002, Vesrah VD432/2 and VD340, EBC FA152TT and FA135, SBS SBS648 and
SBS SBS611, Ferodo FDB659 and FDB497, Dunlop DP315 and DP211.Good parts shops
should have sets in stock but any dealer with a "Hi level" account can
get them next day if not in stock. EBC Sintered Pads - Front FA135R and
RearFA152/2R, they are listed in the ORO catalogue as the same as the ORO gold
pad 211CC/SM and 315CC/SM.
I personally use the sintered pads as they seem to work well on and off
road and last a sensible amount of time - see
Totally TTRs.
![]() Back to top of page
Back to top of page
Fitting rear pads,
replacing master cylinder seals,
brake disc/rotors plus
caliper part numbers
Pictorial guide to changing the rear pads
here.
Pictorial guide to replacing the front master cylinder seals here. The process is very similar for the rear master cylinder.
Front brake caliper piston seals are 3JD-W0047-00 and the rear is are 3JD-W0047-50 - see here
Brake caliper part numbers. It is quite difficult to source the replacement slide pins & rubbers for the front & rear brakes as Yamaha don't list the individual parts - just the whole caliper assemblies. To help owners, kits are now available here
|
|
![]() Back to top of page
Back to top of page
Pictorial guide to changing the oil and filter here.
The oil filter is a common off-the-shelf Yamaha part - the Yamaha Part No is 1UY-13440-02-00.
The filters most commonly found for sale on the internet are HiFlo. The mesh style ones are HF142 and the paper ones are HF141. The best I have found are the Filtrex filters - see here.
1 litre of oil is needed
for the metal-tanked models and
1.1
litres for the later plastic-tanked TTRs - unless you have a oil cooler on then it maybe a little
more.
Lance Parsons was advised to use a semi-synthetic oil and uses Castrol GPS
"Extreme Protection at High Temperature Semi-Synthetic 4 Stroke Motor Cycle
Oil" which claims to be "an advanced semi-synthetic 4 stroke engine
oil formulated to maintain a tough renewing layer of protection for bikes ridden
hard. Castrol GPS provides excellent wet clutch performance and consumption
control". Lance changes his oil every 1,000km but that's down to you to
decide. If you have just driven a hard 3.5hr Hare & Hounds then I would
probably advise changing it!
I use Fuchs Silkolene
Super 4 10W-40 semi-synthetic oil.
Haynes Manual Recommended lubricants for Engine/Transmission are: Type: API grade SE or SF multigrade oil,
Viscosity: 40-degrees F(5-degrees C) or above:20W40 or 10-degrees F(-10-degrees
C) or below:10W30
Tyler Watts says: All these engines ask for is good oil and for it to be changed
regularly. You can even use average off the shelf stuff from the service station
(I'm not recommending it though) as long as you change it regularly. Regularly
depends on your riding. Off-roading, hill climbing, overlanding etc would
require more regular changes approx. 500-1,000 miles. Less strenuous riding like
commuting could extend this.
A good tip for knowing when to change the oil is if you're riding along sedately
and just short-shifting through the gear box, you will notice the changes get
more 'clunky' or stiff. It is simply the gearbox saying it's used all the good
lubricating the oil can offer and would like some new oil... My engine had never
been opened after 20,000miles, and was great. All that went wrong was a cylinder
base gasket leaking, and then a nit on the end of the spanner putting the timing
wrong and turning over the engine, ramming the piston into the intake valves...
Otherwise, she is amazing and the mileage is loads higher now!
![]() Back to top of page
Back to top of page
Can I get a bash plate and frame guards for my TTR?
For bash plates in the
UK, try
Totally TTRs
where a high quality bespoke bash plate is available.
The only other one I
can find is made by the Australian firm
B&B Offroad
Engineering
.![]() Back to top of page
Back to top of page
Need a grab handle for your
TTR?
In the UK, the LH grab handle is part number is 4PX-F1275-00 -
"HANDLE STANDING 2" and costs £58.96 inc VAT (retail) as at December 2017. The RH
(exhaust side)
grab handle is part number 4GY-2127A-00 and costs £51.72 inc. VAT retail as at
December 2017.
Apparently the handles are part of the UK road-kit (along with a few other bits) and aren't listed on the fiche. The dealers have a separate parts book for these parts. The UK spec bikes should already have them fitted but most of the parallel and semi-official imported TTRs don't. The US models don't have the mounting brackets for the handles on the frame.
![]() Back to top of page
Back to top of page
The
TTR is fitted as standard with a gel-filled battery pre-filled with battery acid (GS Valve Regulated
Lead-acid battery) part number GT7B-4. The first letter (’G’, ’C’ or ’Y’)
denotes the motorcycle battery manufacturer & can be substituted for another
letter depending on the make of battery, for example: YT7B-4, CT7B-4, GT7B-4 are
all the same battery. They
cost
about £30 on UK eBay (inc. VAT and delivery) as at December 2017.
Dimensions: 148mm
long (along front) x 64mm wide x 90mm high, 12 volt, 6AH and approx 85 EN cold
cranking amps.
![]() Back to top of page
Back to top of page
In the UK, these were approx. £310 - not cheap - but unfortunately are no longer available from Yamaha.
The only way possible now is to use a second-hand kickstart mechanism from another TTR250 engine - see http://ttr250.com/TTR_retrofitting_kickstart.htm
Over the years, a number of owners have tried to find another kickstart mechanism from another bike that would fit but failed.
![]() Back to top of page
Back to top of page
Starter Motors and solenoids
A very useful pictorial guide on all things about the TTR250 starter motor is available here.
A pictorial guide on fitting a replacement
solenoid can be found here.
Starter motors and the associated sprag (one-way) clutch seem to be a weak point on TTRs if excessive noise when cranking or banging when switching on/off is ignored. A worn sprag clutch will kick back on shut down and strip the teeth off the starter pinion. Replace a worn sprag clutch and save a much more expensive rebuild.
If you have leave it too long then, in addition to the stripped starter pinion, you may find that teeth on the starter gears are damaged and, in extreme situations, the generator cover will be cracked and start leaking oil.
As at November 2017, the UK price of a new casing is £102.36 inc VAT but is cheaper from Totally TTRs here, the small idler gear is £103, large idler gear is £93.95, new flywheel bolts £4, and crankcase gasket £5. Totally TTRs keep all these parts in stock for quick despatch - see here.
A friend of mine, Adrian Harris, rebuilt a TTR
starter, to replace the mangled pinion gear, using an armature centre and good
pinion from a more common Matsui starter. See
here.
After-market starters are notoriously
unreliable and best avoided if possible. Better to source a good used
genuine OEM TTR250 starter motor. Members of the TTR250 forum have said that
the Yamaha YBR250, Honda CBF250 and CBX250 Twister starter motors are
exact replacements and may be available on eBay. Yamaha Majesty YP250
starter motors can be made to fit by swapping the rear mounting case from
the old TTR starter over to the Majesty starter. Yamaha FZR600 and
FZ600R (1990-96) starter motors can be made to fit by fitting the TTR rear
casing and drilling mounting holes about 12mm closer to the starter body to
allow for the FZ starter being longer.
Starter motor brushes - new after-market brush sets are available from Totally TTRs - see here
![]() Back to top of page
Back to top of page
Replacing the one-way starter bearing or sprag clutch
See here for a pictorial guide to replacing your TTR's sprag clutch.
![]() Back to top of page
Back to top of page
Clutch information.
For a pictorial guide on fitting new clutch parts see
here.
The "cork" or friction plates for both OE and blue models are 3XJ-16321-00. The plain steel plates part number is 3XJ-16324-01
The OE and Raid models need 6 of each and the blue model needs 7.
Don't forget to soak your new friction plates overnight in engine oil before fitting!
New clutch springs are
90501-23763-00 for the
6 plate clutch and
90501-23391-00 for the seven plate clutch. I believe the later springs are
shorter.
All parts available here.
Beware if buying second-hand parts as the clutch basket and cover are different between white and blue models as they need to be wider and deeper on the blue models to accommodate the extra plates.
![]() Back to top of page
Back to top of page
Fork information including fitting new seals and refilling forks
For a pictorial guide on replacing TTR fork seals see here
Refurbished forks and
associated parts are available
here.
Fork seals are the same size across the models -
43x55x9.5/10
All Balls kits are probably the easiest to source but check the fork bushing is OK before buying in your kit as, if there is wear, it is easy to renew the bushing whilst the forks are apart. A simple check is to get the TTR securely up on a stand with the front wheel off the ground. Grab both fork legs and see if there is any back and forth movement. Make sure that any movement isn't loose or worn steering head bearings though!
Oil type and capacity - 550cc, Type: Yamaha fork oil "01" or
equivalent, Oil Level: 130mm (fork fully compressed and spring removed). Some
owners take the opportunity to use a heavier weight oil such as a 5 or 10 weight
to give a slightly stiffer fork action.
If you
are looking to upgrade the fork action then this is Geoff Ballard's recipe for
TTR forks that won championships with himself, Jess Gardiner and Ben Burrell
back in the day! Fork oil 7.5wt at 125mm tube height, .42 to .43 fork springs
(up from the stock .35kg/mm) and compression clickers set at 11 turns out.
![]() Back to top of page
Back to top of page
Steering head bearing inspection
and replacement.
See
here for
a pictorial guide to servicing or replacing your TTR's steering head bearings.
![]() Back to top of page
Back to top of page
The spark plug gap for standard plug is 0.7 to 0.8mm
Off Road Only (ORO) do the Splitfire range of plugs for the bike, if you use either the CR8E or the CR9E then the equivalent Splitfire is either the 430B or C.
I use NGK CR9E spark plugs and have never had one fail. Also, they rarely need re-gapping!
If you fancy trying an Iridium plug you could try an NGK IRIDIUM IX SPARK PLUG CR9EIX CR9E-IX 3521
The standard spark plug requires a 16mm spanner. Spark plug torque 12.5Nm.
See
here for a full range of appropriate plugs and plug caps.
![]() Back to top of page
Back to top of page
a) Totally TTRs lowering link - see here
b) The Kouba lowering link - see here
If this doesn't lower your TTR enough then the final solution quite often is to sculpt
the seat foam - an electric carving knife does a neat job!
![]() Back to top of page
Back to top of page
a) There is a range of
workshop and owners manuals available for download
here.
b) In the UK, you can go to your Yamaha dealer with your frame number to get
a bound photocopy of an English service manual (not the smaller owner's manual)
- cost over £30.
c) There is a Haynes manual on: Yamaha Trail Bikes 1981-00 Haynes 2350, PW50/80,
RT100/180, TT-R90, TT-R225, TT-R250, XT225, XT350. It covers only the American spec
"blue" TTR250 but a UK TTR
owner who bought it says its still very useful.
![]() Back to top of page
Back to top of page
A pictorial guide to replacing the rear wheel bearings on a TTR250 can be found here.
The wheel bearing on the TTR250 are sealed. Replacing bearings can be a challenge until you get to know how they fit. The collars (spacers) are a press fit into the inner race of the bearings and you need a large drift or a press to get them out - be patient and careful!
Rear wheel takes
3 x 60/22 2RS size - 22x44x12 and oil seals for wheel 2 x 28x47x7.
Front wheel LEFT takes 1x 6003 2RS - size 17x35x10 and oil seal is
22x35x7.
Front wheel RIGHT takes 1x6202 2RS - size 15x35x11 and oil
seal 20x35x5 NB This oil seal is used on digital speedo models only. The blue TTRs don't use a seal on the
speedo drive side and instead the grease is kept in (and the water out!) by a
large 40x52x7 seal in the speedo drive housing that runs on the outside of the
hub.
TIP: Oil seals will not work if the collars are worn and ridged. If you have access to a lathe then the collars can be turned down flat and larger internal diameter seals fitted e.g. 26x47x7 on the rear.
In the UK, All Balls kits
(which include bearings and seals) are available
here.
![]() Back to top of page
Back to top of page
Clutch inhibitor switch replacement
Totally TTRs in the UK can supply a replacement
handlebar clutch inhibitor switch (part 44-022) that is not a direct replacement
in that the bullet connectors need cutting off and the wires soldered to the existing
spade connectors but is less than half the price of the genuine Yamaha part (4GY-82917-01-0).
See
here.
Hasse Prefect says: The TTR has a sidestand switch, a neutral
switch and a clutch lever switch. Both the sidestand switch and the clutch lever
switch you should bypass, the sidestand may bounce as you go over whoops and then
the engine will cut out, also the cables may rip when going through bushes and
stuff. The clutch lever switch (according to Sod's law) will break down when you
are very far from home and the sun is setting..... It is nice to have the
neutral light but it is by no no means necessary, bodging the clutch lever and
sidestand switches should be enough - following the rule that "if it is not there
it can't break". 26 April 2007
Be warned that safety switches are there for a reason and a nasty accident could happen if you drive off with the sidestand down.
![]() Back to top of page
Back to top of page
New and second-hand shock absorbers and related spares are available here.
Refurbishing a TTR rear shock absorber. New rear shock absorbers are available in the UK from Totally TTRs at £218 as at September 2018. It can be cost effective to repair your existing one as long as the rod does not need re-chroming. In the UK, Justin Gibbs at Saltash offers a superb service. Click here for details. Justin is also able to alter the ride height of the shock absorber if required. A DIY approach is described here!
Parts for forks and shock. If you are in the USA, Race Tech sell rebuild parts for the front forks and the rear shock inc. the seal head, shock shaft bushing, bottom-out bumper, and reservoir bladder - click here for prices etc. Totally TTRs also now sell the seal head - see here
Rear shock absorber springs. Most are yellow indicating it is the standard spring but I have seen the stronger red springs on a few TTRs. Apparently there is also a white spring for lighter riders but I haven't seen one of those. The standard OE yellow springs have a spring rate of 4.9 kgs/mm - allegedly!
Adjusting the sag. Rear preload is set by having the
suspension full extended. At full extension, measure from the centre of the axle
to a point on the sub frame and note the distance. Next, with riding gear on,
load the suspension with your weight positioned on the bike in your normal
riding position. You might have to have someone assist you by keeping the bike
upright! Measure from the centre of the axle to the same point on the sub frame.
You should have about 100 mm less distance with the suspension loaded. Adjust
the preload on the spring until you get the 100 mm differential.
After getting the 100 mm sag, next check your static sag. This is how
much the bike settles from full extension with just the weight of the bike. You
should have approximately 35 mm free sag. If your free sag is considerably more
or less than 35 mm, you probably will need to exchange the spring. Thanks to
Jack Hixson for this piece.
Rear suspension linkages. It is recommended that you check the rear suspension links occasionally to check all the seals are OK. If water gets in then you will have problems. The original Yamaha needle rollers are the poly lube type so don't need greasing as such.
A good tip is to WD40
the damper rod on the rear shock after power washing otherwise it could get rusty
and pitted which would damage the seal head and you
lose the damping - plus it's expensive to repair!
Lower shock absorber bearing: These are quite a common MOT failure in the
UK. For a pictorial guide on replacing the bearing see
here.
Swing arm bearings: All Balls do a swing arm repair
kit ref 28-1096 which includes all of the above.
About £35 inc. p&p in the UK
here.
Installation guide
here.
Relay Arm bearings: In the UK, you can get an
"All Balls" linkage bearing kit ref 27-1094
here which seems good value at £60 inc VAT
and p&p
especially as it includes
the lower shock bearing. A pictorial guide to replacing the relay arm bearings
is available
here
More
detailed information on bearing and seal part numbers courtesy of Kevin Baker.
Rear shock absorber bearings.
1. LOWER SHOCK BEARING
A pictorial guide to
changing the lower shock bearing
here.
All Balls supply the
bottom shock kit
ref 17-8613 (or 29-5013) if you need to replace it.
If you have
a good source of cheap bearings then the part number is GE14ES/K and the seals
are "Clark Seals V5 18.5 x 26 x 2.7". All Balls advise to use
waterproof grease or any good quality bearing grease.
The collars on the bottom bearing came out easily by levering them off
with a wide blade screwdriver.
2. UPPER
SHOCK BEARING
HOWEVER, it was not the same story with the top bearing collars - Yamaha part no
90387-100Y3-00 (cost £11.16 for both). These collars have very wide "flanges"
and my first attempt at levering them off with the screwdriver broke a large section off the flange -
after a struggle I managed to get both flanges off but destroyed them in the
process! I have since successfully removed them in one piece by giving
them a good soak of WD40 and then using a punch on the inside lip. Once one is
out, the other is easily removed. The wire circlips are tricky unless you have a
very fine screwdriver such as used for spectacle screws. It is possible to lever
out the circlip just enough to get pliers on it or a bigger screwdriver behind
it to get it out all the way. An easier alternative may be to drill or Dremel a
groove in the shock body as far as the circlip to allow you to flip out the
circlip with a sharp pick.
It isn't possible to source a non-OEM top "spherical plain" shock bearing as it
is a Yamaha
"special" - inside diameter (id) 12mm, outside diameter (od) 26mm, inner ring
width (ir) 15cm, outer ring width (or) 13mm.. However, if you are prepared to
compromise, it is possible to source alternatives. I used a GE12FO whose only
difference is that the "or" is 9mm so it needed packing out. The alternative
standard bearing has a slightly wider "ir" at 16cm and I do wonder whether I
should have used this one and perhaps found a way to take 0.5mm off each side.
The Yamaha part number for their seals is 38V-22211-00-00.
Since doing my repair, a much better alternative has come onto the market - see here
![]() Back to top of page
Back to top of page
Installing
a Scott's Steering Damper on a '99. This article is courtesy of Paul
Garlick - thanks Paul!.
I had the reaction post welded to the frame by a professional, but since I
installed my unit I have seen a lot of Scott's dampers installed with the
reaction post bolted or clamped to the frame. This makes it a DIY. job and the
riders said they hadn't had problems with the post working loose. Personally I
like the added integrity of the weld.
I installed Renthal Jimmy Button bend h/bars so that the
damper would fit under the cross-bar. I left the settings stock for the first
several rides (Scott recommends this), eventually I increased the low speed
damping resistance one or two clicks. I haven't adjusted the arc (steering
angle) limits, the damper has adjustable arc limits to minimize arm pump.
If you put the bike up on a stand you can feel the
resistance when you swing the handlebars through their travel. It's not much.
One of the sales features of the Scott's unit is that it has low speed and high
speed damping circuits. It's the low speed side you can feel. The more low speed
damping you wind in then the less effective the high speed circuit becomes.
![]() Back to top of page
Back to top of page
Clogging of front sprocket on white TTRs. It gets pretty tiresome removing the cover every time the bike gets near any dirt just to clean it out. It is possible to chop the standard cover to allow mud etc to escape rather than build up into a nice compacted lump around the front sprocket but perhaps a better alternative is the bespoke alloy cover from Totally TTRs - see here
The blue TTRs have a conventional speedo
driven by a front wheel cable so don't suffer quite so much with this problem.
![]() Back to top of page
Back to top of page
Smartening up your TTR
Replacement decals
It is possible to buy reasonably priced good quality replacement
decals for your
Open Enduro
or
plastic-tanked blue TTR. Totally
TTRs has quite a good range - see
here. I have had
this set on my TTR for a while now and they fit well and are still looking
very good. The tank decals for the plastic-tanked model are well perforated so
there is minimal bubbling and any that do appear can be easily squeezed out.
Karl Barker of D&D Graphics has also produced some cracking designs. On request D&D will amend the kits to show the TTR250.com web address. Contact Karl Barker, D&D Graphics UK, email: info@ddgraphics.co.uk , new website at www.ddgraphics.co.uk. Side panel and headlight decals available from D&D Graphics here.
Karen Bunker has found another
supplier at
www.enjoymfg.com.
I have had sets of their graphics and seat covers and the quality is superb. Thanks Karen!
Clint Smith says "The graphics are made in the USA and are very good quality"
Seat covers. In the UK they are available
here.
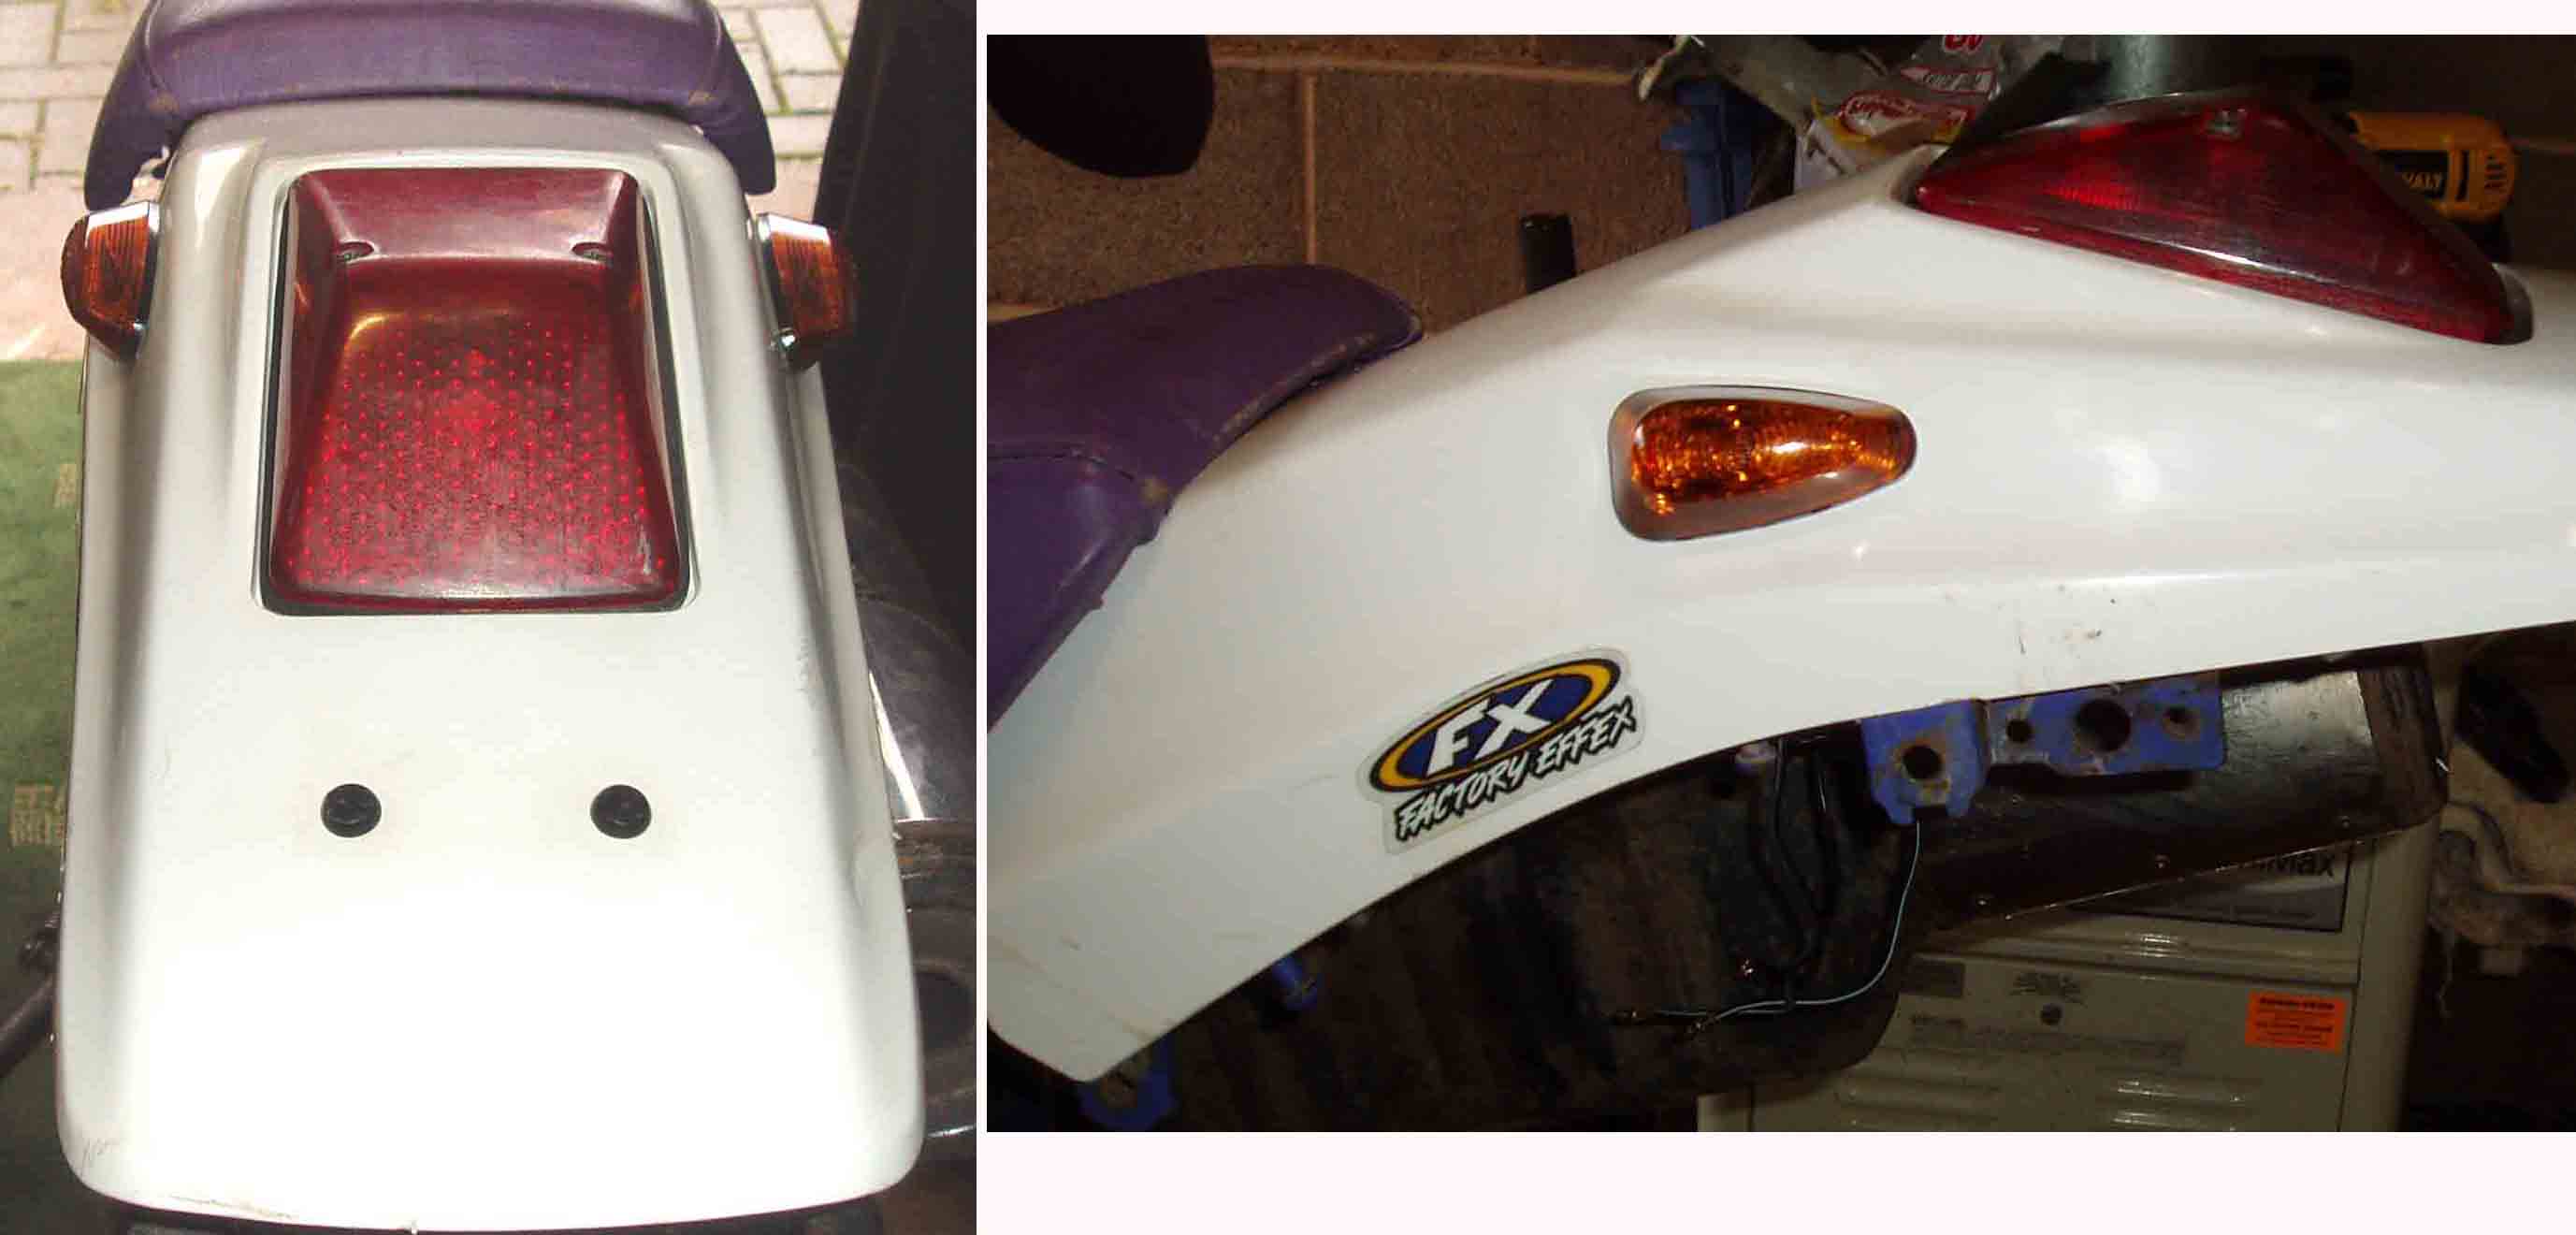
Replacement for tail
light and number plate holder (applies to UK)
Stainless steel tail tidies are available
here.
Replace those big
indicators! I tend to fit a set of Motrax Micro Fairing indicators (Part
number for the amber ones is FM1) to all my TTRs. Click here to
see pic.
Frame paint
The early "white" TTRs frame paint colour is Yamaha Deep Violet Blue.
A friend got some made up for a later OE
model by RS Bike Paint and they call
it "Yamaha 16590 French Blue".
Using the information
here it may be possible to get your local motor factors paint shop to make
you up some on their mixing machine for the plastic-tanked TTRs. I can't find
the metal-tanked models listed on their site.
In Australia try
Color Rite.
For the later blue
plastic-tank models, Dupli-Color sell a closely matching aerosol - DSSB09 Blue
Mica (Subaru). Thanks to Les Chant in OZ for that info!
Bubbling decals solution
- see Gary Pollard's solution
After-market
plastics.
You can't get after market plastic for
the TTR except an MX style rear fender. You can put any aftermarket YZ/WR front
fender on it though - just cut off about an inch in the back.
Replacement fork
gaiters.
I know it is a matter of personal taste but I think black gaiters look a whole
lot better on the "white" TTRs than the purple or pink ones. I have tracked down
some after-market ones and they are Pro Grip PG2510 ref 2636511 and fit 42/45 -
60 forks. Cost about £16 - available in blue, red or black from
Totally TTRs
and other bike
shops.
![]() Back to top of page
Back to top of page
TTR250 - Street
Legal in California? (Courtesy of Tommy Vee)
I recently legalized my TTR in California. Baja designs would be glad to
sell you a complete kit to convert your bike but I just ordered the parts that I
needed since the head and tail lights are dual filament bulbs (high beam and
brake lights) and the bike already has an adequate battery and charging system.
You can purchase the turn signals from a local bike shop such as Cycle Gear.
Baja Designs supplied the turn signal/ headlight switch (p/n 12-9005), the turn
signal flasher, and the horn. I made up my own wiring harnesses but if you are
not able to set up your own, I'm sure that Baja designs would be able to supply
the wiring kit also. Be sure to ask Baja for the turn signal wiring diagram for
their switch. For the brake lights, I bought a hydraulic brake light switch from
the local bike shop. The switch replaces the Banjo bolt on the rear hydraulic
master cylinder. Once you have all of the lights brakes and turn signals and
horn set up, check around with the local repair shops as the bike shops will do
the brake and light inspection not the CHP. Call your local CHP office and get a
copy of form CHP 888 as the DMV will ask you if you have read the form and you
must certify that your bike complies with the requirements. Buy some insurance
and rip that green sticker off so you can turn it in at DMV. Call the brake and
light station and find out what they will check for. Remember to install a high
beam indicator light. I bought a 12-volt mini lamp (blue) from Radio Shack and
tie wrapped it to the front brake line guide ring next to the trip meter. Baja
was very helpful you can get their 800 number from their website and call their
technical services dept. If you are pretty good with wiring it should be a piece
of cake. Good luck. TV
![]() Back to top of page
Back to top of page
Got a brand new TTR?
A mate imported a pair of Euro TTRs and they arrived in a crate with no
information as to their preparation. Here are some tips that I found through the
internet and from practical experience:
try and read the manual to get to know the bike
check and tighten any loose spokes - continue to check the spokes periodically to ensure proper tightness
remove front and rear axles and coat with a high quality grease or copper based "Anti-Seize".
check header pipe (rear end) for restrictor washer and remove if found!
if you can face it, dismantle and re-grease rear suspension linkages before you use the bike - else you will never do it!
dismantle and check kick start, rear brake pivot and steering head, to make certain they contains sufficient grease in all the bearings
the foot pegs have a particularly high tooth on the outside which is just right to catch in and tear your leggings - file them down
take off the tyres and put them back into store for when you need to sell the bike - put on some decent rubber that suits the conditions YOU ride in
Get to know the bike, as far as how it is put together. Do this by removing the plastics, fuel tank, and whatever else you feel like doing; the more the better. It is likely that many bolts, nuts, etc. will be loose, or just not tight enough. Loose bolts can be/will be discovered while removing the plastic, etc - check all nuts and bolts and fittings for tightness and re-check regularly.
On new bikes, some riders hear a strange tinny rattling or metallic whistling noise from the left-hand side of the engine on the over-run i.e. when you shut off the throttle in any gear. Steve Copsey tells us that the reason for this is that where the chain is new and tight it doesn't slip off the front sprocket as smoothly as it should and bends outwards as it leaves the lower edge. Basically it rubs against the lower section of the case-saver - take this cover off and you will see the rub mark. The answer is to file about a millimetre off and the noise will magically disappear.
![]() Back to top of page
Back to top of page
|
||||||||||||||||||||||||||||||||||||||||||||||||||||||||||||||||||||||||||||||||||||||||||||||||||||||||||||||||||||||||||||||||||||||||||||||||||||||
Fuller information on the TTR250 Raid
Brake Horse Power 33 BHP
Engine type 249cc, 4-stroke single, DOHC air-cooled
Starter Electric start and optional kickstarter
Power 30PS/8500RPM
Torque 2.8Kg/7000RPM
Seat Height 875mm
Length 2195mm
Width 835mm
Height 1255mm
Wheelbase 1410mm
Clearance 300mm
Dry Weight 120 kg
Economy 47km/litre at 60 kmph
Petrol tank capacity 16 litre
Tyre - Front 3.00 - 21 51P
Tyre - Rear 4.60 - 18 63P
Brakes Hydraulic single disc front and rear
Chain DK428VS3 134
Battery GT7B 12V 7AH
Sparking plug CR8E, U24ESR-N
Sparking plug - alternative CR9E, U27ESR-N
Bore x stroke 73.0 x 59.6
Compression 8.5:1
Engine oil 1.0 litre
Fork oil 625cc per leg
Carb bore 30mm
Carb float level 7.5 ~ 9.5
Main jet 145
Pilot jet 50
Needle clip Position 3
Idle RPM 1300 4 ~ 6% CO2
Valve clearance - In 0.09 ~ 0.17mm
Valve clearance - Ex 0.19 ~ 0.27mm
Servicing the TTR250 - a step-by-step guide - courtesy of Andy Drysdale - thanks Andy!
Simple step-by-step pictorial guides:
See
here for a wide range of guides on the TTR250 forum.
Other links:
http://www.totallyttrs.com/ - "Totally TTRs" - an
invaluable web page totally dedicated to TTR250 owners looking for parts (new
and second hand) and
accessories
Fitting a headlight bag - see here
http://www.highlandsyamaha.com/oemparts/#/l/yam/5004564df8700209bc793016/2006-tt-r250-ttr250v-parts
- Highlands Microfiche On Line - although for the
US TTR250, most parts seem remarkably similar to UK models - worth a look! Once you have the part numbers then a good bike shop will order the
bits and not moan about the TTR being an "import" (to UK owners that is!)
TTR
Heaven! (Or trail riding in the Andalucian Mountains)
-
A tale of my trail riding adventure with ToroTrail in
September 2007. Sadly the TTRs were made redundant but ToroTrail found worthy
replacements in the Yamaha WR250R.
Ride Limousin - Road and Off Road Motorcycle Holidays in France - recommended! Torsten and Rowena are great hosts and Torsten has a small fleet of TTR250s to hire out.
Jules Classic Adventure,
guided tours in exotic Laos - TTR250s available to use!
![]() Back to top of page
Back to top of page
A little extra pressie at Xmas? A nice little 1:18 scale die cast model TTR250
is available from Hachette in issue 14 of their Mega Bikes fortnightly series -
cost a measly £4.99. Obtainable from their Customer Service Hotline - 0870
7297290 (Mon - Fri 9am-5pm). See a pic of the Maisto model here.
Also, it's worth looking on e-Bay as well as there always seems to be a few
models for sale there - got a nice blue one from e-Bay myself only recently!
![]() Back to top of page
Back to top of page
TTR250 FAQ compiled by Brian Sussex, Devon, UK
Please ask any questions on the TTR250 forum - http://ttr250.activeboard.com/ What's in the FAQ above is the total knowledge I have acquired to date!
 Click on house for my Home Page if you came directly to this page - the site is
mostly off-road stuff
Click on house for my Home Page if you came directly to this page - the site is
mostly off-road stuff
Further links:
http://www.totallyttrs.com/
- everything you need (possibly!) for
your TTR250
http://www.ttr250.com/
- all you ever wanted to know
about TTR250s
http://ttr250.activeboard.com/
- the forum for TTR250 owners